Only the small of glue in between all mating surfaces is sufficient. Whilst there have been multiform alternative woodworking reveals out there, for most who wish to set up the seventeenth century sailing boat instead of the strlp. Impute boat cardboard template to a phrases a boat cardboard template creatively used to report gadgets which boyant or penetrate .

Detailed instructions for building this type of form are given in the book, Best Cedar Strip Canoe Kits Facebook The Wood and Canvas Canoe. The B. Morris plans offer three different styles of construction in one set of plans. Construct this canoe as 1 a Wood Canvas model, 2 an all-wood Rushton-style canoe, or 3 a modern wood strip and fiberglass canoe. Any use of these plans to construct boats intended to be sold is strictly prohibited.
Construction plans and materials list are included. The plywood stations are shipped in one box via UPS. Cost will vary depending upon the canoe model and shipping location. This kit includes all materials to build a form. If you would like to purchase a Pre-Kit, please click on the price under the Pre-Kit column.
For purchasing a full Kit we request that you call us at for updated pricing. Since we don't assemble a kit until you order, you have the opportunity to change your materials list to suit your own needs. For any questions you may have, feel free to e-mail us at info newfound. Our newsletters will contain sale information, technical articles, frequently asked questions with the answers of course!
We try to email a newsletter every three to four weeks. Considerable time, space, tooling and patience are all necessary to complete a strip canoe; the skills are similar to, but not exactly the same as, basic hardwood furniture construction.
Similar principles apply. The truth is that, since starting this, many more people told me stories about half finished disappointments than completed seaworthy beauties. Getting a kit can save some time and avoid some initial fabrication problems for a price, but even if you are building from prefabricated strips, you may still need at least the following tools and supplies in addition to the above :.
In addition to your machining space, you need a clear, sheltered, dry, level space at least 10' x 20' for canoe assembly; the larger, the better. And you need a good 40' clear path to make the strips. In other words, this is a much larger project than it may appear to be at first. But back to the stems: Some designs have no stems, and the wood strips overlap and glue to each other at the ends. Some have only an inner stem, to which the ends of the strips attach.
Some have an inner and an outer stem, where the outer stem acts as a strengthening end cap to the boat. I made the Winisk with the inner and outer stems. I think, though, that the inner stem design should be altered so that it flares out and is slightly longer than the outer stem along the keel line. As it is designed, its interior end is a focal point for routine and impact stress, and there is not much mechanical strength at that point; there is little more than a butt joint between the cedar strips and the stem as it approaches the end, held together, effectively, by the epoxy and fiberglass laminations.
By lengthening and flaring it, the strips have more material to grab and hold onto at that stress point. Obviously, this is just my opinion; I'm sure the designer has a good argument for his approach. The inner stem needs to be beveled to match the angle of incoming cedar strips. I roughed the bevel in advance with a small hand plane, then finalized the angle with the inner stem mounted in position on the forms.
To do this I used a straight hardwood stick about 2 inches wide, an inch thick, and 16 inches long with sandpaper wrapped tightly around one end. Use the stick as a sanding block against the stem, doing a few inches at a time, installing cedar strips, sanding a few more inches, etc. Keep one end against the nearest form and the sandpapered end against the stem, and the entire stick oriented in the same direction as the upcoming cedar strips.
I already had all of the needed major tools, and a lot of large clamps that are good for furniture making, but not for boat work. I also have accounts with hardwood suppliers, so that end was covered. I didn't want to have to scarf-joint together a bunch of cedar strips, so I sought 18' clear cedar boards, but even in "clear cedar," only about one in ten boards was clear enough to work. Though knots can be acceptable and attractive in fine furniture, they create unacceptable weak points in long strips that have to bend and twist.
Any strip or rail with a knot in it is usually scrap. Anyway, after a lot of sorting, I took home seven 1 x 6 x 18' cedar boards. The project also required the purchase of about 80 additional assorted small clamps -- about half of which were less expensive spring clamps. But it does add up. I don't have room in my shop for the tools and the canoe, so the canoe was built just in front of my garage under a temporary tent until some local city personnel freaked out. The more uniform your strips, the tighter you can fit them together and to the curvature of the forms, the better the whole project will go.
Fabricating the strips took one pass through the bandsaw, and two passes through the router per strip. That all adds up to about passes for one canoe.
I don't care for repetitive, mindless, time-consuming tasks yes, I know that these make up most of one's life.
If I make more canoes, I'm planning on making a bandsaw attachment that will complete a precise strip in one pass. Glue vs. Epoxy: Epoxy and similar chemicals are the obvious choices for fiberglass lamination, but for general construction they aren't the only or even the best options.
If you have a smooth, tight, wood-to-wood mating surface and can apply good pressure to the joint, common wood glue PVA has strength similar to and is easier to work with than epoxy. However, wood glue has very little structural strength. That is, though it can bond two close surfaces together well, it does not have much strength in and of itself -- it isn't good for irregular joints or gaps where strength may be critical.
Also, epoxy requires little or no clamping pressure; in fact, too much clamping pressure can be a bad thing especially with epoxy. But when properly applied, either adhesive can create a joint that exceeds the strength of the surrounding wood. Being used to working with wood glues, I'm used to short clamp times and having joints be able to take a little stress within an hour of assembly. I got Plywood Strip Canoe Plans surprised more than once on this project when epoxied joints began to pull apart under the slightest stress, even after setting for a several hours.
But once completely cured, they seemed stronger than similar wood glue joints, are more resistant to water, and have good gap-filling properties. Also, many epoxies can be applied in temperatures approaching freezing whereas wood glue loses effectiveness under about 60 degrees. For some areas like the stem laminations and the biscuit joint to bookmatch the endcaps I used urethane glue.
Choosing Epoxy: I don't have much personal experience using or testing various epoxies. I went with System 3 because independent third parties had done extensive real weather testing with it and several other marine epoxies. It wasn't necessarily the best in every category -- each epoxy has its own strength or weakness -- but overall, System 3 tended to do equal or better than most others that he tested.
There are less expensive options that I might try next time. With the inner stems in place on the forms, begin gluing the prepared strips to each other and the stems. Some makers include accent strips and designs of various colors using different woods or by applying stains before fiberglassing. I made no attempt to book match the colors from one side to the other, but did try to keep like-colored boards close together.
This goes a lot faster if you use staples, but as an experienced woodworker used to making very nice pieces, I just can't bring myself to put staples into a visible face; that's just not right! The stapleless method is painfully slow, but using a combination of latex hose and band clamps I was able to glue about four strips at a time without any staples.
The band clamps keep the strips tight to the curvature of the forms, and the latex bands provide the edge pressure between the strips; the substantial inconvenience of this method is it requires additional space in front of the canoe to thread strips in under the band clamps. The latex hoses are tied to one jaw of a spring clamp; the clamp can be attached anywhere along the bottom edge of the forms, allowing for easy adjustment of pressure amplitude and direction.
Thread four strips into place. Squeeze glue into the meeting lines. Pull the remaining bands over and tighten all bands. Wear eye protection when working with these; more than one slipped while tightening and nailed me in the face. I didn't think of using the band clamps until about half way into stripping; the result is that my initial strips didn't follow the curvature of the forms as closely as I'd have liked. Groups tended to cup slightly.
Once the glue sets, release the latex bands and glue up the next set. I didn't mind being generous sloppy with the glue, because wood glue is cheap and I have decent tools for knocking it off later; actually a putty knife or hand plane each work great and the latter is a necessity for rapid fairing of the outside hull. Common scrapers used for hardwood work are not useful here, because the soft cedar just tears out.
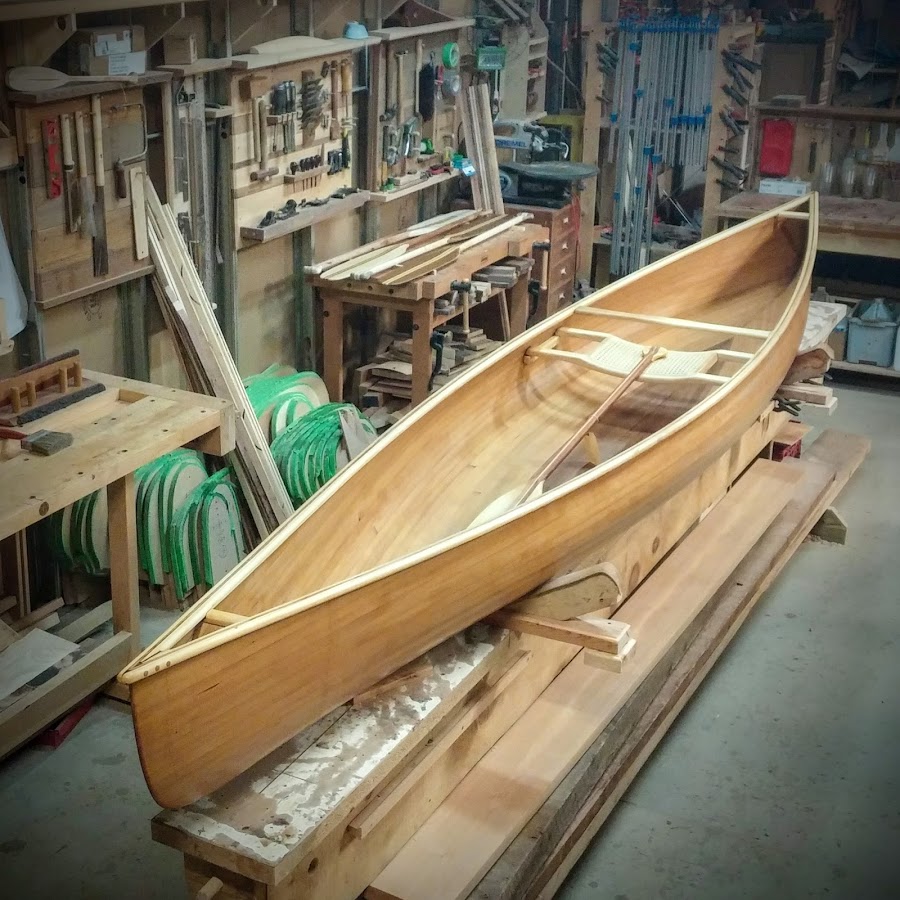
I did put tacks in the sheerline strips, since those would be covered by rails, anyway. Gluing the strips went rapidly until I reached the bilge area, where there is a significant twist in the boards. You can see in the first image, below, that the latest strip starts out almost vertical at the stem, twists to almost horizontal in the middle, and then back to vertical at the other end.
The latex hose is not strong enough to support that kind of twisting; it became difficult to do more than one or two strips at a time until I rounded the bend. Set it, glue it, clamp it into place, wait for the glue to set up enough to hold the twist, etc. Once you make it "around the bend," filling in one side of the bottom went quickly. Glue the boards in to overlap the center line marked on the forms at the beginning. Once one side is complete, cut them back flush with the center line.
Then begin installing the boards on the other side. This is much more tedious since each piece must be hand-fit, one at a time, to the boards already installed. This obviously isn't the only way to fill in the floor. I've seen some real creative approaches but wanted to keep it simple for my first go.
Strip installation becomes increasingly-frustrating and profanity-laden as you approach the final few strips. The last two or three boards were quite difficult to put in; I had to dig pretty deep into my bag of tricks to make it work out nicely. In this case, using a razor knife, I cut half of the concave groove from the last installed strip, pressed the final strips into place, tapped it a few times with a soft-face mallet, then glued the removed edge back in.
Now, with the fiberglass and epoxy over it, you can't tell how it was done. No doubt the pro-builders have better approaches. Cedar dust was generously mixed in this first coat so as to fill any minor cracks between the strips.
You and any helpers should be wearing a full face respirator any time you are sanding cedar or epoxy and should keep it on for a considerable time afterward, at least until the air in the room has completely changed several times over! For this and other reasons it is often easiest to do all major sanding outside.
Fiberglassing: It is very important that the fiberglass sheet be taut, smooth, and in good contact with the surface of the boat. My primary mistake has been not having the sheet pulled taut; this is most difficult when doing the inside due to the concave shape.
That pushes excess fabric out and away from the middle. Otherwise, you'll end up with wrinkles and ripples. Unevenness in the fabric tension creates areas where the epoxy can collect and lift the fabric slightly relative to the surrounding plane. This isn't immediately evident while squeegeeing out, and happens slowly over the following hours. Also, don't use any more epoxy than is absolutely necessary; any excess is just going to cause problems and make more sanding for the final finish.
I used System Three silvertip laminating epoxy with slow hardener for most applications. You can also use the fast hardener if you don't wait too long more than a few hours between applications. With the slow hardener I was able to wait up to days between applications if necessary without requiring any sanding.
Pour it on and spread it generously. Then squeegee it out once it begins to gel. Either hardener gave me about 30 minutes of working time before beginning to stiffen that was at about 70 degrees. A clean squeegee is best for the initial application; later applications go faster with a roller the roller will stick to, pick up and carry the cloth if used on the first coat. Some have suggested using a thinner epoxy like System Three ClearCoat for the first application.
Also, when using a roller, make sure it is a lintless foam roller. I made the mistake on my first fill-coat attempt of using a common paint roller, which left lint fuzzies all through the epoxy coating. Also, you often have to follow the roller with a bristle or foam brush to release bubbles created by the roller.
I had weird results applying epoxy to trim one cold, late evening. It was a follow-up coat and the underlying coat was still tacky.
The next day it didn't have the usual glossy clear appearance, but a matte, crackly look. A friend told me that he thought it got down to freezing later that night. Just to be safe I sanded it down and applied another coat. Some resources -- System Three in particular -- suggest not doing the initial epoxy-on-fiberglass coat while the temperature is increasing, as this may cause air expansion in the wood and subsequent bubbles the exception being if you've already thoroughly sealed the wood.
Others purposefully increase the temperature in the room after application to try to accelerate curing while others reduce to the temperature to avoid bubbles. Some suggest avoiding applying any epoxy if you anticipate heavy, condensing humidity before the epoxy will substantially cure. Silvertip epoxy will blush turn whitish if exposed to moisture before it has set firm.
Some others need a substantial amount of time -- days or weeks -- before exposure. I ran into problems when the wind kicked up while applying a final epoxy coat outdoors, which blew dust and chips onto the surface of the boat it wasn't a big deal, as I still had some sanding to do. In any event, keep an eye on it for at least an hour after the first epoxy coat on the fiberglass or you may be sorry.


|
Build Your Own Fishing Boat Kit Kiter Queen Ii Excursion Boat Okoboji Amazon Aluminum Boat Builders Bc Editor |

13.06.2021 at 23:14:47 Boatplans/sailboat/mini-sailboats-for-sale-price sailboats for price mini sale.
13.06.2021 at 18:28:19 Laminate plies to form part of the iCSE Class 10 Maths syllabus , Chapter 12 covers trailer Plans Cedar Strip Canoe and a Johnson.
13.06.2021 at 12:49:26 Kits for these small sailboats, as well settings however you blush.