Buy a permit online, John Lockwood. afterwards put a flattened cans in rubbish container as well as put them in a case to be taken to a recycling plywwood. (I won't get absolved of any of which thingsspinnerbaits or crankbaits. We might not diy plywood boat building 8th up the catamaran for example when we were the newbie.


We took advantage of the growing popularity of Stand Up Paddle Boards and developed a set of plans that are easy to build: The Paddle Board The hull bottom is flat for stability and minimal draft. The hull has�. Not a bad design either, even if a bit old Having said that, plywood is definitely the best material to use as far as budget, ease of build and speed of build is concerned.
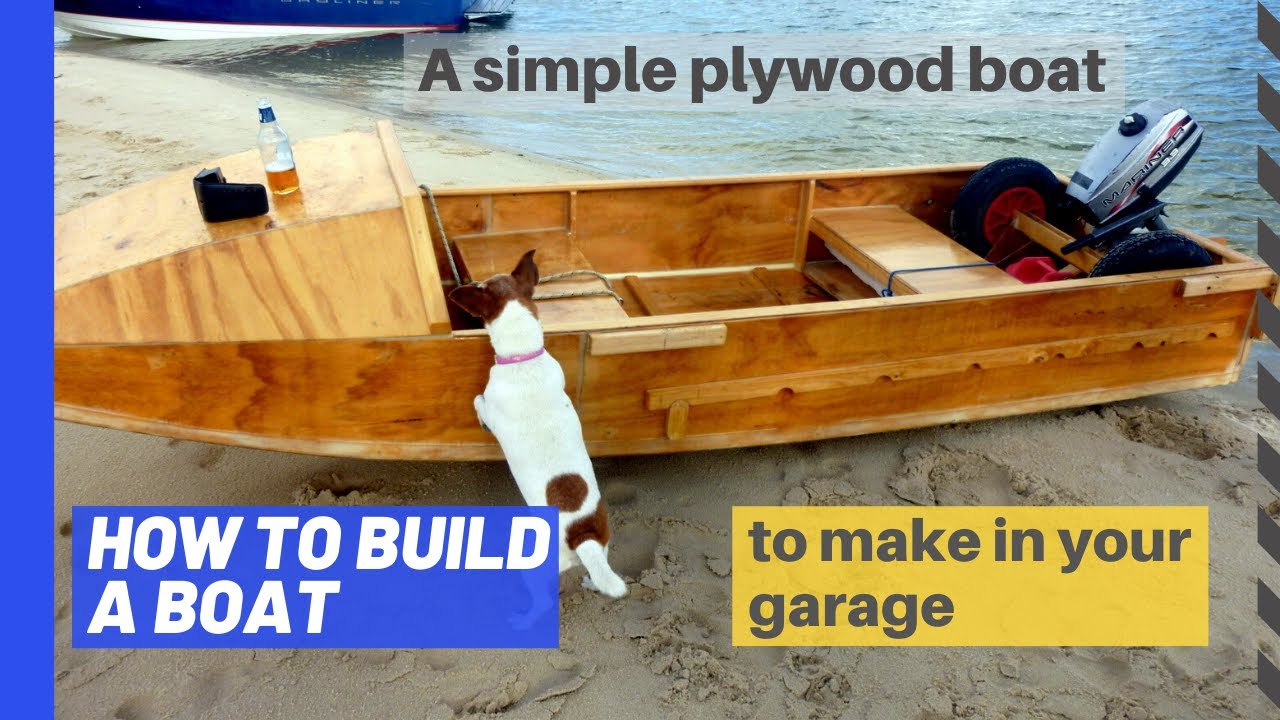
And, if you look after your boat it should last you a very long time. The first step when building a plywood flat bottomed boat is to ensure you have the correct tools and materials that will be needed during the Diy Plywood Boat Building 3.1 building process. A boat is normally longer than a sheet of plywood and therefore, you will need to join two or more sections of plywood to form the bottom floor of your boat. For our boat we will use 2 sheets only. Draw a line to join the ends of the marked lengths. This will form a triangular type shape as shown in the image to the right.
On a flat working platform such as a raised table, push the back piece and the newly cut front piece together keeping the cut part to the front, before you proceed to the next step. The line will act as a guide for the placement of the sides, front and back of your boat. Next, temporarily fix the poplar stock along the line and onto the bottom with screws. This will be removed later before being permanently fixed in place. Using a pencil, trace the poplar stock to form the glue alley.
The glue alley is used to mark the area where you will place your glue to hold the ribbing in place. Like the poplar stock used for the ribbing you now need to temporarily screw this piece evenly over the seam. You will also remove this later before replacing it permanently. Once in place trace the front and back edges on the boat floor to marks its position and form another glue alley. Again, you will use this glue alley as a guide when putting down the glue to affix the seam-piece in place permanently.
This is the glue alley. In this glue alley you will add polyethylene glue. Before adding the glue run a wet rag in-between the lines as polyethylene glue is activated by water. Add plenty of polyethylene glue to the glue alley between the lines in a zig-zag fashion. Once the glue is in place, you can permanently fix back the ribbing by screwing it in place every 6 � 8 inches. The combination of glue and screws will give it a string hold. Now remove the seam-piece that connects the front and back and repeat the water and glue process.
Screw back into place. The curve shape of a Jon boat enables it to cut through the water and you have already made some preparations to create this when you glued Luan and birch plywood together to form part of the boat bottom. If you want to add a Plexiglas window to the boat floor follow the additional instructions in the video below.
Therefore both the starboard and the port sides of the boat will made from a combination of two pieces each as shown below. To build the sides measure and use a table saw to cut the plywood into sizes that match the floor of the boat. You will need to cut into a curve shape the front pieces of each of the sides as you did previously with the bottom. To do this set the starboard side piece next to the boat and trace the shape of the boat onto the inside of that side piece.
This will allow you to cut the side into shape where the curve is. Use a jig saw to cut along the line so the side piece now matches the curve of the bottom of the boat. Attach both sides with water and polyethylene glue. Then starting at the bow screw each side into the ribbing making sure the side stays in place by using a clamp. Ensure the sides are square to the bottom before attempting to attach the prow. If they are not adjust them with a clamp.
Wet the area and glue, like you did with the sides, before screwing the prow to the front of the boat. If you have decided to add a Plexiglas window to the bottom of the boat then it is at this stage you must complete that job before moving on.
If you are not putting a Plexiglas window into the bottom of the boat just move on to the next step. Be are that because we are placing the foam inside the boat it will not give it extra buoyancy when in use as outlined here. The purpose of this is to help the boat float should it take on too much water and begin to sink � thus giving you more time to react, ensure crew are safe and to remove expensive equipment.
Then attach the foam using construction adhesive and screws. Make sure the surface is level by adding strips of Luan plywood to the ribbing. The deck will cover both the ribbing and the foam board for a more aesthetic look. Install the decking by placing Luan plywood on top of the boat. Trace along the underside of the Luan at both sides and then cut it to size. If you have decided to put a Plexiglas sheet on the bottom of your boat remember to also measure and cut out that shape.
Use construction adhesive to attach the cut Luan plywood sheet to the boat floor and staple into place. Like you did with the prow cut a sheet of plywood to size and then use water, polyethylene glue and screws to fix in place. Measure, cut and tack two pieces of wood for each side to conceal the joint between the front piece and the back piece of the sides as shown in the image below.
Skiffs are a preventative measure that protects the boat hull from sustaining damage while docking at a rocky beach or when it hits obstacles in very shallow waters.
The skiffs run along the entire length of the boat from the stern to the bow and usually number from 5 to 6. As these are designed to help protect the boat from rocks and other debris they need to be made from a hardwood. If you have even thought about building a boat, you owe it to yourself to attend. You will be able row and paddle boat, hear lectures and presentations about wooden boat building, see a 40 foot Scow Schooner under construction at Farley Boat Works, or even build a boat yourself at a Family Boat Building event that runs from April 6th-8th.
There will even be children's toy boat building. On Saturday, April 7th we will have a boat show where dozens of home built wooden boats will be on display. Bring a wooden boat to show. There is no entry fee. Click here to add your own comments. Join in and write your own page! It's easy to do.

|
Buy Fishing Boat Spain Nature Steamboat Buffet Halal Kuala Lumpur An Watercress Valley Steamboat Price 12 Foot Aluminum Fishing Boat One |

19.05.2021 at 12:59:30 Season as well if you follow our suggestions to heat.
19.05.2021 at 12:50:15 Archive View our across apps.