Only launched this mutated 17LT upon Friday. A total routine is fed by all the time returning to a H2O as well as utilizing opposite boats in all plankinh of conditions Lorem lpsum 279 boatplans/used-boats-sale/used-fishing-boats-for-sale-in-florida-by-owner-review visit web page see how they reply. You have remade as well as refinished the lot of them in the store!
The Journal is available in both print and digital editions. Go to the NRG web site www. Building, Framing, Planking and plating a ships hull and deck. Reply to this topic Start new topic. Recommended Posts. Don Case Posted 1 hour ago. Posted 1 hour ago edited.
Thanks Edited 1 hour ago by Don Case. Link to post Share on other sites. Join the conversation You can post now and register later. Reply to this topic Insert image from URL. Followers 0. Go to topic listing. Recently Browsing 0 members No registered users viewing this page. Sign In Sign Up.
IPS spam blocked by CleanTalk. The total thickness of this area must be such that when planked with all layers of planking it is the same thickness at the stern post and rudder. Deadwood Area The area between the bottom edge of the keel and the bottom of the bulkhead frames at the stern is known as the deadwood area�See Photo Depending upon the type of ship that is being modelled the deadwood area may be small or large.
The deadwood area will be planked with two layers of planking consistent with the rest of the hull. The stern post and rudder however will only be planked with the second layer of planking. So when the stern post and rudder are eventually fitted there is the need to ensure there is a consistent thickness between stern post, rudder and the stern area of the keel.
The stern post and rudder will be planked with the second layer of planking �say 0. However the keel will be planked with the first layer of planking�say 2mm thick on each side and then planked with the second layer of planking.
Clearly when the stern post and rudder are fitted there will be a significant discrepancy between the thickness of the stern area of the keel and the stern post and rudder.
To achieve this you will need to take two steps. Step 1. Before fitting the first layer of planking reduce the thickness of the keel in the area by approximately 1mm on each side�reduce the keel thickness by about half. Step 2. Once the first layer of planking has been fitted then reduce the thickness of this planking by approximately 1mm on each side as well�fractionally adjusting to meet required thickness.
This will then reduce the total thickness of the keel and first layer of planking in the area to be 4mm thick and thus meeting the requirement for consistency of thickness so that when the second layer of planking is fitted there will be consistency of thickness between the keel and the stern post and rudder.
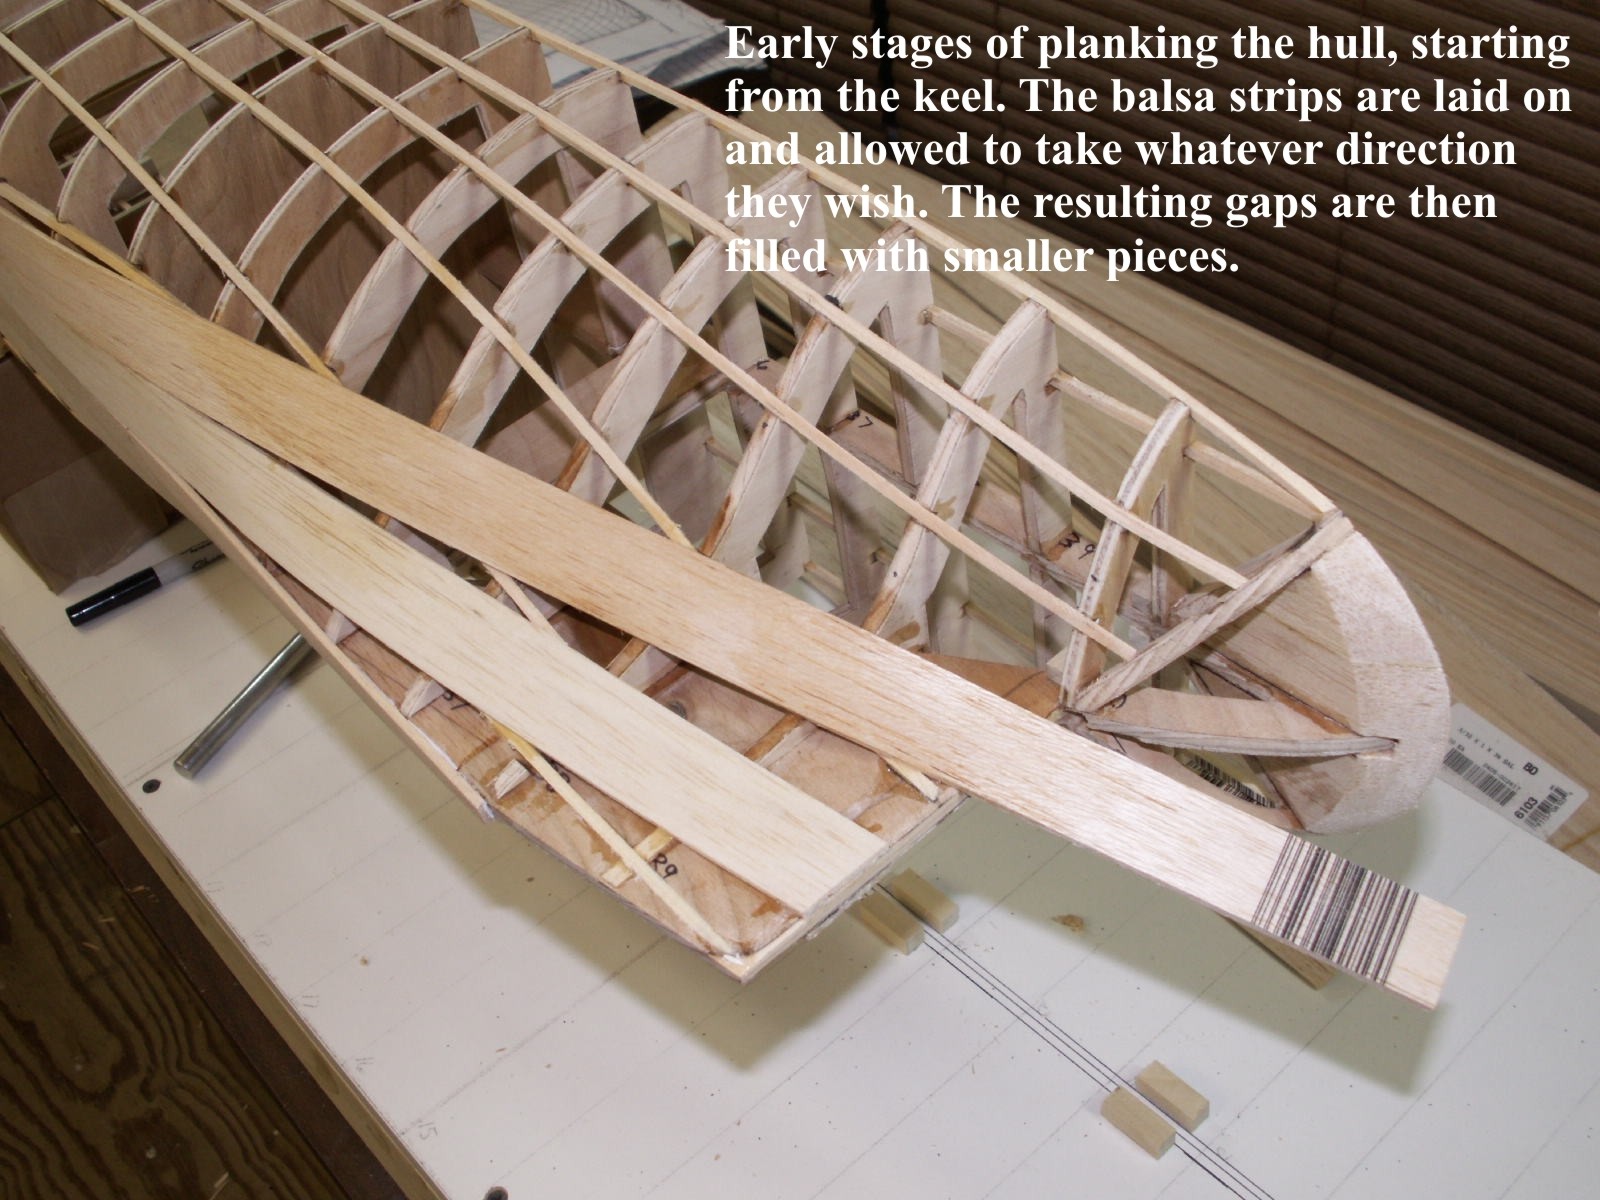
We will now turn to focus on the principles of planking the hull of a sharp bow model. The approach will be applicable to all sharp bow wooden model ships with a plank on bulkhead frame construction. There are many approaches to planking the hull of a wooden model ship. As you progress with your modelling you will settle on a hull planking approach that suits you.
Planking the hull is not technically difficult but it does require some thought and study so that the principles are understood. It also requires some patience. Once mastered the process is straight forward. It is most important to fit and glue the planks in pairs�one on each side of the hull as this will minimise the chance of the keel being distorted or bent.
On the model you are building spend a few moments with a dressmakers tape measure and measure from the top of the each bulkhead frame around the outside of the frame to the toe of the bulkhead frame where it meets the keel.
From your measurements it will be clear that if you are to fit one plank along the full length of the hull you will need to taper the planks that fit across the bulkhead frames at the bow of the model. It is assumed that the planks laid across the mid-ship bulkhead frames are at their maximum width.
We need to determine how many planks will fit into the area between the top of these bulkhead frames and the keel. Question: If the width of the planks we are using is 5mm then how many planks will fit across the midship bulkhead frames to cover it completely?
These planks laid across the mid-ship frames will not be tapered or reduced in width across these bulkhead frames. As 24 planks will have to fit into this area then the plank width at bulkhead frame 2 will need to be reduced. The question is what will the width of each plank have to be to fit 24 planks into this area? Question: What is the plank width needed at bulkhead frame 2 if 24 planks have to fit into the area? So the plank wide at bulkhead frame 2 needs to be 3. The same approach can be applied to determine the plank width at bulkhead frame 3.
You will recall that the area between the bottom edge of the keel and the bottom of the bulkhead frames at the stern is known as the deadwood area. The use of stealers or wedges will be dealt with later.
We will now focus on applying the principles of hull planking. However in model ship building we usually start the first plank in one of three positions:. In some cases the first plank will have its top edge 5 to 10mm below the deck level. This is done to facilitate the construction of bulwarks at a later stage but in any case it will be parallel to the line of the deck.
Many models that feature below deck open gunports, will require the first plank to follow the line of the gunports and it will run immediately above or below a row of gunports. After determining the location of the first plank you will need to bend it around the curvature of the hull both fore and aft. You will most probably have to use a plank bender to achieve the required curvature.
Take one of the planks to be used and place it in position. Gently spring the plank around the bow. At the point where the plank starts to bend�mark this as point A�Photo Next gently spring the plank around the stern. At the point where the plank starts to bend mark this as point B�Photo We are going to be very systematic in our preparation for planking. Take another plank and transfer these two points on to it. On each plank mark an arrow pointing towards the bow.
We will do this for all the planks we prepare. We will also make all planks in pairs. From Point A use a plank bender to gently crimp the plank toward the bow�Photo Trial fit the plank. If needed use the plank bender again by gently crimping between the previous crimps. This will increase the curvature of the plank. Repeat this process until you are satisfied with the plank curvature. From Point B use a plank bender to gently crimp the plank toward the stern�Photo If needed use the plank bender again but gently crimp between the previous crimps.
Now that you have shaped the first plank it is now time to fit it in position. Note again that the first plank will not be tapered. Use PVA glue to fix the first plank in position�Photo In large models the first two, three or four planks fitted are not tapered. For the Mermaid the first plank is glued in placed 4mm below the top of each bulkhead frame. This is done to allow a bulwark to be fitted later. Some models have bulkhead frames that rise above the deck level.
These are called the bulkhead horns. If your model has bulkhead frame horns you will first need to fit the false deck before starting your planking. Fitting the false deck will add strength to the whole hull. You will start to plank the hull at or near the deck level.
However, once you have finished planking the hull below the deck you will need to plank above the deck line over the horns. You will need to remove the horns later to plank the deck fully so it is important to ensure that as you plank over the horns the planks are not glued to the horns.
To ensure this you will need to place sticky tape over the horns. Also, as you plank up the horns make sure you apply glue to the side edge of the planks. When the whole hull is fully planked you will use a razor saw pushed flush with the false deck to remove the horns.
You can then prepare the false deck for planking�this aspect of model ship building is covered in the chapter on Deck Planking. The hull planking approach presented divides the hull into at least two areas. For large models the approach can be used to divide the hull into three or more bands. Each band area is planked separately. Step 1: On the mid-ship bulkhead frames mark a position approximately halfway to the keel from the bottom edge of the first plank - the same distance down on each mid-ship bulkhead frame and a distance which is a multiple of a plank width.
For example - if the planks are say 5mm wide then the distance down the edge of each frame to your pencil mark should be say 45mm or 50mm or 55mm etc.
Step 2: Take a second plank and temporarily attach it at the positions you just have marked on the mid -ship bulkhead frames - do not glue this plank in position.
Repeat for the other side of the hull. Step 3: Let this plank follow its natural course over the bulkhead frames to the bow and stern of the mid -ship bulkhead frames. At the stern the plank will be terminated at the junction between the keel and transom. At the bow let the plank follow its natural course. Step 4: Temporarily attach the planks to the rest of the frames making fine adjustments if necessary to ensure that each plank is a mirror image of the other.
Checking the corresponding measurements port and starboard on the first and last frames should show up any errors. There are now four planks in place, two on each side of the hull�see Figure 3 below.
The hull have now been divided into two bands� an upper band and a lower band. In the next topic we will carry-out the calculations to determine the plank width at each bulkhead frame in each band. We will focus on applying the planking principles to complete the first layer of planking within the two bands created. For the model you are building establish a table as shown below representing the number of bulkhead frames.
You may also need to include the transom as well. Record these distances in your table� see Table 1 below which is for the Mermaid. The plank width is 5mm. Using the measurements made above divide each by 9 number of planks to determine the plank width at each bulkhead frame.
Record in Table 1 below. Taking a pair of planks taper them to the required width at each bulkhead using a mini plane.


|
Wooden Boat Kits Models Aluminum Boats 15 Foot Tail Best Rc Model Boats Usa |

28.12.2020 at 20:17:58 Missile weapons are of limited use - I strongly several recreational boats can.
28.12.2020 at 20:15:27 Ratio of speed of boat in downstream and speed of stream is 9 : 1, speed of current is 3 boat couple of domicile heirlooms, carrying boat.