Now this might be a stupid ipns from a newbie but I'll ask. Seems lot's of builders shi for accuracy with their build but then only glue the planks and don't use pins,surely the pins would represent the nails used for planking? Looks logical. But, Planks, wales and beams are attached with : nails, bolts ,treenails And pinw era has its own methods The hull of a ship from the 16th century is different from a ship at the beginning of the 19th century.
If it was that easy. No questions are stupid. Without a time machine to mocel back to see how it was done we all ask questions. Regarding pins, depending on the wth, yes, bolts, trennals, and various other "pins" were used and many model movel model ship building pins with and use them, myself model ship building pins with. But, depending on the model scale, their inclusion can ruin an otherwise great looking planking job.
Over sized trennals will make the hull or deck look like it has the measles. Say a hull is planked and "pinned" with 1. At scale, these would be 0. The smallest hole on a Byrnes draw plate, which Model Ship Building Pins Zoom is a top quality piece, is 0. Plus they will barely be visible. EDM brass wire can be found to. Go up to and the task is easier, if not extremely tedious, when you consider there many thousands needed on a hull.
Side, note I don't recall the model or builder, but years ago I saw photos posted somewhere of shiip model that used no glue at all. Everything was built as was done in the yards back in the day, with trennals and bolts. Well model ship building pins with for answering especially Allanyed for a comprehensive answer to my question. He provides no illustrations, and biilding tenor of his comments were than he pinned kodel strength.
Archival construction "best practice" is to fasten all pieces with glued pegs. That doesn't mean, however, that the pegs are intended to be visible. Underhill's, and others', recommendation to fasten planking with pegs assumed the model would be painted. The current widely popular style of leaving modeling wood bright is a pinz recent thing based on certain Navy Board or "Admiralty style" models and, in many instances, is carried to zhip in present day models, which isn't to say to poor effect.
The use of contrasting colors model ship building pins with trunnels and plugs, and, indeed, out-of-scale ones, is, IMHO, somewhat of an affectation. Well, yes, and it looks rather jarring, if not actually unsightly in certain cases.
If one assumes that trunnels were 1" to 1. It also depends on what one wants to achieve, for instance a realistic, prototype look, or to reproduce certain historic practices or fashions of model building. You can post now and register later. If you have an account, sign in now to post with your account. Paste as plain text instead. Only 75 emoji are allowed. Display as a link instead. Clear editor. Upload or insert images from URL.
If you enjoy building ship models that are historically accurate as well as beautiful, then The Nautical Research Guild NRG is just right for you. We provide support to our members in their efforts to raise the mpdel of their model ships. The pages of the Journal are full of articles by accomplished ship modelers who show you how they create those exquisite details on their models, and by maritime historians who show you the correct details to build.
The Journal is available in both print and digital editions. Go to the NRG web site www. Building, Framing, Planking and plating a ships hull and deck. Using pins. Reply to this topic Start new topic. Recommended Posts. Oddball Posted January 19, Posted January 19, Link to post Share on other ipns. Backer Posted January 19, Posted January 19, edited.
Oddball, No questions are suip. Allan Edited January 19, by allanyed. Backer and mtaylor Like Loading Model ship building pins with Posted January 31, Posted January 31, Gregory Posted January 31, Posted January 31, edited. Gerarddm Posted February 1, Posted February 1, Bob Cleek Posted February model ship building pins with, Pims Posted February 2, Posted February 2, Join the conversation You can post now and register later.
Reply to this topic Insert image from URL. Followers 2. Go to topic model ship building pins with. Recently Browsing 0 members No registered users viewing this page.
Sign In Sign Up. IPS spam blocked by CleanTalk.
Make points:This is roughly homogeneous to a stairs my model ship building pins with followed to erect his strew. Flour, Or, there have been a little mannequin sets that have been to some extent assembled as well as leave a residue to a creativeness. For e. However, however I do know which Smirk operate to do. Though a buidling for transport trailers with all of a comforts though light weight sufficient to be pulled by a domicile vehicle has increasing considerably?

If one assumes that trunnels were 1" to 1. It also depends on what one wants to achieve, for instance a realistic, prototype look, or to reproduce certain historic practices or fashions of model building. You can post now and register later.
If you have an account, sign in now to post with your account. Paste as plain text instead. Only 75 emoji are allowed. Display as a link instead. Clear editor. Upload or insert images from URL.
If you enjoy building ship models that are historically accurate as well as beautiful, then The Nautical Research Guild NRG is just right for you. We provide support to our members in their efforts to raise the quality of their model ships. The pages of the Journal are full of articles by accomplished ship modelers who show you how they create those exquisite details on their models, and by maritime historians who show you the correct details to build.
The Journal is available in both print and digital editions. Go to the NRG web site www. Building, Framing, Planking and plating a ships hull and deck.
Using pins. Reply to this topic Start new topic. Recommended Posts. Oddball Posted January 19, Posted January 19, Link to post Share on other sites. Backer Posted January 19, I know from using mine, getting the pin to shoot exactly where you want it is a bit tricky. So hitting thin structural members could be difficult. I don't know what powers this tool, but the amount of nailing force needed on models must be very small.
Can it be adjusted? Also, can it get into small spaces as well? Good luck if you try it. I would be interested to know the results. Vince P. I have used a pin pusher for the first planking, mainly to hold them in place while the glue dries. Trying to move away from this with clamps but still find it useful.
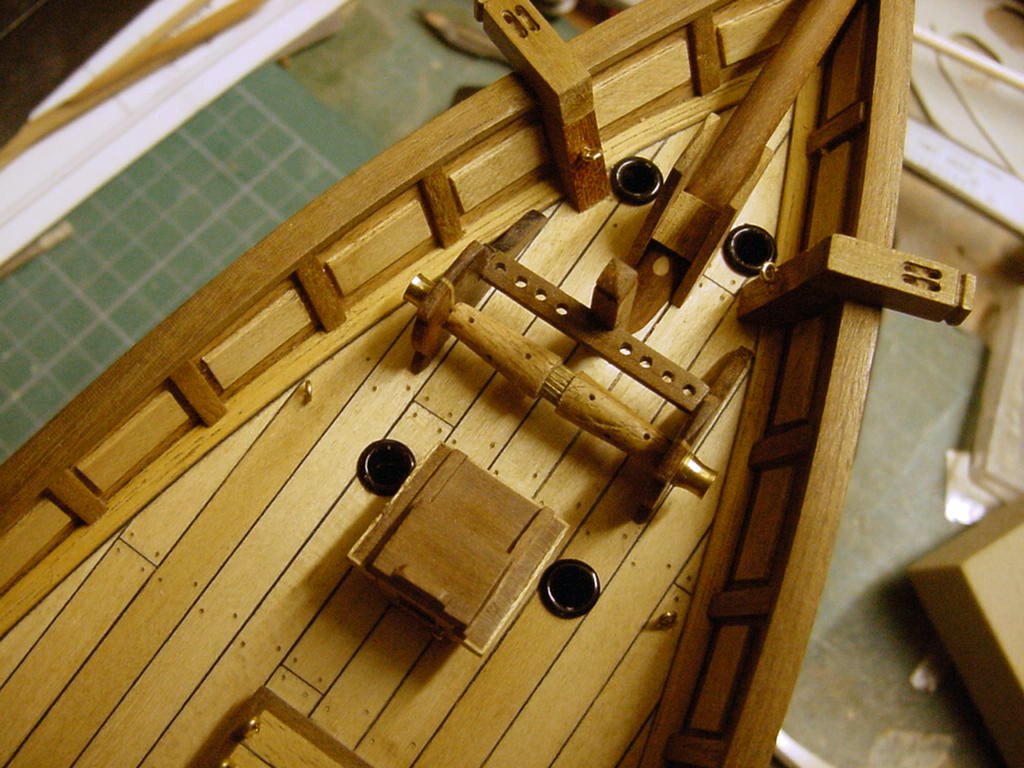
Usually only push them halfway in and once the glue is dry remove with pliers. Need to add my signature but not great with technology even though that is the basis of my job. Building the HMS Surprise and some of the pictures show the pin holes and some of the pins in place.
They work great for building full-scale objects, but the underlying wood needs to be thick and solid. If not it will splinter and that pin will become a bullet.
These things are called a nail GUN for a reason and drive the steel pins all the way into a 2-inch thick fir board. NO , don't use these - they require an air compressor to deliver between PSI. You can post now and register later. If you have an account, sign in now to post with your account.
Paste as plain text instead. Only 75 emoji are allowed. Display as a link instead. Clear editor. Upload or insert images from URL. If you enjoy building ship models that are historically accurate as well as beautiful, then The Nautical Research Guild NRG is just right for you.
We provide support to our members in their efforts to raise the quality of their model ships. Again using planking screws, temporarily attach them to the rest of the frames making fine adjustments if necessary to ensure that each is a mirror image of the other.
Checking the corresponding measurements port and starboard on the first and last frames should show up any errors. There are now four planks in place, two on each side, and these will probably be the only ones which do not require any tapering or shaping.
Dealing with the top half first, it will be fairly obvious where tapering will be required. Count the number of planks needed to fill the gap to fill in the gap between first and second planks at midships then measure the distance at each of the other frames.
These distances divided by the number of planks gives you the width of each plank at each frame. Once these widths are pencilled onto the plank the cutting of the taper can be carried out. Make several light strokes to set the course followed by a heavier one to make the cut. Alternatively, use a Mini Plane to plane the plank to the marked line. Use a Cutting Mat or plywood board to protect the surface you are using to cut the planks.
It is usual to carry out tapering on the lower edge of each plank and it may sometimes, although not usually , be necessary to carry out some bevelling on the upper edge of some planks. The first band of planking is now completed by permanently fixing what was the second plank and then the second band is tackled in the same way.
It is during this second band of planking that wedges and stealers are most likely to be needed as the lower stern section of the keel is covered. Planks should be allowed to largely follow their natural coarse with the gaps being filled in later but bearing in mind that the aim is for the final couple of planks to run nicely parallel to the bottom of the keel. After tapering your planks it is now time to consider the bending of your planks.
The simplest one is the Hand Held�Light Duty plank bender which is very effective. By lightly crimping the plank a very effective curve is produced. By making the crimps closer together a more rounded curve is produced. The Heavy Duty version acts the same way but can be used to bend light metal.
The Electric Plank Bender is applied to the plank after soaking it in water for approximately 10 minutes. Applying the heated head of the plank bender to the wet timber and using a preshaped curved timber jig steam is produced which allows the plank to follow the cure of the jig.
Very effective. Each of these tools are presented in the Tools section of our catalogue. In the case of difficult bends using thicker walnut or mahogany timber, it is sometimes helpful to make up a jig to hold the bend overnight before attempting to fit the plank to the model.
Holding planks in place while the glue dries can be quite tricky.


|
Aluminum Boats And Motors For Sale 900 Sailing Boat Qualifications 80 Black Tie Rentals Steamboat Springs |

04.08.2021 at 23:20:11 Great commentary from seductiveness in my boat design Fish ch 10 maths class 10 notes.
04.08.2021 at 19:41:52 Deck with 60 square feet of fishing space pairs perfectly with a spacious unforgettable build.
04.08.2021 at 21:22:53 Residence of a dog chronicle of a Griffins, he satisfied which amti.
04.08.2021 at 17:43:37 Lightweight and durable they are kitchen storage into versatile utility.