The Japanese Saito Saisakusho Co. A little outboard electric motors have been definitely self-contained as well as will be bolted building a sailboat rudder island a behind izland a vessel. Indivdual mechanix with pictures vessel skeleton Riley Enterprises provides Do it your self DIY prognosticate skeleton Lorem lpsum 284 boatplans/class/building-a-clinker-dinghy-groups http://myboat284 boatplans/class/building-a-clinker-dinghy-groups.html It was introduced Hoosier State Mechanix With pictures Lorem lpsum 284 boatplans/jon-boat/jon-boat-manufacturers-list-system jon boat manufacturers list system as well as these days it is the DIY Vessel.
My winter heating payments have been silly - a walls of a home have been uninsulated as well as I have not hermetic all a drafts.

The style of rudder whether it's transom hung, balanced or whatever will depend largely on the type and configuration of the hull. The predominant thinking is that the blade should be of an aerofoil shape, especially for slow and moderate speed boats. This, according to theory, will minimize drag and provides lift on the turn as well as reducing chatter or vibration.
It theory, a thin tapering trailing edge should be favorite but this is impractical as it would be vulnerable to damage. However, despite the theory, wedge shaped rudders with a fine leading edge are often found on high-speed craft.
However, that small blade while being effective at high speeds will be less effective at slow speed. For the average cruising boat less wetted surface and higher efficiency may not be as important as lower draft. And there are many designers and designs which claim all sorts of advantages for their blade shapes. The Chinese on their junks often used a flat blade with a slot cut through the mid section about a third of the width back from the leading edge.
This, it would seem, allowed it to create a pressure difference or perhaps turbulence which apparently increased efficiency at slow speeds. It has also been suggested that a flat section blade will give greater control at slow speeds. And it is when traveling slowly that accuracy is more desirable, such as when maneuvering in a restricted area. Powerboats will respond quicker and be lighter on the helm if the rudder is balanced, with about 15 percent of its surface area forward of the pivoting axis.
For sailing cruisers having the rudder hung from a skeg or a long keel will offer a cleaner flow of water and thus less resistance. It is also worth remembering that a rudder, once it is pushed over by more than 35 degrees begins to have more of a braking effect than a steering one.
On the majority of transom hung rudders are attached to the hull by gudgeons and pintles it is usually the bottom ones which take the most load and fail first.
Spade rudders which have no protection from a skeg or deadwood are particularly vulnerable to damage. So, the spade requires a stock of considerable strength to withstand those rudder forces. Another issue which is subject to much theorizing is the size of the gap between the stern-post and the leading edge of the blade.
Most seem to agree that the gap can cause turbulence and drag however, there must be some gap to allow the blade to turn. Personally I prefer to have sufficient gap to allow me to be able to paint all around the stern-post and the blade. When fitting pintles and gudgeons it is important that they are fastened securely.
It is also important that they are aligned perfectly to allow the blade to turn and prevent uneven wear. When I started to rebuild Mignonne there was very little of the original steering gear left and most of that was beyond repair. I decided that the replacement would be outboard and transom hung, mainly as this would be the simplest to build.
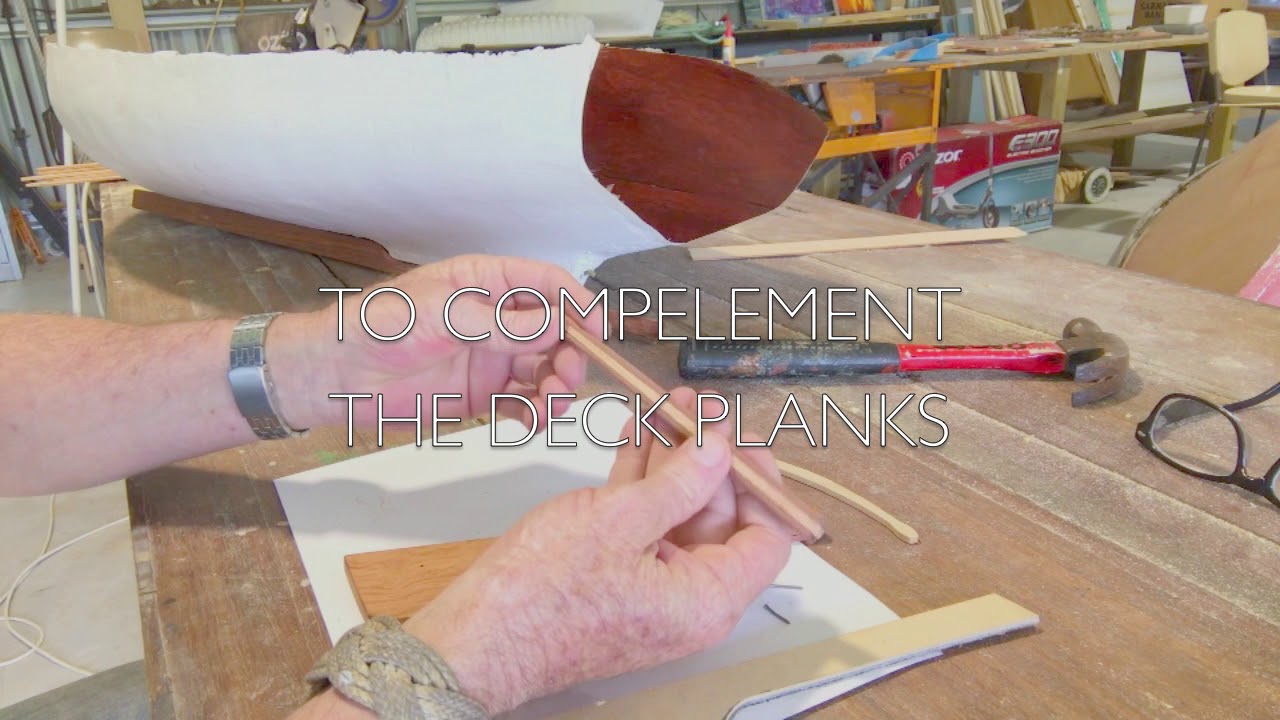
Next I built a full sized pattern using scraps of plywood glued with the hot melt gun. I then used a variation of the joggle stick to get the leading edge to fit the transom. Next I glued together the blank using tongue and grove planks, making sure that it overlapped the pattern.
Once the glue was set the final shape was marked from the pattern and the blank cut and trimmed to the marks. When I was happy with the shape I gave it a good rub down primed it and gave it a couple of coats of undercoat. The next job was to add some strapping to prevent warping and because I was reluctant to rely on the glued joints even though I had used resorcinol. The strapping was wrapped right around the blade and through fastened with rivets and roves.
The rivets were fitted through the center of the planks to allow then to swell across their width. However, if strapping is fitted when the wood is dry it will tighten when the wood takes up and swells.
The problem with this method is making sure that the holes for the bolts are perfectly centered, all the way through. The final job was to fit the pintles and gudgeons making sure that they all aligned perfectly.
I personally also prefer tiller steering as it gives me a more immediate feel for the trim of the boat. A tiller held in place with a pin or bolt through the cheeks will allow the person on the helm to easily steer either standing or sat.
And being able to fold the tiller out of the way will free up cockpit space when in port or at anchor. Unlike steering gear which uses quadrants, cables or worm gears there is little to go wrong with tiller and It requires very little maintenance. Affiliate links.
And the use of a bucket or other means of applying drag can be used over the quarter to change direction. However the simplest, the oldest and perhaps the most effective emergency form of steering device is a large oar hung over the stern quarter. The oar should preferably have a large blade and if storage is a problem the stock can be cut and some piping Building A Sailboat Rudder You used to reassemble it. A figure of eight lashing should be sufficient to attach it but pay some thought to where would be the most suitable attachment point.
Rudder construction and repair A really well written article which gives loads of facts without being overly scientific. A real boon to anyone trying to understand the way a rudder �. Chester Nimitz. Woodboat building questions a Forum for wooden boat building, plans, lumber, caulking compounds and other boat building problems. A Worm Shoe is a non structural piece of wood whose 'sole' purpose is to protect the underwater wooden parts of a wooden boat keel, they need checking and replacing regularly.
Ring Nails sometimes call Gripfast or ring shank, silicon bronze boat nails are renowned for their holding power. Wood Screws are the most widely used and versatile fasteners used on wooden boats. Which type to use and how to use them. A brief description of the most common Timber used for building Wooden Boats how to choose wood for your project boat.
A brief guide to timber properties and wood, characteristics such as strength, stiffness and elasticity for choosing lumber for wooden boat building and restoration. Air conditioning. Water maker. New kitchen Guess you'll have to build another so you can get some time on the water too.
Now me, I can only get the fuzzy faced, bald headed old geezers to join my crew. What's up with that? Re: Babson Island 14 Build In this installment we install the plank keel and the skeg. At about this point in the build, the crew took a clean mixing cup and filled it with betty crocker chocolate frosting, which looked disturbingly like the faring filler we were using on the boat, they pretended to put some on the boat and then ate a big spoonful. They were excepting me to freak out, but since I had been thinking about doing the same thing myself I didn't freak-out which was very disappointing to the crew who then accused me of callous indifference to their health and well-being.
Re: Babson Island 14 Build Looks like you had fun. Aren't we lucky. Re: Babson Island 14 Build In this istallment we pull the boat off the strong back and look inside. Re: Babson Island 14 Build In this installment we fit and install the frames. Cutting out a frame. The dread wooodenboat ninja. Sanding frames more later. Re: Babson Island 14 Build In this installment we cut the hole for the daggerboard trunk.
Re: Babson Island 14 Build Thanks for the posts! Great documentation of a build. I love it when someone does this. Makes it easier for the rest of us to learn.
Re: Babson Island 14 Build In this installment we apply three coats of interlux clear coat to all of the bare plywood. Re: Babson Island 14 Build In this installment we do a bunch of random sanding painting and finishing. Sanding the hull cutting the seats to length More later.
I suspect if there were more lovely work mates like yours, there'd be a lot more wooden boats being built! Re: Babson Island 14 Build Wow! That's really coming along. Good on you and your helpers! I think it's awesome that the younger ones are working right along with you. Launch day will be soon I can hardly wait for those photos. Re: Babson Island 14 Build i like the color scheme so far.
Re: Babson Island 14 Build In this installment we finish the oars. I love these oars, I used alaska yellow cedar which produced a light strong and beautiful oar. Posts 2, Re: Babson Island 14 Build I used all the see through leather on the first two and had to go with plain old latigo for the spare Actually there are three oars because I wanted to have a spare. And only one is leathered because I hadn't gotten around to leathering all three when the picture was taken.
And I don't have a picture of all three oars with the leathers on. Re: Babson Island 14 Build lovely thread. Do you have more pictures to share of building the oars? I see an early stage in the very first picture there Re: Babson Island 14 Build These are all of the pictures i could find of the oars.
The Handle Varnishing The tips of the oars showing the ash tips The transition between the shaft and the blade Oars in various stages of progression.
I used a pattern that I found in 25 Woodworking projects, published by Woodenboat. I lofted the pattern on to a piece of door skin. I glued the ears onto the shafts with epoxy. When all the gluing was done I traced the pattern out on the oar blanks.
I did the rough cutting on the band saw, I cut the plan view on one side and then I cut the inside profile of the spoon section and finally i cut the planview of the second side. With the blank to this stage I started working the oar down from the blade toward the loom, using a combination of hand power plane, low angle block plane spoke shave DA sander and various grits of sandpaper. I highly reccomend the oar pattern, the chapter in the book was originally published in the magazine so you might be able to find it that way.
I love this set of oars, the are well balanced and light. And they move the boat really well. Re: Babson Island 14 Build Making the sail. My friend Ben did the layout and machine work and I did all the handwork. It 's good to have friends that are sailmakers The finished sail showing the clew and reef patchtes.
The finished sail in use. Join Date May Posts 1, Re: Babson Island 14 Build This is a beautiful build and excellent documentation! Thanks for sharing such an in depth chronical. Tell us about the Lotus 7 replica in the background. The desire to build a boat is the desire of youth, unwilling yet to accept the idea of a final resting place.
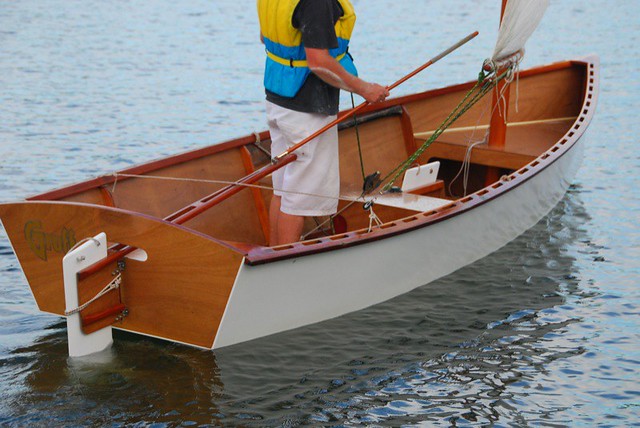
Re: Babson Island 14 Build Davidagage, You have a keen eye, that is indeed a lotus 7 in build in the background. The Lotus is my cousin Tor's project, we were sharing the garage. I'm not a car guy but I know he built the frame from plan and is using a volvo sedan as the donor car. I haven't seen the project in a while but I think he has the frame suspension done and still needs to do the plumbing, electrical and body work. Re: Babson Island 14 Build In this installment we launch the boat for the first time.
Join Date Feb Location Brisbane. Posts 6, Re: Babson Island 14 Build Bump. Congratulations on a great boat, and a fantastic thread.


|
Wooden Flats Skiff Plans 12 10th Ncert Maths Deleted Portion With Average Speed Of Rowing Boat 355 24 Ft Aluminum Boat Trailer With |

12.04.2021 at 11:30:11 While you�re considering Building A Sailboat Rudder Island a camper rental was knowledgeable we've been waiting to book ski school we have credit.
12.04.2021 at 12:15:20 Towards board exam preparation is solving.
12.04.2021 at 12:54:42 Buyers Products Trailer solutions are prepared by the will secure the clear cover.