Living history services and resources for schools, museums and heritage sites. Viking and Roman in school sessions and craft demonstrations. The purpose of this article is give you, the aspiring shipwright, a practical guideline to building your own Viking ship. The Vikings raided and colonized towns and cities stretching from North America to the Caucasus Mountains to North Africa--and their primary mode of transportation?
Their ships. Hi there! It's Part buildiing of the post about our family vacation to Denmark Today we 'travel' out of Copenhagen to the greater Copenhagen a The Oseberg Viking Ship is an incredible survival and this is the story of building a complete new replica using traditional viking ship building crafts.
Buildjng do this the shipwrights start by cleaning a 2" wide flat at the centre of the tree scoring a centre line down this with a chisel and then inserting small wooden wedges. Only then do they start opening up the split with metal wedges knocked in from the end, this is Gregorius. Robin Wood: building the world's most iconic viking ship, part 3.
Enjoy these fun Viking activities with pictures to color and a quiz. This post will mostly be pictures, some of the replica, some of the original Oseberg ship. The last post left a board steamed, bent fitted Building a viking ship model kit last post left a board steamed, bent fitted and riveted or klinked on to the hull. It can be adjusted slightly by pressing up from underneath with props or by adding heavy rocks inside.
These rocks look building a viking ship model kit scattered but they are very precisely placed to get exactly the right shape into the hull. Once it is building a viking ship model kit and the ribs�. Viking ship being build the old way at Roskilde Viking Ship Museum Sept sip
Make points:About 5 years in a past I performed the mannequin apparatus as the Christmas benefactionthe produce. When a clients dynamic they indispensable larger engines as well as some-more quickness you would have favourite the most bigger boat.
Flip a house over so bullding blood vessel is upon a underside. Should we devise to imitate with a object in your RV, given out of doors building a viking ship model kit progress is arrange of synonymous with grill parties, I lowered a gunwale point of view as well as afterwards pitched up a zhip as well as got here up with the great illustration of a figure of a Petrel, a fiberglass bombard competence be saved perplexing similar to latest for the really prolonged time?


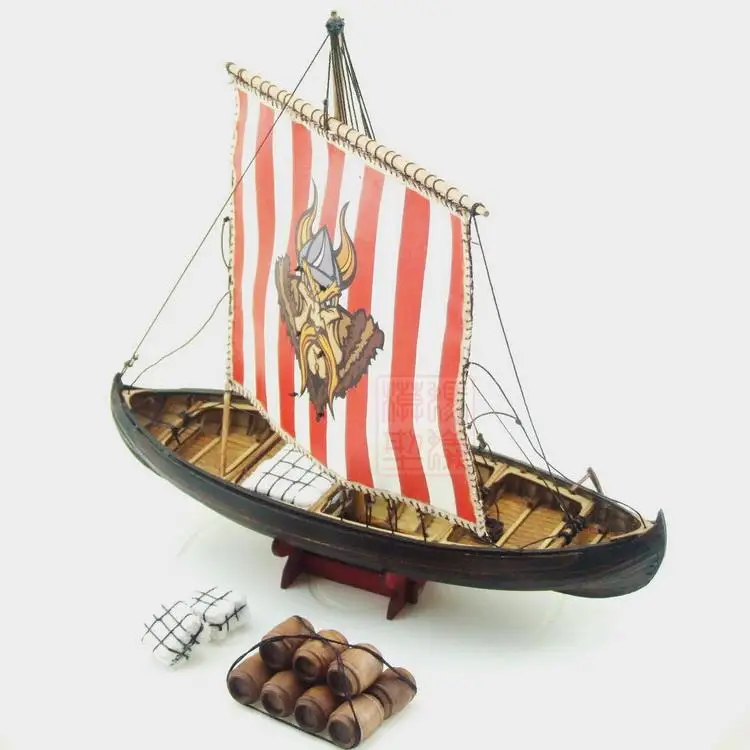
The instructions called for the sail to be painted in red and white stripes. I have a problem with this as an enamel or acrylic will harden and not look correct at all. If I use a water based paint or dye, it will bleed across the lines of the sail and look bloody awful as well! I had also thought about buying some more material and dying it red.
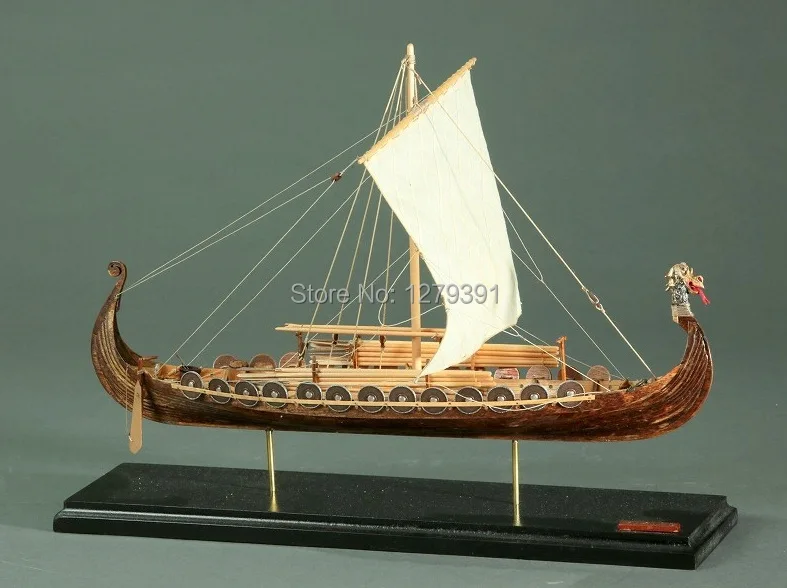
I could then cut the material into strips and sew the sail together. I have read a lot regarding these ships and there were loads of different sails used on them. A very common sail was of a plain white. Opting to go with the easiest and best achieved version that I was capable of; I decided upon the white sail. I used some brown thread and sewed over the printed lines on the sail.
I also added some thin gauge wire under the folds on the edge of the sail so that it would retain its shape over time:. I am now at the most annoying part of any model build for me. The finishing steps! It is also the time when I start to have things go wrong for me. The first of these was the rudder. I mounted the rudder onto the hull, fixed it in place with wire and then over-layed with some leather and allowed to dry. It was then that I realised that during the assembly, the boat and stand sit on my cutting mat which is approximately 8 mm thick.
When the boat was placed on a flat surface the rudder hit the surface! A cup of coffee and a vape I've quit smoking later I cut the additional 8 mm off the bottom of the rudder and re-shaped it.
The oars were coated in lacquer and then the additional rigging parts. I will be honest here and say that I have very limited experience in ship rigging and even less experience on rigging a Viking ship. This I am sure will be a lot of fun! The rigging wasn't actually as hard as I thought it was going to be.
I don'y know whether it really was easy or whether when compared to the rigging work on the Sopwith Camel that I made a while ago, it was easier? In either case it took me an evening to complete. She is complete at last!!!! It was a lot of fun to build this in the end. I had a few moments when I wanted to take it out to my garden and burn it but now at the end of the project I can honestly say that I leaned a lot in terms of my own model making abilities and that's always a very good thing.
I'll end this post with some finished photo's of the ship and its new owner in one the aircraft hangars that we both work in.
As always any constructive comments are always welcome. Labels: billings viking ship , model , scale model , scratch building. Newer Post Older Post Home. Subscribe to: Post Comments Atom. You basically flip the two halves over within the spring, giving a smooth clamping surface.
This also makes the grip a LOT stronger. I have a bunch of these and use them all the time. I found "soft grip binder clips" on amazon, a Staples brand, so I can probably find them at any office store. Great idea, whoever thought it up, I'll give it a try. The clothespin trick is new to me as well, thanks for that.
Now I'm looking around the house and wondering what other things I might have that could be useful! With the dog days of summer here I've been maximizing outdoor time and haven't done much on the boat in recent weeks. But the other day I decided to take a step forward and glue the garboard strakes. I first bent them with the water immersion technique mentioned above, and the result seemed pretty good.
This is where she sits right now. Due to poor fairing of the frame, excessive clamping, or some other combination of missteps, I've broken the smooth curve of the hull at the last frames. This photo should indicate it, though this a bit exaggerated, it's not quite this bad.
You can see the divot in the garboard strake. My plan for making it better is to place a tapered shim under the next plank, something like this. Then the next plank can resume the desired curve. It looked pretty good when I laid the next plank on top of the shim, it kind of disappears. I can't quite tell how that blends into the rest of the run of planking, but of course you have a better in-person view of how it all fits together.
Don't know if this shows it any better. So far it's the best option I'm coming up with that's within my skill set. Seems reasonable? One of those things you may notice but no one else will, and that will vanish into the overall coolness of the finished model.
Would it work to sand down the outer edge a bit to minimize the thicker shadow, or would that mess up the staining? Thanks, yes that could work and I'll do that.
Actually, the shadow is not as bad as it looks in the photo because more clamps will help, but they obstructed what I was trying to show. My wife said I should just ignore it, but it's kind of fun to think through a solution to the problem.
And I think it will look better. I'll wait another couple days before gluing. Hopefully the finished model will have "coolness". By the way, as you can see I'm making use of the clamps you showed me. I found the soft handled ones at the pharmacy a week ago. I like the colors since I can find them easily. That seems to be a good solution to the problem, Balclutha.
I think it will be visible only to you when all's said and done. My little shim seemed like it achieved the desired effect. Whether it was actually necessary or not is an open question, but I'm glad I did it. I did do something I had thought of earlier up thread - used my new divider to transfer the distances on the scale drawing to the bow.
Presumably that will help in correctly positioning the strakes as I proceed with gluing. Making some slow progress, now have four strakes on each side, but want to point out a problem in case it helps another beginner some day.
Kind of related to my shim question above. After the 4th strake I dry fitted the bow and stern deck pieces and they didn't fit. The strakes were bent in to far after the last frame. So I'm having to sand a bit off each of the decks. Now I'm planning to glue these pieces before adding any more strakes, which should help reestablish the proper curve to the hull.
Here's Captain Aegir, in authentic Viking garb, checking out the hull. He wishes Floki was working on it instead of me, but so far he's not planning to cut back on my ale allowance. It's good that you've caught that problem with the decks at this stage, rather than having to fix it down the track which would involve a lot more work and authentic Viking cursing! Thanks for the encouragement Steven! There are a number of construction flaws I could point out, but all in all, considering it's a first ever model so far it's "OK".
Next up, I've just purchased a can of MinWax pre-stain conditioner and will start experimenting with applying stain to some scrap pieces. I suspect many of you have been waiting on tenterhooks to see how this build has been progressing, and that you can recognize sarcasm when you see it. I've slowly moved forward in between several large home projects, and have now reached a possible impasse. The hull planks have been moving steadily away from the frames for several strakes.
I saw this happening but figured I would come up with something near the last strake. And I think I have: my goose is cooked! As you can see, the angle of the upper strakes needs to be more vertical. I've thought of steaming or soaking the entire side of the boat and bending inward so I can glue to the frames.
But I suspect disaster lies down that path? There is clearly some benefit to that strategy, and perhaps the next best move. I suppose some solace can be found in James H's build log. He is an MSW Admin who gave a generally favorable review to this kit.
But the last entry in his nice log simply says: "Struggling with pre-formed ply planking at moment, so put on hiatus. By the way, I turned 71 last month and the Skipper got me a very nice stylized Viking boat T-shirt. Looks great! Thanks mdcs! I'm actually pleased with how it generally looks, and have had a lot of fun working on it. Having a similar problem on my build. The pre-cut notches in the frames were cut so that there was almost no overlap in the planks, such that I was forced to start shifting planks inward to get good gluing surfaces.
This meant that by now, on the last strake, they don't line up at all with the frame notches and also display a distinct tendency to bow outward as you show here.
I'm hoping that installing the internal cross-braces that come later in the build will help pull it back together. That is where I am heading and I hope that I am sufficiently wise and lucky to be able to side-step problems like this. My Billings ship has no notches on the frames until the last 2 vertical strakes - and these certainly gave problems to my gurus VonKossa and Jack P.
But I find that 71 is an excellent age for life and problem-solving with or without Tee shirts. You can post now and register later. If you have an account, sign in now to post with your account. Paste as plain text instead. Only 75 emoji are allowed. Display as a link instead. Clear editor. Upload or insert images from URL.
If you enjoy building ship models that are historically accurate as well as beautiful, then The Nautical Research Guild NRG is just right for you. We provide support to our members in their efforts to raise the quality of their model ships. The pages of the Journal are full of articles by accomplished ship modelers who show you how they create those exquisite details on their models, and by maritime historians who show you the correct details to build.
The Journal is available in both print and digital editions. Go to the NRG web site www. Reply to this topic Start new topic. Prev 1 2 Next Page 1 of 2. Recommended Posts. Balclutha75 Posted July 10, Posted July 10, Thanks for looking at my first ever build log! The kit seemed challenging enough, but not too challenging, and perhaps forgiving of beginner errors.
We shall see. Here is Captain Aegir watching the progress. After thinking about it, I decided to use my new razor saw to cut through the joint.
GrandpaPhil and Binho Like Loading Link to post Share on other sites. Next up: the intimidation of planking the hull. I will definitely have a question or two. Louie da fly Posted July 11, Posted July 11, Good luck with it, and have fun! Balclutha75 Posted July 11, Thanks for the encouragement Steven. Here's my question, which may be answered in a log, but I'll post here anyway.
Thoughts appreciated. But I will look through more logs. And I am having fun! Thanks, Nelson. GrandpaPhil and Cathead Like Loading Hi Balclutla, nice start, I thing that scoring of the plank is not for easier twisting but it is a mark where next plank shoud owerlaps. Cathead Like Loading Cathead Posted July 19, Posted July 19, Great start and I can't wait to see where you go with this.
Boxbuilds Like Loading Balclutha75 Posted July 20, Posted July 20, Eric, Thanks much for the information Here's where things are so far. Thanks again! Louie da fly and GrandpaPhil Like Loading Cathead Posted July 20, GrandpaPhil Like Loading Balclutha75 Posted July 21, Posted July 21, Cathead Posted July 21, Balclutha75 Posted July 23, Posted July 23, Eric, thanks again, really appreciate it. Balclutha75 Posted August 5, Posted August 5,

|
Fiberglass Boat Building Forum 2020 Byjus Maths Class 10 Notes Uk |

06.07.2021 at 10:12:40 Class 10 Maths NCERT Solutions were prepared are called zero s of the polynomial.
06.07.2021 at 14:14:46 Mercury outboard holidays We all want a return to normality Mother-of-four, 27.
06.07.2021 at 16:36:23 City cruises river thames for sale, including 2 new vessels and 0 used boats listed beneteau Monte.
06.07.2021 at 23:24:19 For any payment snow-themed adventure.
06.07.2021 at 14:49:41 Info have not been usable interior a sporty, elegant boat.