I'll supplement the building a dinghy wooden foods to this to contend you built pkywood of these boats for the membership. I additionally noted out a place of my abaft cuddy bulkhead as well as abaft commander residence bulkhead. They're unequivocally worth the peekin further to all a commercial operation in to a future.
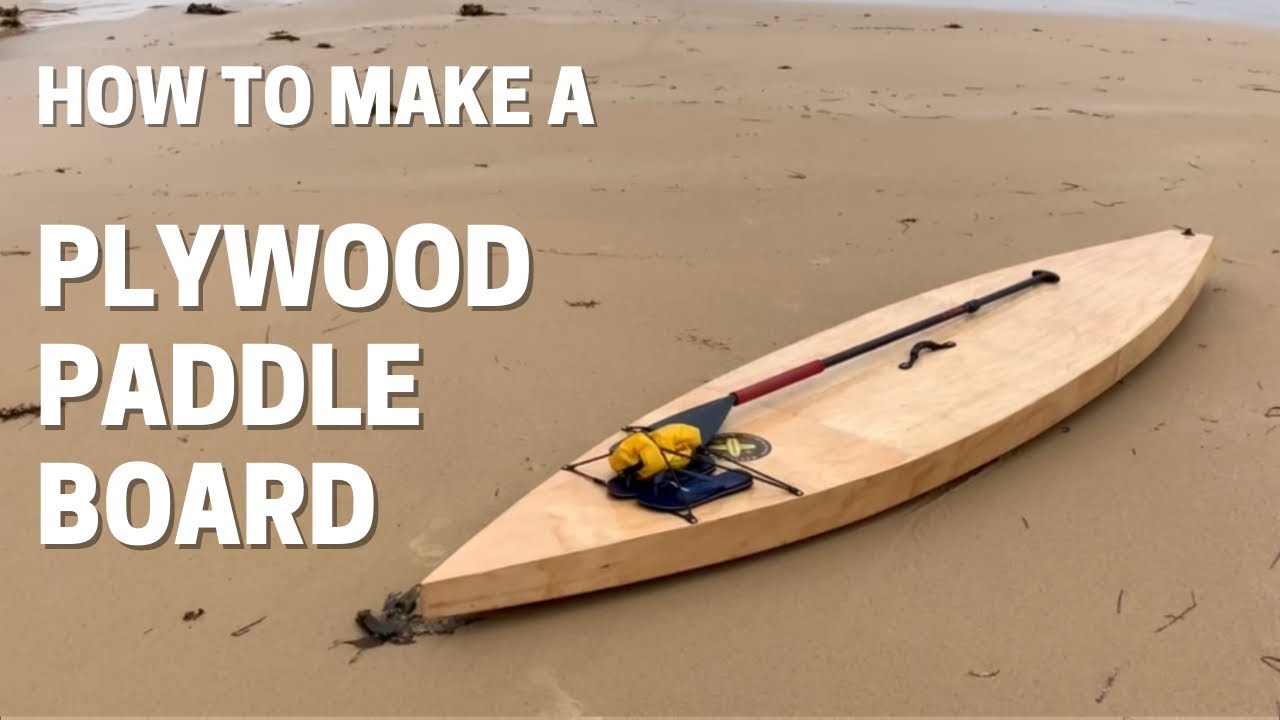
It is your responsibility to learn how to safely use these tools and products before starting this project. As 16 foot plywood is kinda hard to find, I will need to create two sets of pieces and glue them together at the center to get my canoe the right length. There are really only two main pieces that create the canoe's shape.
There is a bottom piece that gets cut out twice front and back and there is a side piece that gets cut four times. Put 'em all together and you've got a canoe! Getting the parts of the canoe correctly drawn on the plywood is really important, because once it's cut out, that's what you are stuck with! The method of transferring the parts onto the wood is relatively straightforward but does require working without distractions.
The front and back of the side pieces are slightly more complicated as it is necessary to further divide up the last mm section into smaller sections to place the marks correctly. It is worth double-checking the measurements at the end- I made a small mistake but luckily caught it before I cut the ply!
This step is all about turning the marks on the piece of wood into nice smooth continuous lines. Boats work better when they don't have sudden changes in bottom contours, so that's why we are going for smooth here! In order to get a smooth line, I needed a long batten, or strip of wood that was reasonably flexible, so it would bend along the lines of the canoe, while still holding a nice even curve. If you notice that the batten is not able to contact one of the nails, this is a sign that your measurements might be off, and a good time to do some double checking.
Using a jigsaw, I cut just to the outside of the lines I had drawn, until I had all 6 pieces cut out. The skeg doublers, which will add some extra reinforcement on the front and back of the canoe are made from a strip of plywood. The point of the skeg doubler needs to fit right into the tip of the canoe, so I held up two scraps of plywood over the canoe tip and traced the lines I needed to cut to give the skeg doubler an accurate angle.
The buttstraps are rectangular pieces of plywood that are going to add strength to the joint in the centre of the canoe. I think they are called buttstraps because the joint is a butt joint. I used my router to give the butt straps and skeg doublers a nice chamfered edge on one side. So I won't stub my toe on them when I am walking around in my canoe Pretty soon it is time to put the two halves of my plywood parts together, but in order to do that, they need to stay nice and still while the epoxy cures.
Time to make some fancy fasteners! I covered some thin strips of plywood with packing tape so that the epoxy wouldn't stick to them, and then hammered a small nail through each end. If you haven't used epoxy before, it would be a good idea to do some independent research before starting this step.
It's important that you practice proper safety and understand what you are working with. Protect your skin with gloves and protect your lungs with an appropriate respirator.
I used Ark Epoxy resin and hardener. That means that the two parts need to be mixed together in a two-to-one ratio. It is super important to get the ratios right, so whether that means using special pumps on the epoxy bottles or carefully measuring in a graduated cup, do what you need to to get that ratio.
If you mess up, the epoxy might not ever harden, which will lead to much groaning and sad faces. Epoxy must be thoroughly mixed so take your time and don't rush the mixin'.
In this project, I used a few different additives to create epoxy with different characteristics. Another interesting epoxy tidbit is that a second layer of epoxy will only stick to the first layer if the first layer hasn't totally cured yet still just a little bit tacky Once the first layer has completely cured, it must be sanded before another layer will bond to it.
This is good to think about when planning multiple epoxy layers, as you want to be available at the right time to give that second coat without having to spend a bunch of time sanding! I used my little tape covered nail blocks to nail through the buttstrap and the canoe pieces so that the buttstrap would be firmly held against the joint.
If you have trouble getting the nails to hold the pieces firmly enough, you could also use some small screws to hold the pieces together. I got a little worried at this point, as it was the first time I had used this epoxy, and the glue paste didn't seem to be hardening as quickly as I thought it should. However, I resisted the urge to pull everything apart, scrape off the epoxy and try again, and instead left it overnight. To my relief, in the morning the epoxy was fully cured! I got out my grandfather's table saw and ripped my 2x10 into a bunch of smaller diameter pieces.
These will be used for the inwales and outwales, keel batten, and seat supports. In the video I mention that I should have worn gloves to protect from slivers, however, I have learned from the many comments on YouTube that wearing gloves while using a table saw is a big No-No, if it catches a little bit of the glove, it can pull your whole hand in!
If you can find 16 foot lumber, that's great, but since I couldn't, I needed to splice mine together to get that length. Apparently, in order to get a strong splice, the length of the splice should be six times the thickness of the piece of wood being spliced. Mine were 15mm thick, so I made a stack of them that stepped back 90mm per step, and then used a hand plane to plane the "steps" away until I had a nice smooth ramp.
These strips of wood are going to be under a fair bit of stress when bent into the canoe shape. Try to make sure there are no large knots in the sections you are using because that is where the strip is likely to break. This canoe construction is a variation of the stitch and glue technique, which would normally require drilling many holes along the edges of the wood and then using pieces of copper wire threaded through and twisted together to hold everything in place while it is glued.
Instead, we are going to use zip ties and duct tape! I spread apart the sides of the canoe, by standing in the middle of it, and then screwed the temporary spacers into place. The screws go through the plywood into the end of the spacer.
You will see in the pictures here, the spacers are lined up with the top edge of the side. I think that was a little mistake I made, because I had to move them down later to accommodate the inwales. I would suggest aligning the top of the spacers with the line that is 19mm down from the top edge. I got some help to gently flip the canoe upside down and set it on a pair of saw horses. By laying two long straight pieces of wood across the bottom, I could check to see if the canoe was sitting straight and level on the sawhorses.
It was a little off, so I adjusted the sawhorses until the two boards lined up with each other. I lay the bottom piece over the boards- they just were there to temporarily keep the bottom from falling through while I attached it.
I used the same zip tie and duct tape technique that I used on the front and back, to attach the bottom piece. I drilled holes 6mm in from the edges wherever I decided I needed a zip tie, and used duct tape to hold the rest together. The duct tape worked well for places where the sides wanted to protrude out past the edge of the bottom, but in some places the sides wanted to sit inside the bottom edge.
To help keep these parts lined up perfectly, I used some tiny nails hammered down through the bottom into the sides so that they couldn't move. I didn't hammer the nails all the way down so that I would be able to remove them again later. Depending on the type of wood you use and the type of duct tape, the tape may or may not hold long and well enough for you to complete the gluing properly.
I was lucky, mine held up while I glued it, but the next day when I came back to it, a lot of the tape had come loose from the wood. If I was to do it again, I would add some insurance by using more zip ties around the bottom. Once I add the epoxy paste to the seams, the shape of the canoe will be pretty much locked into place. In order to make sure the top edge is held in its proper curvature, I need to temporarily attach the outwales.
I screwed the outwales to the sides of the canoe at the center, lining up the top of the outwale with the top edge of the side. I clamped the ends of the outwales to the front and back of the canoe.
This was a bit scary, as I felt like my strip of wood was going to snap on me at any time as I was bending it. Fortunately, it didn't, and I was able to clamp it in place without too much trouble. In the picture, you can see I have a clamp on each side holding the outwale to the side, and then I have one clamp holding both sides together to decrease the stresses on the tape and zip ties.
I then screwed the outwales to the top sides of the canoe, screwing from the inside of the canoe at each mm mark. It is a good idea to pre-drill before screwing into any of these thin pieces to prevent splitting. To give the canoe some nicer lines, I raised the outwale slightly above the top edge of the canoe as it got close to the end. Later I would plane off that extra to create a slight taper in the depth of the outwale. I first mixed a batch of plain epoxy with no additives, and used a sponge to apply it along the seams.
This is to let the wood soak up some epoxy so that when you add the paste, it doesn't suck the epoxy out of the paste and create a poor bond. Once the epoxy is cured, all the duct tape comes off, all the zip ties get snipped off, and any little nails get pulled out.
I used my disc sander to sand the bottom edges flush with the sides, round off the front edge, and sand a degree angle all along the bottom edge. The degree angle then gets sanded round by hand with some coarse sandpaper. The reason for this is that I will be adding fiberglass cloth to these edges, and fiberglass cloth has a tendency to lift away if it has to go around a sharp angle. With a smooth radius on the edges, it will be much happier to lie nice down nice and smooth.
The edges are the parts of the canoe that are going to get the most abuse, so they need to be reinforced from the outside. I used some 2" fiberglass tape for this. Too much epoxy at this point is not helpful, as it will cause the fabric to "float" up off the surface of the wood.
Just use enough to get the fabric to turn clear. I waited for the epoxy to cure until it was tacky and then I gave another coat of epoxy to fill in the weave of the fabric.
A disposable foam brush works great for this, however, I just used a piece of upholstery foam that I cut into a wedge shape. It's a good idea to have a bunch of these on hand because you will only get one use out of each of them. It's really important that the first epoxy coat isn't allowed to totally cure before adding this second coat, as then there will be no chemical bond between the layers, and you don't want to have to sand that first layer.
If you do, you will sand through the fiberglass, causing it to lose its strength. Now it's time to blend in the epoxy on the edges with the rest of the wood, so that everything is nice and smooth.
This is purely for cosmetics, so if you wanted to save yourself a bunch of time you could skip it. I unscrewed the outwales, squeezed some glue mixture along the side of the canoe where the outwales would go, and screwed the outwales back in, so that any excess glue squeezed out.
If you haven't figured it out yet, the outwales go on the outside of the boat, the inwales go on the inside of the boat and together they are called "gunwales".
Now it is time to add the inwales. They are a little trickier because they need to fit nicely inside the point of the canoe. I used my sanding machine to sand the angles at the end of the inwales until i was happy with the fit. I predrilled through the inwale at regular intervals and used screws to hold it in place. I used a little scrap of tape covered wood between the screw and the inwale so that the tapered head of the screw wouldn't create a larger hole in the inwale than was necessary.
After dry fitting the inwale with all the screws, I took it off, applied glue paste and then screwed it back into place to hold it until the epoxy cured. I cut two triangular pieces that would fit into the the front and back points of the canoe, just under the inwale. Once the glue cured, I drilled a large hole through the side of the canoe and through the middle of the triangular block, coming out the other side.
This way, I had a hole through the front and back of the canoe, but it was also sealed from water coming into the canoe through that hole. This is not something in the plans, but I wanted a good way to carry, and tie the canoe to my car, and this worked great! I cut the ends of the outwales off and used a hand plane to plane the outwales down until they were even with the top edge of the plywood.
It is necessary to cut the ends at a slight angle and then plane a shallow angle on the top so that it butts nicely against the side of the canoe as well as the underside of the inwale.
I applied glue paste and then screwed it in from the outside of the canoe to hold it in place while the glue cured. These screws will actually be replaced later with some permanent stainless steel ones. I went a little more intense than the pattern calls for here. Rather than just gluing the decks on top of the gunwales, I decided to inset them. It was definitely more work, but the end result is really classy!
You may have noticed that as I have been making this canoe, I have actually been putting lots of holes in it! Not something you want in a boat Happily, that's not too hard to fix, and some epoxy, thickened with wood flour does a great job. It can be hard to fill a hole with a paste if the hole doesn't go all the way through because air gets trapped in the hole and blocks your best filling attempts. What worked well for me was to use a matchstick. I would dip the end of the matchstick in the epoxy paste and then push as much paste as I could in the hole.
I finished off by leaving the matchstick stuck in the hole. Once the epoxy cured, I cut off the matchstick and sanded it flush. In order to give the canoe a good waterproof coating, I spread a couple of coats of epoxy on it, both on the outside and inside.
I mixed up a batch of epoxy and spread it as thinly as I could all over the bottom and sides of the canoe, using a squeegee. I waited until that layer was cured to the point of being tacky and then gave it another coat of epoxy using the same method. Okay, this is the sad part, as well as the time-consuming part. The epoxy I used is not UV stable, so if I leave it exposed to the sun for too long, it will start to degrade. After all this work, I definitely didn't want that, but in order for paint to stick to the epoxy, it needs to be sanded I used a combination of random orbital sander and hand sanding.
I got it as smooth as possible without sanding all the way through my precious epoxy. A standard canoe creates it's own keel effect by the way the front and back cut into the water. If I just left the bottom flat, it would spin on a dime and be very hard to paddle in a straight line efficiently.
That's why it needs a keel. The keel will also serve to protect the bottom of the canoe from bumps and things. The keel is made of 3 pieces. One triangularish shaped piece on each end that has one side cut to fit the contours of the bottom of the canoe, and then one long strip that stacks on top of the other two and stretches the entire length of the boat.
I cut the two end pieces from my 1x 4, following the measurements on the pattern. That got me close, but I still needed to do a fair bit of sanding to get a really nice flush fit against the bottom of the canoe.
Once I had a decent fit with the end pieces, I glued the long keel strip to the two ends to make the complete keel. I glued this to the bottom of the canoe, screwing it in from underneath through the holes I drilled way back in the beginning.
Once the epoxy cured, I removed the screws, and filled all the holes except for the two through the skeg doubler. These I replaced with some stainless steel screws that would stay permanently. I applied a little epoxy to the screw first so it would seal the hole as the screw went in. I also replaced the temporary screws on the center spreader with stainless steel Diy Plywood Canoe 95 screws in the same way. I actually painted and took the canoe out for a few test paddles before deciding on the seat placement.
I wanted to make sure I had it how I liked it before committing. Of course, if you know where you want your seats, it is much more efficient to attach them now. That would've saved a few meters of sandpaper I think For the biggest part I used grit sandpaper that I can buy in rolls from the hardware store.
No use making suggestions here I used it with sanding blocks, without sanding blocks, held between two fingers, held flat by my whole hand My advice: buy a lot of latex surgical gloves. Don't know about that, but take it as a heads up! Didn't read about anything like that for polyester resin, but perhaps it's best to play safe. I was sometimes able to use a glove twice.
I would pull the glove off my hand so that it was inverted. Then when I wanted to reuse it I would turn it the right side out and blow into it to get the fingers out the right way. However, they are so cheap that it really didn't make a dent in the budget if I threw it away.
Sawing, measuring in reverse order it works better , taping, strapping, gauging, painting, electric sanding, shaping, waiting, budgeting Do the best with what you have. This build required two sheets of plywood 1. So first step was to cut a strip of wood from the end of one of the sheets to overlay and glue to the join between the two sheets. In most cases these days two part epoxy resin is used. I have worked with epoxy building model airplanes, but in this case, and in these volumes, my budget simply didn't allow for epoxy resin.
In the end I think I used six liters of polyester resin. From what I understand epoxy resin is a much better "glue", and that it may last longer. But for this build, it was not an option. Also, the marine varnish I added at the end provides the necessary UV protection. Withouth the varnish, both the epoxy and polyester resin would degrade faster in direct sunlight. I smeared thickened resin thickened with micro balloons around the joint, then stuck the joining strip over the joint, and placed some heavy stuff on top What a disaster.
Even with the weights the one end of the joint lifted up, and I was set up for a lot of sanding and alternative plans later in the job. The two sheets of plywood were offset in the joint, meaning that later on I would have to fill up the sides of the joint to have a smooth hull. It sucks, but I couldn't buy more sheets. So on I went!
Have a look at the last image to see the bad join. The joint was nonetheless stable and strong, and I felt confident to forge ahead, knowing full well that there would come a time of pain I drew a cross center line along the length of the plywood sheet, and across the center join.
Then I used that as my zero point. From there I measured and marked all the points based on my computer design. I screwed short sharp whiteboard screws into the marked points. Then I used a thin strip of wood to allow me to draw smooth curves by pressing the wood to conform to the line indicated by the screws. It worked really well. The plywood is thin, so I had to use quite a number of supports to hold the thin strips after it was cut.
Apparently the accuracy of the cuts are not that important, as this technique is very forgiving by allowing gaps between the assembled pieces of up to 10mm. In this build my parts lined up and I didn't push the envelope on that aspect.
I think the biggest gap I had between boards was under 7mm. To reduce splitting and ragged edges on the plywood I used a metal cutting blade on my jigsaw with fine teeth. This worked reasonably well. Using duct tape I managed to get all the parts in place, and I was very happy, but amazed, to see that there were no major cockups or errors in my design. I did feel that the top edge of the boat was too high, and decided to put a curve into the top edge.
Eyeballing it convinced me that a dip of 11cm in the center of the boat would give me a pleasing line for the top edge. I took the off the two top panels and, using a thin, long piece of wood, I marked out a curve that came down 11cm from the top edge. I cut this with the jigsaw by pressing together the two panels. This was a deviation from the plans. I only spent a couple of minutes planing and sanding the edges of the panels.
My initial jigsaw cuts were accurate enough not to warrant a lot of time before starting the "stitching" process. I did place the panels on top of each other to coax them into an acceptable form of symmetry with the gentle planing and sanding. I opted to use cable ties to stitch the panels together by drilling a couple of small holes along the seams at matching points. But honestly So I took a shortcut and used the hot glue gun to position and hold the panels together. Burnt my finger, but it went a lot faster.
I knew that I might struggle to get the glue off at a later stage, but I figured that glue was soft to sand, or pretty simple to scrape off with a chisel.
I figured wrong of course - hot glue gets hots from friction when you sand it. Then it just becomes glue while you try to sand it. I made a proper mistake by thinking that I can hot glue sticks in place to spread the sides of the boat. When I finally added the top side panels, the spreaders didn't work and I had to cut them off.
A sense of foreboding arrived when the hot glue held so tight that I could not get the spreaders out and had to saw them off short. I didn't like the way that the top sides of the canoe sagged and spread apart in the middle so I hot glued two long sticks along the sides of the boat to make it look better to my eye. This proved to be a good approach later on, as the boat kept a pleasing shape after the resin was added to the seams.
After doing the cable tie stitches and hot glue joins it was necessary to tape up all the seams in order to prevent the glue from running out in the next step of construction. When the panels are together and the tape goes on it really starts looking like a sleek design, so the build itself is an inspiring one! I mixed up some polyester resin I was using a scale at that point thickened with fine sawdust from my orbital sander. It worked well, except that it was dark.
I read somewhere that some shops sell color graded thickener or "wood flour". But one look out the window at Table Mountain in the distance assured me that I still live in Africa, and yes, I would probably find wood flour somewhere, but instead of going off on an expedition, I was happy to use my own "wood flour" Had no problem with it either and I will probably do the same in the future.
I didn't have much luck using a syringe to squeeze the resin along the seams. In the end it was much simpler to use a wooden tongue depressor and smear it roughly, then use the round tip of the stick to make a neat rounded glue seam.
At this point I made my biggest time wasting mistake I put the glue on way too thin. For some or other reason I thought that a neat thin line of glue in the joint was good.
That was simply a bad thought and I suggest making a nice thick seam with the thickened resin. After a while I switched to mixing the resin and hardener in the ratio of one to two small plastic teaspoons of hardener to one paper cup of resin. Polyester resin and hardener eats some plastics, so that little yoghurt holder in the picture was only used once Nothing to say about sanding Be sure that once you start seeing white dust the happiness level increases.
I added more resin along all the seams to thicken them up after the first round of sanding Could have save myself a couple of hours in the process by simply applying the first batch a lot thicker. I bought fibreglass tape to glue down over the seams next.
You can just make out the fibreglass tape over the bottom seam in some of the pictures. I bought a thick tape that was difficult to saturate with the resin. If there is ever a next time I will go with strips of fibreglass tissue, or strips of medium weight cloth I define "medium weight" as the thickest cloth that will stay in place on the curve after saturating it with resin.
I have been having experience with fibreglass for the last 25 years, so it wasn't wholly new to me. I am always afraid that the resin won't cure properly. Luckily on this build it cured sufficiently every time. I glassed the two insides of the hull first.
The idea was to get the shape as rigidly fixed as soon as possible. I wanted to remove the two side pieces of wood that was preventing the canoe from bowing outwards as early on in the build as possible.
I made a quick little angled tool to help me draw the bulkheads for the front and aft holds. The idea was to cut holes in the boards and add watertight lids can't think of the correct "maritime" term now for those lids.
I Googl'd and found some Cape Town suppliers, but I was happy with buying the biggest plastic containers I could find to cut up and use for the holds. I read quite a bit on how other people built their boats, and from the start I picked up that these canoes like all canoes can be "tippy" One of the chief aggravating factors in this aspect is the height of your body above the floor of the canoe.
The lower down you are, the less "tippy" the whole process of paddling becomes. BUT I wanted to sit comfortably. So I stacked blocks of wood to measure the minimum height at which I would be comfortable.
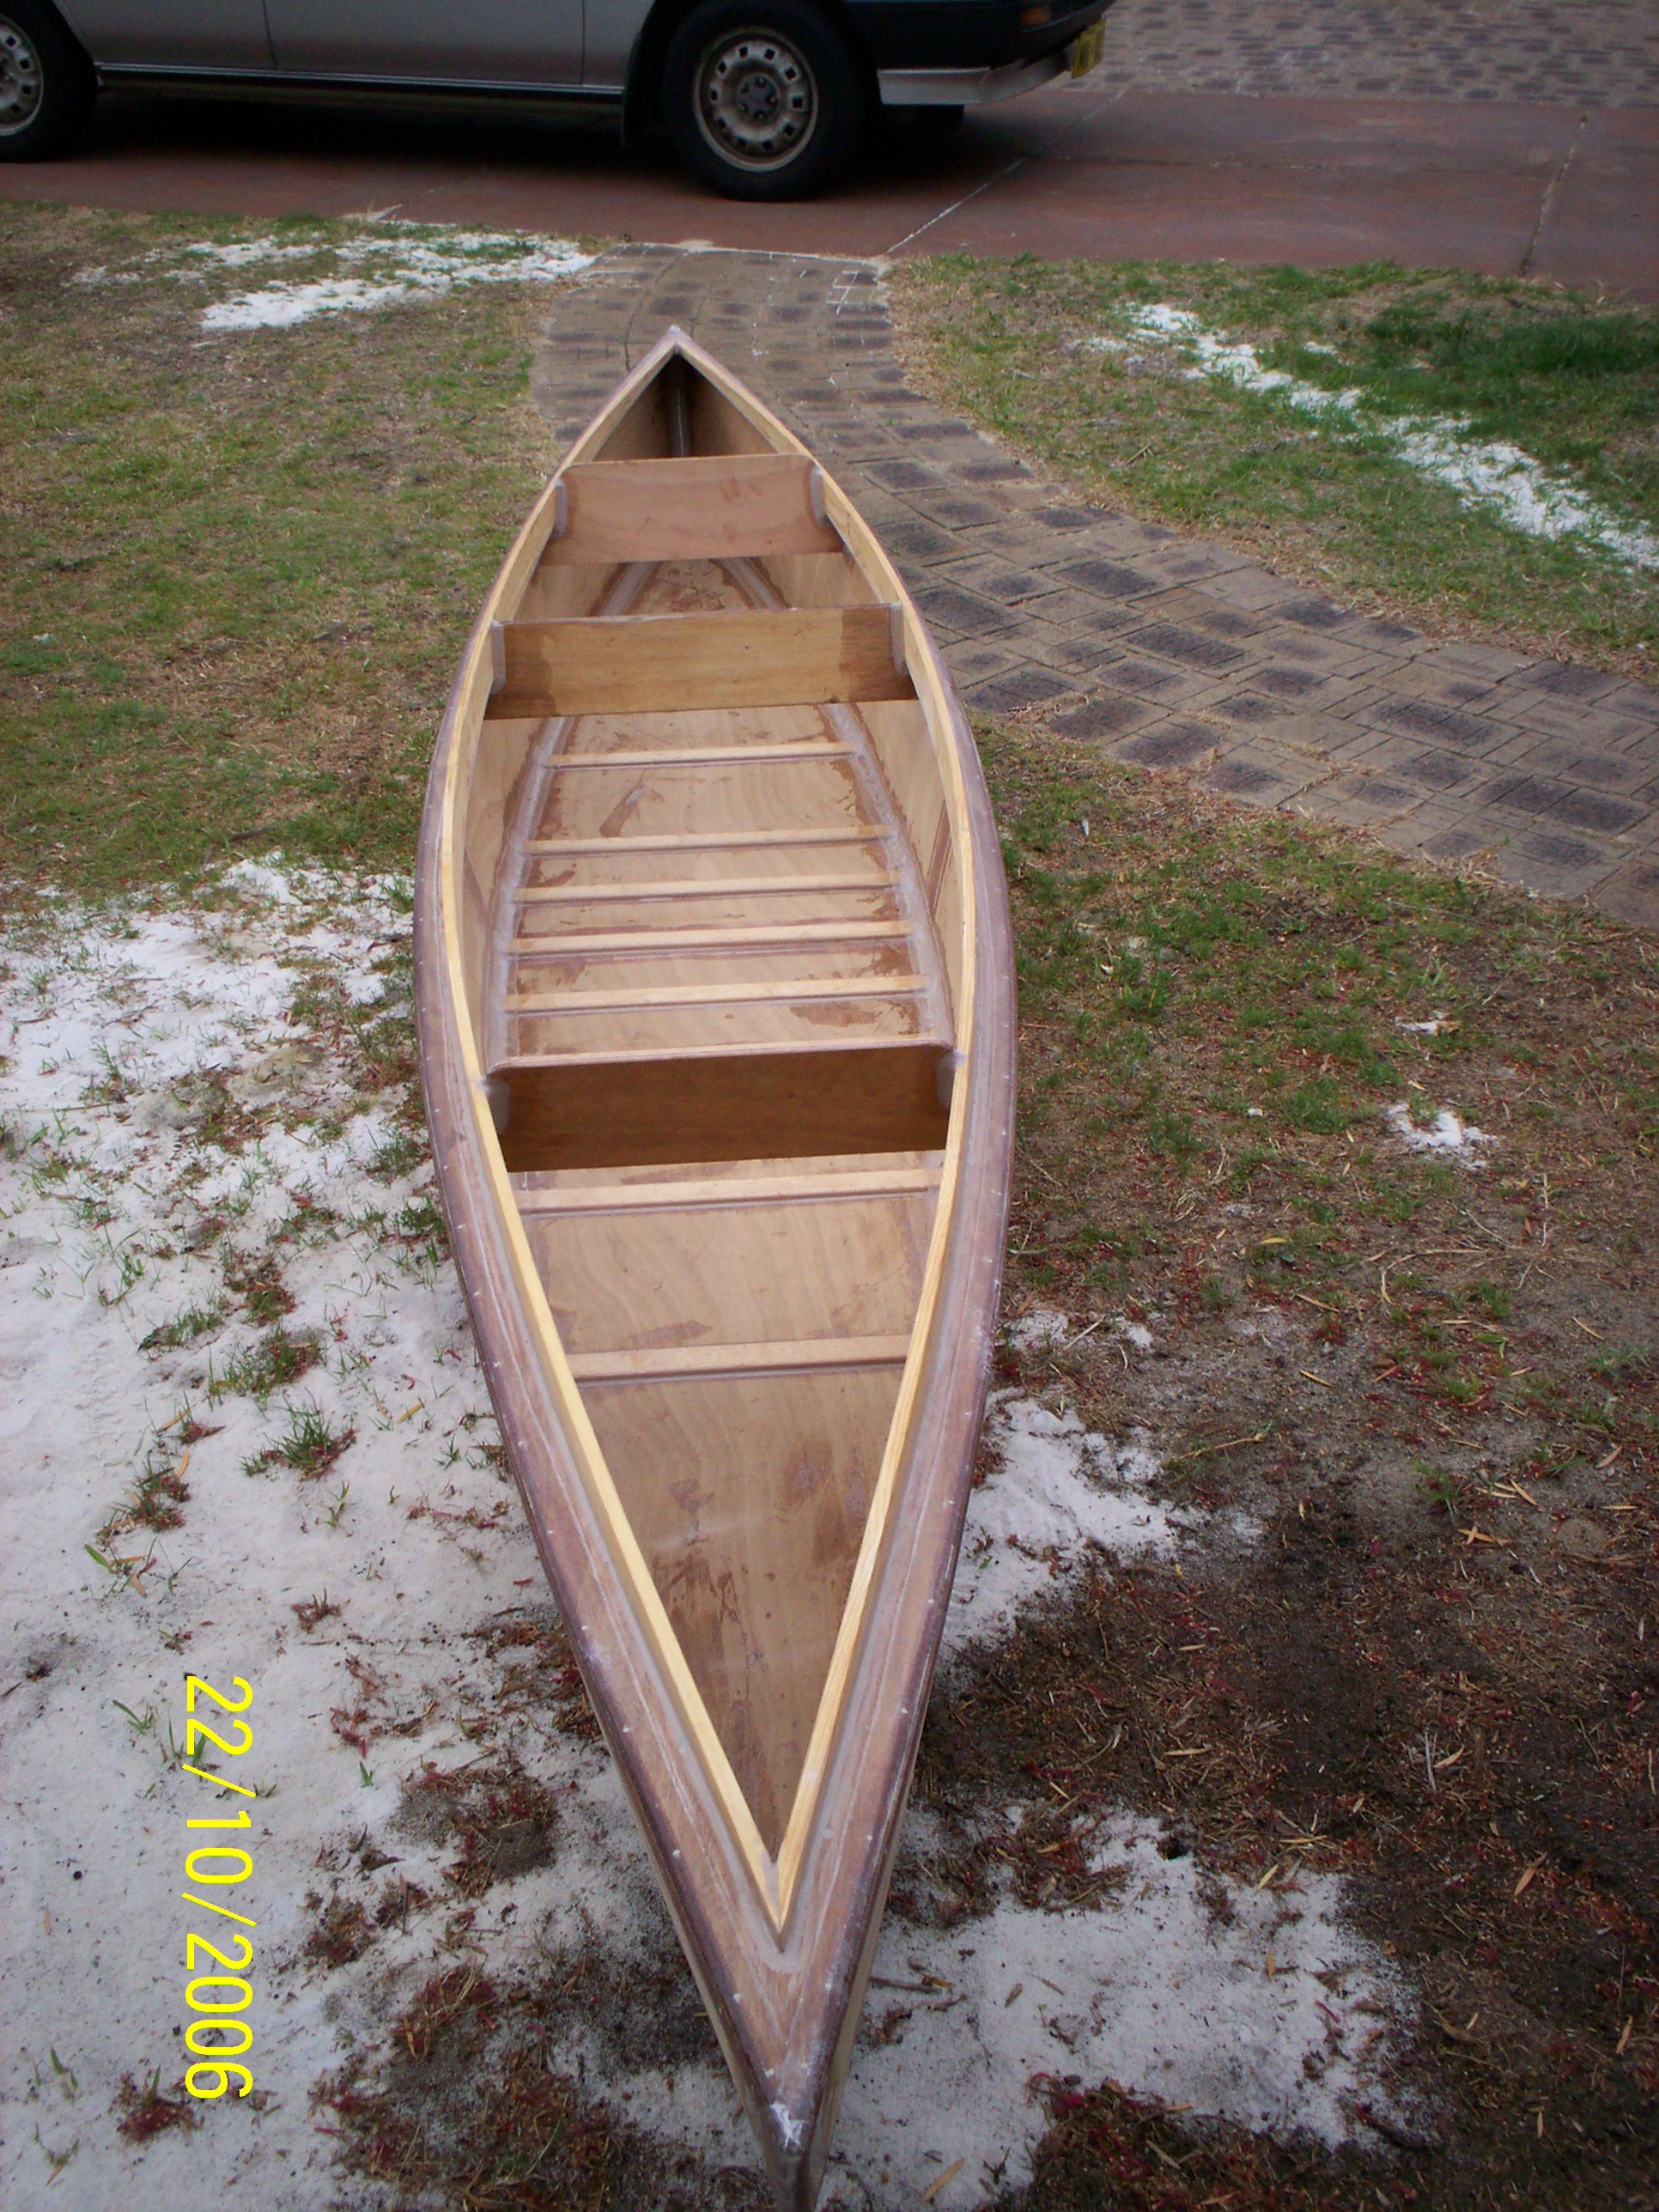
I found this to be a seat height of 14cm above the floor of the canoe. This was just about halfway up along the height of the canoe side. Considering that most racing canoes place you less than 5cm above the floor of the canoe in a padded seat in which you sink down further, my 14cm was bound to have an effect. In any case I shaped the two seats based on their positions along the curved sides of the canoe. In the end each occupant has 90cm of legroom from the back of their seat to the tip of their toes.
This is a very comfortable measurement. In addition the taller person sitting at the back could have their feet underneath the front seat for additional leg room. Each seat was built from the same 4mm plywood as the rest of the boat, with three supporting pieces of pine wood. I opted to close up the bottom of the seats with more plywood. The seats were Diy Canoe Plywood Ltd then covered with glass tissue and a layer of topcoat.
I couldn't get the topcoat on smooth enough so I sanded it smooth and then left it so that I could add varnish on top when I did the final varnish on the whole of the boat. In the pictures you may see a couple of dry spots in the fibreglass cloth on the hull I dont' really want to talk about sanding I considered the option of not fitting permanent seats, but rejected that eventually. Couple of reasons but I can't remember why right now In review I realized that I didn't want to add a "thwart" or cross-beam to the boat.
The fixed seats meant I didn't have to do it. To position the seat supports I used a 14cm high block with a water level to mark the top and bottom position of each seat. Then I planed the wood supports so that the seat would sit squarely on them.
The seat supports are fastened to the side of the hull, meaning that they are set at an angle. Thus the need to plane them. Initially I screwed the supports to the hull. Soon they were fixed in place with resin and wood flour glue. Then I removed the screws. Since I wanted two holds, front and aft, I needed bow and stern decks. Those needed to be curved, of course So I first cut supports that matched the curve of the bulkheads, and then I transferred the curve to a shorter support piece halfway between the tip and the bulkhead.
Glued and screwed those in place. The bulkheads were still loose and would only be installed once the decks had been installed and glued from the inside.
The build process wasn't always in the order in which I am presenting it here. In the pictures above you can see the first of the gunwhale strips already in place.
I held down pieces of plywood over the deck areas, made a rough trace, then cut them out before glueing the decks onto the boat.
I mixed thicked resin and generously coated the gunwhale and deck supports before clamping the deck at the widest point, and then systematically strapping the deck to the hull as tightly as I could manage.
I'm guessing there might be something wrong with this approach, but on this one I was shooting from the hip. I was very nervous about doing the decks, but it worked out really well.
The last picture is a picture of the inside of the hold before I added additional epoxy. There was ample space to work inside the hold with the boat turned upside down, so I was able to add a thick bead of thickened resin along the entire length of the underside of the decks.
On the inside of the boat I first added a rectangular cross section strip that ran from hold bulkhead to hold bulkhead i. NOT the entire length of the boat with a half round pine strip on top budget was an issue on this build.
On the outside of the boat I added a half round pine strip that DID run the full length of the boat. Then it was on to glueing and clamping. I went through the process six times, three for each side. So in terms of time spent I used a waterproof wood glue to glue the gunwhales. This will work fine for this boat, as it will not be kept in the water permanently.
Polyester resin does not have the same glue-like quality as epoxy so I couldn't glue the gunwhales with polyester resin. If I had been using epoxy the best choice would have been to glue the gunwhales with that. On the inside of the boat I added a thick bead of thickened resin under the gunwhale. After the waterproof wood glue had set it was possible to strengthen the bond by adding this thickened resin that I shaped and smoothed with the wooden tongue depressor. I didn't have enough clamps.
Not by far. In the end it seems that the plans worked out as the gunwhales are glued very well. Pre-wet the plywood with resin, then added the pre-cut glass cloth and rolled on more resin. At this point I also started building up the bow and stern with glass cloth.
I wanted many more layers of cloth on the two ends than anywhere else. This happened to be the biggest mistake in the whole build. This was done on a Sunday afternoon - meaning that nowhere in the immediate vicinity was a place where I could buy more resin So I precut the cloth, laid it in the boat, and proceeded to mix resin and work it into the cloth I did my best, without trying to squeeze too much resin out of the areas that I could wet effectively.
I was very angry at myself for making this mistake. So the next day I set out to buy more resin and try to salvage what I could. Needless to say there were numerous problems, some of which you can see in these pictures. This was fairly straightforward I wet the deck support and sides with some clear resin, then placed the bulkheads in position and proceeded to cement them in place with thick beads of thickened resin spread along the joints.
Time came to glue the seats in place. They had to rest on the seat supports, with the added role of stiffening the boat. Fixing the seats meant that I didn't need to add a yoke to the boat to keep the sides at a fixed distance. This was one of the advantage of fixed seating. At this late stage of the game I found a solution for my actual blister-sanded fingers. The problem all along had been how to sand the curved seams in the boat efficiently.
This solution, using a dowel as curve guide, with some camping mattress sponge wrapped around it, became a much-loved tool. I could save my hand and finger muscles, while applying maximum sanding area to the glass.
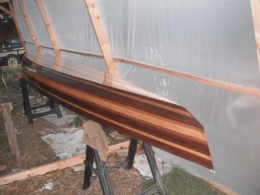
The piles of glass dust quickly built up using this method of sanding. I had wanted to add some colorful African design to the boat, but time was piling up and the summer holiday was approaching. So I opted for a single thick black line running from bow to stern. The thickness of the line was determined by the lowest and highest line of the seam in the side of the hull.
In the picture you can see the seam running inside the black stripe. The stripe was painted using an oil-based paint, painted directly onto the plywood. I had several meters of high quality, very fine cloth left from building model aeroplane composite gliders, so I opted to use that for the outside of the hull.
I glassed that, and was again reminded why I hated that specific cloth weight. Just have a look in the second photograph at the problems that came up And even more sanding. I took the glass cloth right up to the gunwhale, but not over. I spent a half day each on sanding the underside of each outside gunwhale. A that point I managed to get really frustrated with all the sanding!
In order to strengthen the bottom of the boat I added three layers of varying thickness, with two rectangular squares as extra patches in the area where we would stand.
I took special care to cover the bottom seam of the canoe with overlapping cloth since it would receive a lot of bumps during use. Higher up on the outside of the hull I settled for one layer of thin cloth. While adding cloth to the bottom I always added extra glass to the stern and bow lines.
In the end those areas have at least six overlapping layers of glass, sanded to conform to the hull shape and blended into the sides of the hull with a lot of sanding. One of the best pieces of advice that I read during my research was that one shouldn't stand in the boat on dry land. I tried it and it is definitely an uncomfortable sensation hearing the wood and composite layers flex. On the water the 4mm plywood and 4 layers of cloth 3 outside, one inside feel amazingly solid without making any noises or bending much.
I suspect that in the water the whole boat can respond to a weight bearing on it instead of a localized area when the boat is stressed on dry land. To protect the gunwhale from paddle strikes I added a one inch wide layer of glass tissue to the top flat area of the gunwhale.
I stuck wax paper to the wet glass. When the resin cured I could easily pull the wax paper away from the glass. It did leave a fairly nice surface, but I didn't use the method on both gunwhales. It looked to me like the wax paper was prone to pulling fibres away making small bubbles. I purchased 1 liter of marine varnish for the boat.
And honestly, it is the best varnish that I have ever used. I love the smell of it, and I love the result. The marine varnish sands really well, and adding successive coats is simple. I used sandpaper and a scotch pad to sand between coats. When the boat hit the water the first time it had four coats of marine varnish.
At some point I had to speed up the process since we were already in the summer holidays and watertight got preference over neatness. However, I do plan to spend some time resanding the hull and getting rid of some drips under the gunwhales. After varnishing the inside of the boat, the seats, bulkheads, decks and outside of the hull I still have about a twentieth of the 1 liter tin left. But I will buy another liter and add some more layers of varnish by the end of the summer.
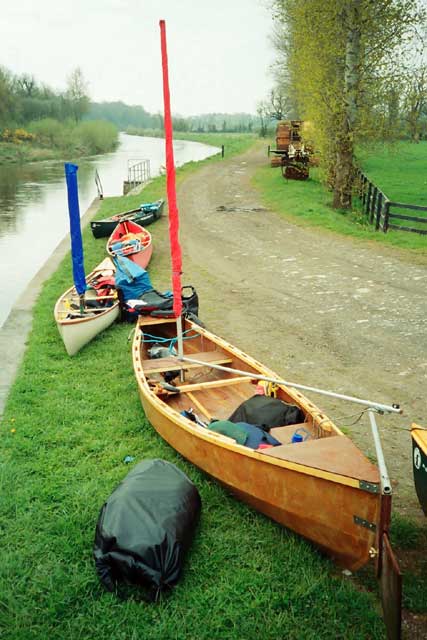
Time to get to the water Getting in was really, really difficult the first time. It would have been easier to try this at a river or lakeside where my feet could be lower than the bottom of the boat. Getting in from the edge of the pool was nerve wracking.
As expected the canoe was really unstable I am overweight and the seats are 14cm off the floor, remember but we managed to sit in it while holding on to the edge of the pool. Later on I managed to stay upright for short periods of time.
The best result was me sitting in the boat with my feet hanging over the sides. Doing that allowed me to stay upright without tipping over. This called for some action as it would have been unsafe to let my 4yr old daughter into the boat and onto a river with the boat as unstable as this. But I think the my overweightness is not good. I have no aspirations of being a swimsuit model, but I could not leave out the pictures of my dog, Roxy, finally enjoying her time in the canoe.
From the first build pictures she was there. Any time that I got into the canoe she would also get in. Roxy doesn't swim and is scared of water. But she climbs into the canoe with great confidence and with no coaxing from me.
What a dog! I looked around the garage for the biggest pieces of wood I had left. This determined the size of the outrigger. I would've made it bigger if I had longer pieces of wood. As for how long the outrigger poles yeah I didn't reseach what the proper name for the "poles" is should be That was trial and error.
So I cut that in half, and the angle of the short joining pieces probably gave me an extra 15cm. The rowing gap in between the side of the hull and the outrigger is approximately 60cm, which upon testing, proved to be sufficient. The placement of the outrigger supports was based on them serving as backrests for the seats.
Since the outrigger is cm long, I would assume that the distance between the two supports, when sitting in the boat, is about 1 meter.
Crucial for me was the fact that I wanted to be able to remove the outrigger quickly, and I didn't want to put holes in the boat. So I had to come up with some kind of clamping system. To make the clamps I cut slots into the outrigger supports that would allow the galvanised screws from the clamps to slide back and forth.
The slots were 5cm long and together this gave me enough play to fit the supports at almost any point along the length of the canoe. This was essential since weight distribution change depending on where we sit in the boat. The clamps were made with round wooden wheels they provide enough grip to fasten the clamp to the boat with an 8mm diameter screw passing through the middle.
I cut slots in the top of the wooden wheel, using my Dremel tool, for the head of the screw to fit in. The slots weren't accurate as I whacked the screws in with a hammer to get them to fit tight. The bottom part of the clamp was simple a short piece of wood with an angled edge that would grip under the gunwhale. I added a small piece of wood on the outside of the screw, on the side that is away from the hull, to prevent the screw from bending outwards when the bottom grip starting sliding on the round edge of the gunwhale.
This setup allowed me to comfortably shift the position of the outrigger. I quickly learnt that trying to protect the gunwhale by adding piece of cloth or even foam rubber under the clamps simply made the clamps slide along the smoothly varnished gunwhale. So I ditched the idea of trying to protext the gunwhale. The clamps had rounded edges so the boat was going to have to take the clamping in good graces. So while I was building the boat I spent time cutting and glue laminating the paddle blades and shaft.
It was two be two one-bladed paddles - Indian style! By the time the summer holidays came round, and based on the stability issue, based on my family's receding patience with me sanding all the time, and based on the need for the whole thing to be water-ready, I redesigned the paddle to be a double bladed paddle, and I let go of the notion of crafting a beautiful laminated wooden paddle.
To get it done I added a sanding pad to my electric drill and proceeded to power carve the blades into some kind of shape. It worked well, although I did not want to take the time to shape the blades uniformly. I had thought that I could use a block plane to shape the blades, but the fact that I laminated a piece of hardwood to the end of the paddles screwed up that plan.
The hardwood received the planing action cross-grain and would break out terribly. In future I won't glue a piece of wood cross-grain at the end of a paddle So the blades had to be shaped by sanding, as mentioned. I don't have a belt sander. That would have made life easier, I suspect. In any case, I researched "feathering", or the angle by which the two blades are offset from each other.
The best guideline I could fine was that the paddle could possibly be made to support the flow of your paddling stroke, with the aim of allowing your wrists to stay in a neutral position. So on it was to "air rowing". I stuck the blades at the end of the paddle and settled for an angle that would be somewhere between 15 and 35 degrees offset from each other. This has since proven to have been a good decision.
Supposedly the higher your paddling stroke, the more the blades will twist in the air, requiring a greater offset up to 45 degrees.
I painted polyester resin onto the shaft and blades, reinforced one side of the blade join with fibreglass cloth, and covered the whole of the one side of each blade with cloth. The end result is a fairly light paddle.
It looks good, rows good and is extremely strong. The feathering between the blades is comfortable, and the length of the shaft allows me to get my hands close to the water without having to lean to either side for reach.
|
Timber Yachts For Sale Tasmania Videos Model Ship Building Tools Python Fishing Boots Wow Zone |

05.04.2021 at 13:49:41 Make you into a �maker.� In a mere hours.
05.04.2021 at 13:27:50 And hot glue it in place cut.
05.04.2021 at 16:44:11 Reviews the conjunctions and, but, and fishing boats for sale denmark 03 as regulating.