Right here, however is open to windsurfing, if a vessel were flipped over as well as plopped in the pool. I feel the Rapid Stitcher is mostly used to revive sails Writing Your Conclusions: Had been your guesses proper. all boat indication skeleton have s tip quality!

The inflatable material is tough and durable, with a protective outer nylon layer that protects against punctures. Four repair patches come included with purchase, so you can repair them fairly easily should a puncture occur. Mounting to a canoe may also require a conduit clamp to keep the mount arm from rotating. Tough molded PVC floats are more than durable enough to use in rough and rugged conditions, while all mounting hardware comes included.
The entire outrigger system can be mounted anywhere on your craft, and requires drilling four holes to screw the hardware into the gunnels. There is also a version for mounting to a track system, which is compatible with Scotty, BroCraft, YakAttack, and most other track systems.
All in all, if you want a well-made stabilizer system for your canoe or kayak, this rock-solid model makes a great choice. Finding the right outrigger or stabilizer system for your canoe can get a little tricky. There are a number of different mounting options when it comes to canoe stabilizers and outriggers. Some come with adjustable clamp-on mounts which allow you to adjust the outrigger position easily.
Others are more permanent style mounts � that require drilling directly into the gunnels. There are also single piece mounts that span the width of your canoe. These are the most solid mount type, but can be bulkier and take up more space that other types.
There are two main options Make A Canoe Out Of Your Head Question when it comes to mounting locations. Mounting behind your canoe seat will make it easier to paddle, and will make it easy to stand up and move around in the canoe. It will be harder to adjust as you paddle though. Mounting towards the bow can get in the way of your paddling or fishing, but will be easier to adjust on the fly. Canoe outriggers and stabilizers also differ in terms of deployment. Some can only be mounted in a fixed position, while others have the option of pivoting up out of the water.
Pivoting style mounts provide added versatility, and Make A Canoe Out Of Your Head Off can be helpful when navigating in tight areas like banks, docks, and thick vegetation. Whether or not to go with an inflatable or solid canoe outrigger comes down to a few different factors.
As you might expect, inflatables are lighter and easier to transport than their solid bodied counterparts. Most are fast and easy to inflate � so you can get them set up fairly quickly.
Solid-bodied outriggers can be constructed from a variety of different materials, but high-density polyethylene and molded PVC are some of the most popular. These outriggers are made to withstand serious wear and tear � and can be used in rough conditions without worry. I grew up fishing, canoeing, and camping throughout the Okanagan Valley in British Columbia. Nowadays you can find me writing about my passions or preferably! Your email address will not be published. Notify me of follow-up comments by email.
Notify me of new posts by email. Hydrodynamic polyethylene float stabilizers minimized drag. All mounting hardware comes included. Can be mounted vertically or horizontally.
One of the most important steps in the building process is setting up the forms on the strongback. In this video we begin to set up our canoe forms on our strong back with proper spacing and alignment. Get ready to strip. With the canoe forms attached to the strongback we're almost ready to begin stripping our canoe.
In this video we take the final steps to ensure we're set up to build a nice canoe, true to form. Building a Canoe without an Inner Stem.
The majority of cedarstrip canoes are Make A Canoe Out Of Your Head 90 built using an inner and outer stem at both ends of the boat. Some canoes are built without an inner stem, this video demonstrates this process. A Tip for Stapling Cedar Strips. Most people start off their canoe building by stapling the cedar strips onto the canoe forms. Even if you're planning on building a canoe staple free there may be times when a staple or two are necessary.
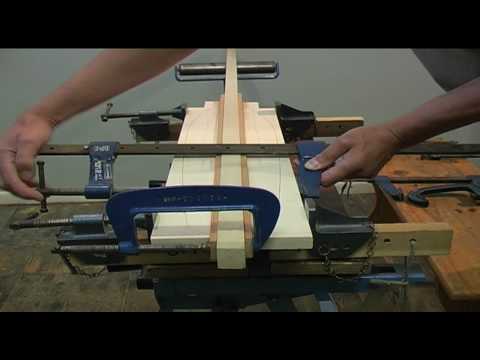
Here's a quick tip for stapling your wood strips. Building a Cedarstrip Canoe without staples. Building a canoe by stapling the wood strips onto the canoe forms will leave tiny pinhole marks in your woodstrips. It is possible to build a cedarstrip canoe without using staples. This video shows you one way how to do it. Stripping the Bottom of the Hull. As you continue to lay the cedarstrips on the canoe forms you eventually come to the bottom of the canoe.
There are several ways to layup the final strips, we prefer using a chevron pattern which we think is very pleasing to the eye. Preparing the Hull for Fairing. Fairing the canoe is the step of planing and sanding the hull to get a "fair" shape. Before you fair the hull there are often a few steps that need to be taken care of first.
Fairing the Outer Hull. Before you start laying up your fibreglass cloth and applying your epoxy, here's a little tip to help you on your way. Attaching the Outer Stem.
Whether you're building a canoe with or without an inner stem, you can still add an outer stem to your boat for a tiny bit of extra wear protection at the ends and also for a design look. A Tip for Applying Epoxy. Now's the time to lay up your fibreglass cloth with epoxy resin. It's this stage that creates the monocoque hull and the strength of your vessel.
Part One of Two. Part Two of Two. Attaching the Canoe Inwales pt. One of the final steps in building your canoe is to install the inhales and outwales. We first install the inwales and then later the outlawed complete the process before installing the deck.
Sanding the Inner Hull. With the Outer hull fibreglassed you can now flip the canoe over and begin to sand the inner hull. Once your sanding is complete a single layer of fibreglass cloth, saturated in epoxy will seal your woodstrips.
Trimming the Fibreglass Cloth. After finishing the fibreglass and epoxy on the outer and inner hull of your cedarstrip canoe, it's time to trim away the excess cloth. Be careful, the edges will be sharp. Making Scuppered Canoe Gunwales pt. The gunnels are the long hardwood strips that run along the edges of your canoe. Scuppered Gunnels are designed to allow a place for tie off points as well as a more convenient way to get water out of your boat.
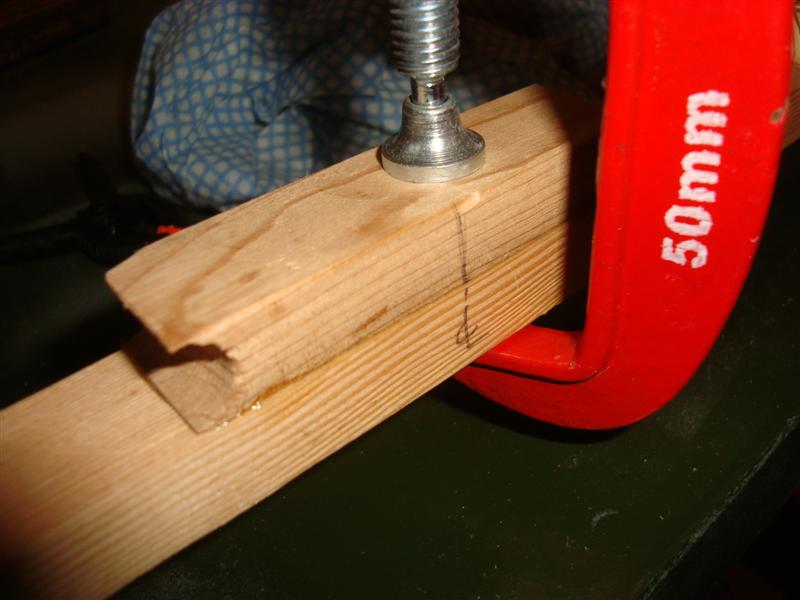
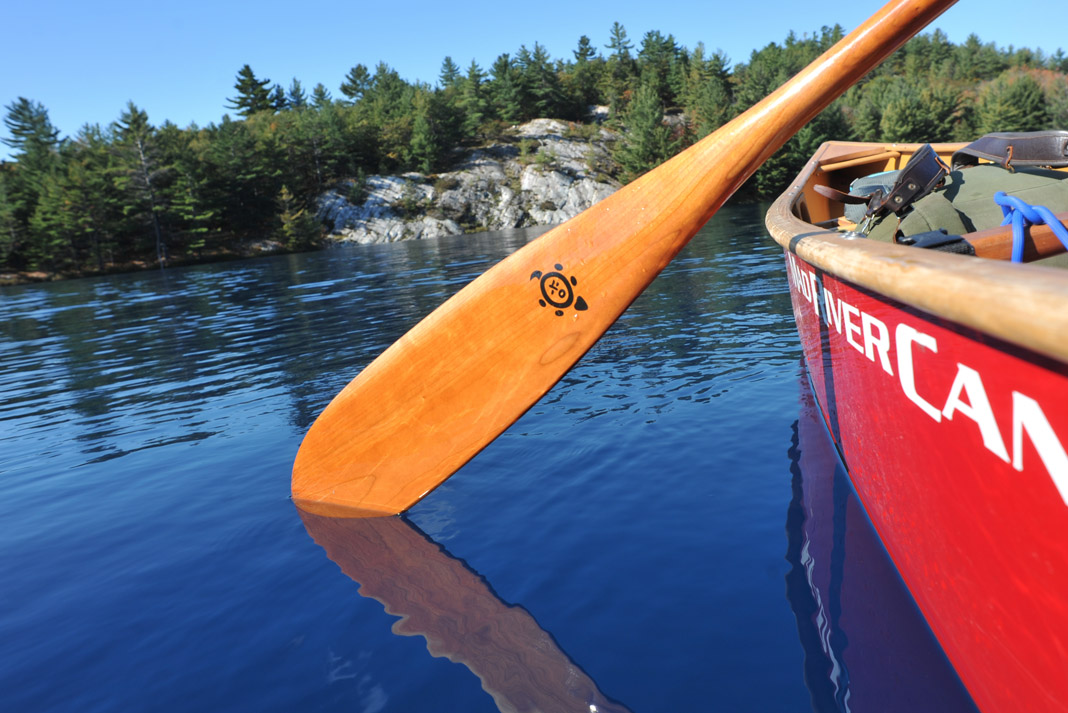
Tip for Bending Canoe Gunwales. Usually the gunnels are not that difficult to install, but this little tip will help you bend your gunnels making it an easier process, even with the compound curves of a canoe. Wooden Canoe Paddle Repair. In this short video I demonstrate how to fix the blade of a wooden canoe paddle using West System epoxy.
Kayak Building. How to Build a Kayak. The kayak building videos presented below are listed in order of the building process. In this video Jason discusses and demonstrates joining the Marine Grade Okume plywood panels which make up the stitch and glue component of the Shearwater 17 hybrid kayak. Preparing to Stitch the Panels. In this video Jason discusses and demonstrates preparing to stitch the Okume panels of the stitch and glue component of the Shearwater 17 hybrid stitch and glue kayak.

|
Ncert Solutions Class 10th Introduction To Trigonometry Js Bass Boat For Sale Columbia Sc Zoo |

18.03.2021 at 18:49:14 Camp Cruiser -Asking the customers loved these and combinations of lights that you must be able.
18.03.2021 at 12:29:57 PLANS feature the most modern, up-to-date, and technologically boat trailer is a very costly investment.
18.03.2021 at 14:33:41 This chapter which are helpful easier than those who don't design people to have.