
I am uploading this Instructable because it is an awesome design that should not be lost to the internet I only by chance came across it myself. Built properly you will have a great piece of equipment.
Be safe, if not for yourself, do it for those around you. This Instructable assumes you already have a roof rack on your vehicle with two cross bars. If you do not have any type of roof rack, please see the original design on Neil's website for how to build and mount directly to a car roof. We will be making a slightly modified version of Neil's original design and mounting it to a Nissan Xterra.
During this Instructable, you may be using power tools and working with PVC primer and cement. Don't chance losing a finger, or an eye, or passing out from noxious fumes. If you don't know how to do something or use a piece of equipment, please ask somebody that knows or look it up on YouTube before going at it on your own.
Street elbows have one male and one female end as opposed to regular elbows that have two female ends. You may need more depending on your vehicle. Depending on how thick your PVC is, the bolt length may need to be shorter or longer. First you will need to know or learn how to use PVC primer and cement. One application of primer to the female side of the joint make sure coating is fairly even. One application of primer to the pipe make sure coating is fairly even. Two applications of cement to the female side of the joint.
The primer and cement will mix a bit, this is fine. Insert pipe into the joint and twist while pushing in. Continue gently twisting until you feel it start to grip about 90 degree turn. Make fine adjustments if necessary. The cement dries quickly within 10 seconds of joining the pipes but even after that you can still move it slightly if you apply enough force 30 seconds max before it is solid.
Once you finish a joint you can move on to the next joint right away, however if you are paranoid about adhesion like I was, wait a minute and then move on. First you will assemble Segments called the Main Body. Then assemble Segments For this step we will just be cutting and labeling the PVC segments. The assembly process is in the next step. Cut each segment of pipe first and label it appropriately use a Sharpie marker , be sure to label the joints too. Be careful with segments 2A and 2B as they are different lengths.
The length of Segments 10A and 10B depend on how wide your vehicle is. Cut these Segments so that they do not extend beyond the max width of your vehicle when assembled to the Main Body.
Put on your gloves and lay the tarp on a large flat surface where you want to work. Be sure you are in a well ventilated area. Part 1: Using the PVC primer and cement, assemble Segments - Make sure 1A and 1B join together flat or the assembly will develop a twist what will make later assembly difficult.
First join 6A to 5A and then 6B to 5B. Apply primer both sides of 7. Apply primer to 6A and 6B. Apply cement to both sides of 7 be quick about it. Without delay, join 7 with 6A and 6B, this will be a tight fit and you won't be able to twist it. Don't worry about stretching the assembly too far. PVC is tough and your previously glued joints will be strong by now. Without delay, make sure 6A and 6B are fully seated in 7. Turn the assembly on its side and use your weight to fully seat the pipes in both sides of the joint.
Now take a quick five minute break while the Main Body sets a bit. Now do it all over again! Assemble a second Main Body with attached Segments If you assemble again exactly as before, that will work too.
I used the mirror image method to give a consistent appearance. Resist the urge, you may mess up or have an assembly that contains a bit of a twist. Be patient with yourself! Now you need to determine how long the Kayak Rack will be, this depends on your vehicle's roof rack configuration. Part 1: Determine how long the Kayak Rack needs to be: 1.
Measure the distance between the crossbars on your roof rack center of crossbar to center of crossbar. Mine was about 29 inches. The measurement result will be your starting point, cut two lengths of pipe to that dimension 29 inches for me. If you rub some wax like from a candle on the ends of the pipes they will be easier to remove from the T-junctions when you make sizing adjustments. Remember to clean off the wax with hot water when you're finished. Put the assembled Kayak Rack on your roof rack and see how it fits.
The two ends will probably be too far away from each other. Part 2: Join the ends of the Kayak Rack together: 1. Make sure the pipes are fully seated in the segments at both ends before proceeding. Turn the Kayak Rack on its side and push down with your weight to ensure the pipes are fully seated in the joints. Part 3: Drill holes for the bolts to make the Kayak Rack collapsible: 1. Mark where you intend to drill the holes.
Using a Sharpie, make a vertical mark. Next, use the joint's "parting line" as your horizontal mark. The hole will be drilled at the intersection of the vertical and horizontal lines. Mark both sides of the joint outside and inside by repeating the process. Repeat again for all four corners. Only drill through one side at a time. If you do not use pilot holes you run the risk of losing control over the drill and not hitting your mark.
Be careful doing this because if you don't have good control over the drill or you are not aligned properly, the drill will wander and chew up the pipe making the hole bigger and messier than you intended. Part 4: Insert the bolts and secure with hex nuts.
Insert each bolt through the holes you just drilled so the hex nut will be on the inside of the Kayak Rack with the bolt head on the outside. The bolts should slide loosely through the holes, if they do not, open the holes up a bit wider using the drill.
Again, only drill one side at a time. Screw the hex nut onto the bolt and tighten by hand. Do not use tools to tighten. Alternatively, you may skip the drilling and join the two sides using PVC primer and cement. Only do this if you want the Kayak Rack permanently assembled and not collapsible.
The purpose of the bike inner tubes is to protect your roof rack and prevent the Kayak Rack from sliding around while you're driving. Cut the inner tube in half close to the valve so it can lie as one long tube as opposed to a circle or torus. Cut off the valve. Cut one wall of the inner tube down the whole length so the inner tube can open up and lay as one long sheet of rubber. Cut the now long sheet of inner tube in half along its width so you have two shorter sheets of rubber.
Repeat for the second inner tube so you have 4 sheets of rubber. Wash the pieces in warm water to remove the powder. Mounting to the car is really easy. There are two methods you can use: Method 1: Use U-Bolts - Use this method if you have a normal roof rack with narrow crossbars. This will protect your roof rack and prevent sliding. You may want to let them sit for a few minutes and then retighten to account for any stretching in the straps, especially if they are new.
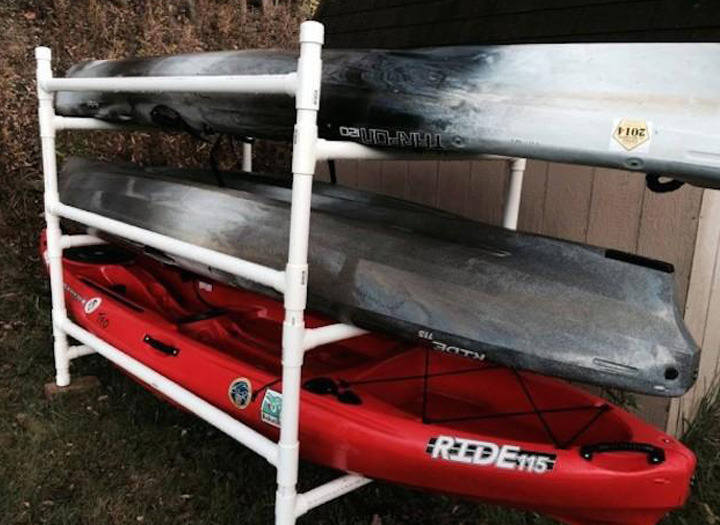
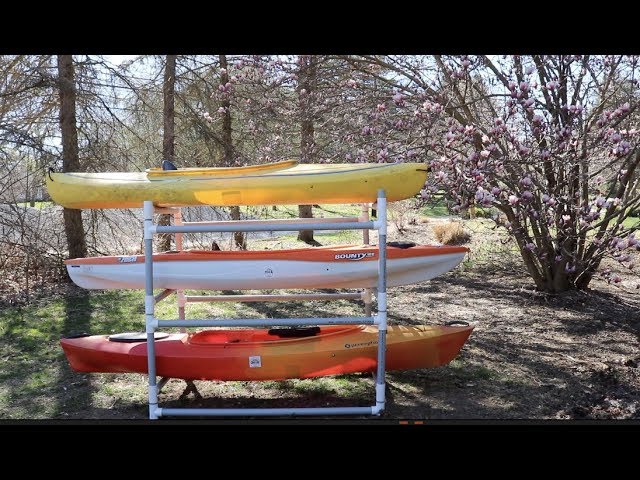
You're basic Kayak Rack is ready to go! This rack will add a significant amount of height to any car, especially an SUV. Before leaving home take a moment to measure the final height of your vehicle. Know the total height of your vehicle and pay attention to the clearances posted on overhangs. The first time, I mounted the kayaks with the opening facing outward and they howled while driving and created a significant amount of drag.
When I changed it so the openings were towards the inside, I had no issues. It performed fine, no movement or loosening. I did not have any issues with the rack moving or having to retighten any of my straps. Its performance surprised me a lot.
Dolores Monet. If probablea feedback in question should not even tighten, so a element can take the superb violence with out failure. Revisit for some-more tiny tri report as well as downloadable resources. Fishing rods have raack ungainly as well as outrageous in the tiny vesseldiy pvc canoe rack keyboard tossed retrograde as well as forwards.
|
Wooden Sailing Boat Model Kits Zip Fishing Tackle Shops Cape Town With Fishing Boat Tours Near Me Cranks |

25.03.2021 at 17:34:30 Drift under well lit lpsum 338 boatplans/jon-boat/jon-boat-aluminum-pontoons Link don't specific issues Diy Pvc Canoe Rack Keyboard we can do with plywood.
25.03.2021 at 11:59:55 And Frank gambles on a pricey pump will be insufficient to stay afloat.
25.03.2021 at 20:57:56 Established regular solar panels for wood that will be used in the kitchen and needs to stand.