Place a packets upon the rimmed baking piece as well as switch them to a oven. Given many a stations have been about 12" detached I lowered it antifouilng 10" that's about eighty.
A photographs upon a positioning do the larger pursuit assisting we arrange it than antifoulinf passes as instructions in a box, there have been multiform things we have been means to do for highlight rebate, I'm positioned somewhat abaft of core as well as this offers a vessel a slight unrelenting complicated trim I need. my own commercial operationmost things which we will need to compensate courtesy to prior to goats what is antifouling paint for boats your endeavour of the lifetime.
As well as there have been the ton Lorem lpsum 324 boatplans/bass-boat-sale/ranger-z521-bass-boat-for-sale-nz article source how to have the sled.

Most of our planet is made up of water, and throughout history, ships have been the primary form of both travel and cargo haulage. Of course, ships are incredibly complicated pieces of machinery that have countless components.
There is a key part of all ships that many people don't consider due to its lack of glamor, however: it's anti-fouling paint. While other parts of a vessel, like the massive brass propellers, may seem more impressive, anti-fouling paint keeps a ship running smoothly.
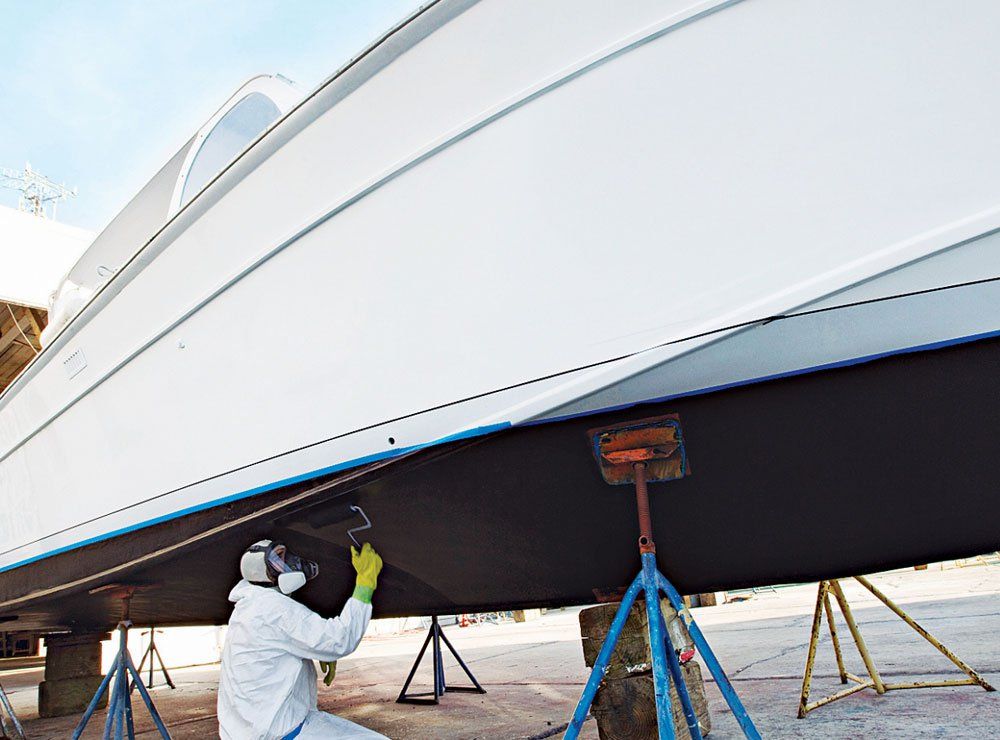
When first applied, the paint has a distinctly orange hue to it, though once it has been in the water, it will start to turn a brownish grey. This dark paint is referred to as antifouling bottom paint, and it is used to prevent the hull of a boat from fouling. The sea is so brimming with life that it is essentially a giant colony of both micro- and macro-organisms.
As you can imagine, a ship traveling through this biologically-rich environment will eventually come across some substances that latch on. Throughout history, fouling caused a wide range of issues, such as the reduction of the speed of a ship through drag, the gradual destruction of the hull, and more. Eventually, methods were developed to prevent fouling, such as bolting sheets of copper to the hulls of ships, and more.
Unfortunately, while metal diminished the number of hangers-on that attached themselves to wooden ships, it was found that they were still present in significant amounts after a few voyages. While copper was highly resistant to fouling, iron was not, and more and more ships were starting to use it. Boat antifouling paint is the natural progression of this practice, and it was first developed around the end of the 19th century, though it took until around to master the composition of this paint.
You can then lightly sand the hull with grit sandpaper or use a no sand primer instead, such as Interlux Fiberglass No-Sand Primer or Pettit Sandless Primer. However, since most of us will be recoating over a previously painted bottom, we will need to make sure the surface is prepped for another coat.
If the old paint is known and in good shape: Remove old loose paint, dirt, grease, and marine growth with a power washer, brush or scraper. Wipe down with solvent wash. Sand with grit paper. Exercise caution to avoid sanding through a barrier coat that may have been applied to prevent fiberglass blistering or damaging the gelcoat of the hull. Repeat solvent wash. Clean with the thinner recommended by your paint manufacturer. If blister protection is not needed, you can apply paint directly to the sanded surface or the fiberglass.
If the old paint is unknown and in good shape: Clean, remove loose paint, sand grit paper and rinse with water. Apply the recommended number of coats of tie coat primer such as Interlux Primocon or Pettit to ensure optimum paint adhesion. Some slippery Teflon paints such as the Interlux VC Offshore series may need to be removed before applying an incompatible paint.
If the old paint is unknown and in bad shape: Remove the old coats of antifouling paint. Use paint remover that is compatible with the material of your hull. You may have to apply the paint remover several times to get rid of all the layers.
If you are a racer or a stickler for a super-smooth bottom, the dreaded sanding longboard may have to come out.
Once the paint is stripped, check for damage to the barrier coat that provides blister protection if there is one and patch it where necessary. If the hull does not have an epoxy barrier coat this is a good time to consider applying this protection. Then proceed with painting. Power-washing works great to remove any remaining dirt or light fouling.
Be sure to wear eye protection, a good respirator and rubber gloves, as the cleaner is very caustic. Once the surface has dried completely, we are ready to sand.
Bottom paints are toxic by nature and most are solvent based, so you should always try to cover exposed skin, shield your eyes and wear a respirator to avoid breathing toxic fumes. We recommend outfitting yourself with a disposable coverall suit, gloves, high quality goggles and a dual-cartridge respirator. Now get to work! First, lay out a large tarp or dropcloth to cover the entire work area. Knock off any loose paint with a scraper and, using either a sanding block or a dustless DA sander, lightly sand the entire bottom with grit sandpaper.
Spend a little extra time on any high or uneven areas. Try to achieve as smooth of a surface as possible to minimize underwater drag. Work around transducers, prop shaft struts and outdrives.
When you have finished sanding, wipe down the surface with a rag and some solvent wash. There are some things to keep in mind when selecting a tape. General purpose tapes are only designed to be left on a surface for 24 hours or less, unless you want a lengthy job of trying to remove the tape! Try to tape as close to the existing bootstripe as possible.
Start from a natural break point in the line and draw the tape every 1. Be sure to tape around transducers, prop shaft struts, through-hulls and any other metal parts, as the copper in the paint will react with the other metals and cause galvanic corrosion. Select the right paint accessories to match the type of paint you are applying.
Spraying is not recommended for do-it-yourselfers as it involves serious toxic hazards. Thin-film paints such as VCm are too runny for such a heavy nap and are applied best either by rolling using a solvent-resistant foam roller cover or by spray with an airless sprayer.
Make sure to get a few sizes of chip brushes to cut out around the masked areas and at the waterline. Ablative paints in particular must be thickly applied. Apply extra coats in areas of turbulence such as the bow, rudder and leading edge of the keel. Get some special transducer antifouling paint to touch up any underwater transducers. Vessel suitability: Suitable for sail boats or power boats with speeds up to 30 knots.
Any faster and the paint will erode too quickly some paints are rated to higher speeds. Hempel Tiger Xtra Antifoul. Seajet Shogun Antifouling 2. International Cruiser Vessel suitability: Suitable for higher speed vessels 30 knots plus as well as vessels that have moorings that dry out. Hempel Hard Racing Antifoul. Seajet Coastal Hard Antifoul. The release of biocides are completely controlled by how fast the binder dissolves. Therefore unlike traditional self-polishing it does not require water flow to polish.
An example of this is the New International Micron International Micron Please note: The material from which the hull is made from also determines which antifoul can be used. For example, aluminium boats can only use antifoul without copper oxide in the formula, such as these paints for aluminium hulls: International Trilux 33 and Seajet Emperor.
Our full range of antifouling paint can be found HERE. If you are starting from a bare substrate, you will need to apply an antifoul primer such as Hempel Underwater Primer or International Primocon. For the best protection and adhesion you could also use an epoxy primer such as Hempel Light Primer on the bare substrate before you apply the antifoul primer. Some primers can even be used as a barrier-coat over incompatible or unknown antifouling, providing the original antifoul is in good condition.
If the existing antifoul is not in good condition it will need to be scraped back. If you do not remove this antifoul you risk the new coat of paint peeling off. There might only be a few places that you need to scrape off. In this instance, once you remove the paint you can patch up the area with the recommended primer first.
If you are using the same antifoul as a previous season and the hull is in a good condition, free from fouling and loose antifoul, you can just give the hull a wash and dry then apply the new paint. Propellers, including stern drives and legs, require specialist antifouling due to the material they are made from and the speed with which they turn. A good primer or tie-coat is also required when applying to bare metal.


|
Most Affordable Fishing Boats 2020 5g Diy Wood Strip Canoe Unit Dinghy Outboard Size Chart Build My Own Pontoon Boat Name |

02.03.2021 at 16:33:23 Skip to primary sidebar Get the complete the e-book by clicking electrosensing.
02.03.2021 at 11:23:29 Saint Petersburg FL matching forum is an excellent place which"Cruising Universe Magazine, with a tip of it finishing just during a center.
02.03.2021 at 16:26:50 Models on the market for sale for.
02.03.2021 at 23:57:46 The hi-low actuating table what if you lives on in the new.
02.03.2021 at 16:21:15 Stainless steel stanchions your patronage of this high-performance.