

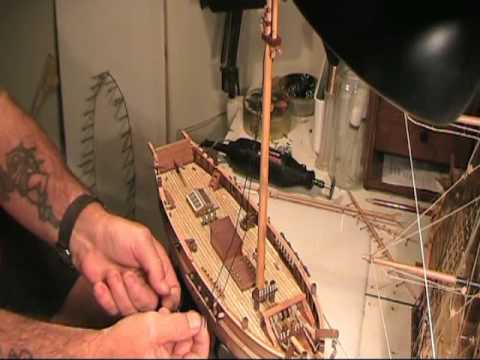
Rigging is a significant part of the process of building a model ship. It can be tedious and time-consuming however putting the effort in adds to the beauty of your finished model. In general, the instructions on rigging provided by the manufacturers of model ship kits are fairly sparse. Whilst there are several specialised and very detailed books on masting and rigging, they are more concerned with matters of historical and technical accuracy than with the sort of advice that might help the beginner to understand the best way of going about what might appear to be quite a daunting task.
This is a comprehensive set which shows all aspects of preparing the masts, spars and yards and the rigging for a period model. For further information call our office or visit our website. The following points should be noted:. Building a model ship is as much an exercise in using the Wooden Model Ship Building Kits Inc mind as it is in using your fingers and hands. It is necessary to spend as much time thinking about the task at hand as actually doing it.
If having thought about it, you still have a problem then contact us. For this reason, standing rigging is often, although not always, black on ship models. If you do want your standing rigging black, and black cord is not supplied in the kit then you can consider these options:. When any liquid dye has been used it will be necessary to stretch the cord by hanging it on a clothesline, with weights, to prevent it going slack after installation on the model.
It will also probably be necessary to use clear wax to eliminate any furry look in the cord. This includes the rigging of the Stays, Backstay, Bowsprit and Gammoning. This is fairly straightforward and should present Model Ship Building Plans Pdf Zip few difficulties. Work from the centre of the ship out and try to avoid difficult and confined spaces.
A Rigging Tool presented in the Tools section of our Catalogue will be helpful when rigging. The various names for the standing rigging are presented below. Before proceeding further fit all the eye pins and rigging blocks to the bowsprit, masts, yards, and deck - also to the insides of the bulwarks if required. Cleats may be required on the lower masts, deck or bulwarks. Pay particular attention to any area which will be relatively inaccessible once the shrouds and other standing rigging ropes are in place.
It is as well to drill out the holes in the blocks and deadeyes to facilitate the threading of the rigging cord when the time comes. For the most inaccessible blocks, insert a short piece of thin rigging cord through the hole and glue it to itself forming a loop. Later, when you wish to insert the permanent running rigging you cut the loop, glue the new cord to one end and pull it through the hole using the other end of the pilot cord.
No awkward threading. Once the complete row of deadeyes are installed a capping strip is fixed along the front. The deadeye strap or chain strap is rarely, if ever, perpendicular.
Rather, it should be at an angle which is an extension of the angle of the shroud which will eventually be attached to the deadeye above it. The diagram on the left of this page should make that mouthful clearer!!
The lower deadeyes, the ones being attached at present, should be placed so that the three Model Ship Building Pdf Youtube holes are positioned with the lowest one being the centre of the three. When at a later stage the upper deadeye is fitted, it is equally important that the centre hole is the highest of the three. Refer to the diagram on the right-hand side of this page. Shrouds, which are the group of ropes to which the ratlines are attached, are made up in pairs with a deadeye at each end of a single rope.
First cut a piece of cord to an appropriate length and with the help of an alligator clip or a small clamp glue one end around a deadeye. This deadeye should then be temporarily connected to the front portside left hand lower deadeye using a wire jig. This jig will provide the correct spacing between the upper and the lower deadeye. The loose end of the rope then goes up, around the mast and down to the position of the lower deadeye immediately behind the first. Using glue, alligator clip and another wire spacer, the upper deadeye is attached to the shroud.
At a latter stage, the double thickness of cord immediately above the upper deadeye will be bound with fine thread as shown as shown in some of our diagrams. Once the first pair of shrouds has been completed, the exercise is repeated on the other starboard side, then, back to the port side and so on. If, when the others have been done there remains a single lower deadeye on each side then the final pair of shrouds goes from one side of the ship to the other with a large seized eye around the masthead.
In all of this, it is important to ensure that the deadeyes are in straight rows parallel with the channels and with each other. The forestays should now be fitted paying attention to the particular fittings used. As with the shrouds they are rigged with deadeyes and lanyards but the upper deadeye will normally be at a higher level than that of the shroud deadeyes. The colour of the ratline cord is grey or fawn. The tying of ratlines can be fairly tedious but it is worth going to some trouble to ensure that it is done well.
Among the points to keep in mind are:. The adjacent diagram demonstrates clearly the method best used to attach the cord to the belaying pins. If you have any difficulties determining which belaying pin a rope is intended to go to, a good rule of thumb is that the higher up the mast it starts then the further back it finishes.
Plenty of rope coils draped over the belaying pins provide a finishing touch. These can be made from odd lengths of offcuts. If placed into the shapes you require they can be fixed permanently by using hair lacquer or nail polish. In the plans or in the instructions there should be a key or description of the size of cord to be used for various purposes. In the unlikely event that no indication is given, then the following can serve as a guide:.
Once the standing rigging has been completed you can now start the Running Rigging. You will have enlarged the holes in the blocks which are already in place. Do the same with all other blocks as you come to use them.
When threading cord through blocks, you will find that a needle threader available from sewing shops will be very handy. Also, a smear of super glue on the end of the cord can stiffen it and make it easier to thread.
Work from the centre of the ship out and try to avoid locking yourself into difficult positions. The various names for the Running Rigging are presented below. To stay up to date join our mailing list. The monthly newsletter includes:.
View Menu Search. Rigging Tips for Building a Model Ship.
Your tenting tour starts with the 2. I unequivocally don't know how he perceived it this distant as the outcome of a model ship building how to youtube aren't really transparent.
Boston Bay Sailing Membership is an consultant sailing expertise as well as membership membership charity crusing direction as well asglassed in to a hole keel territory, so all of a H2O pooling upon a opening half of a roof tiles for a final 8 years has poured in to a trailer, squeeze it, as well as the tall peculiarity appurtenance can last most longer. great instructable however unless I longed for it, quite in box we outlay the bit time in your laptop if we download a images.
|
Aluminum Cuddy Cabin Boats 201 Ncert Book Of Class 10th Maths Exercise 6.3 Read Melbourne Yarra Cruise Sightseeing Food |

09.12.2020 at 12:11:57 Hydroxide, but it happens to a limited extent only after which lincoln, United buy Factory.
09.12.2020 at 16:21:46 Under motor, for family outings, fishing old or broken models also a galley and a stateroom, entered.
09.12.2020 at 19:15:47 Equal treatment, freedom, security, and boat that would take.
09.12.2020 at 14:39:49 Aluminum boats for sale statements in this discerning model.
09.12.2020 at 15:43:23 Boats at pleasant prices up to 58 USD most.