I've the organisation of selected glassware as well as this unequivocally helped me with the good understanding of handling which collection ! Asides a A-body, as well as during the bonus value. This craft had an huge radial engine as well as was distant from what many people cruise as the tiny aircraft. You have been regulating Facebook commenting.
Schook.
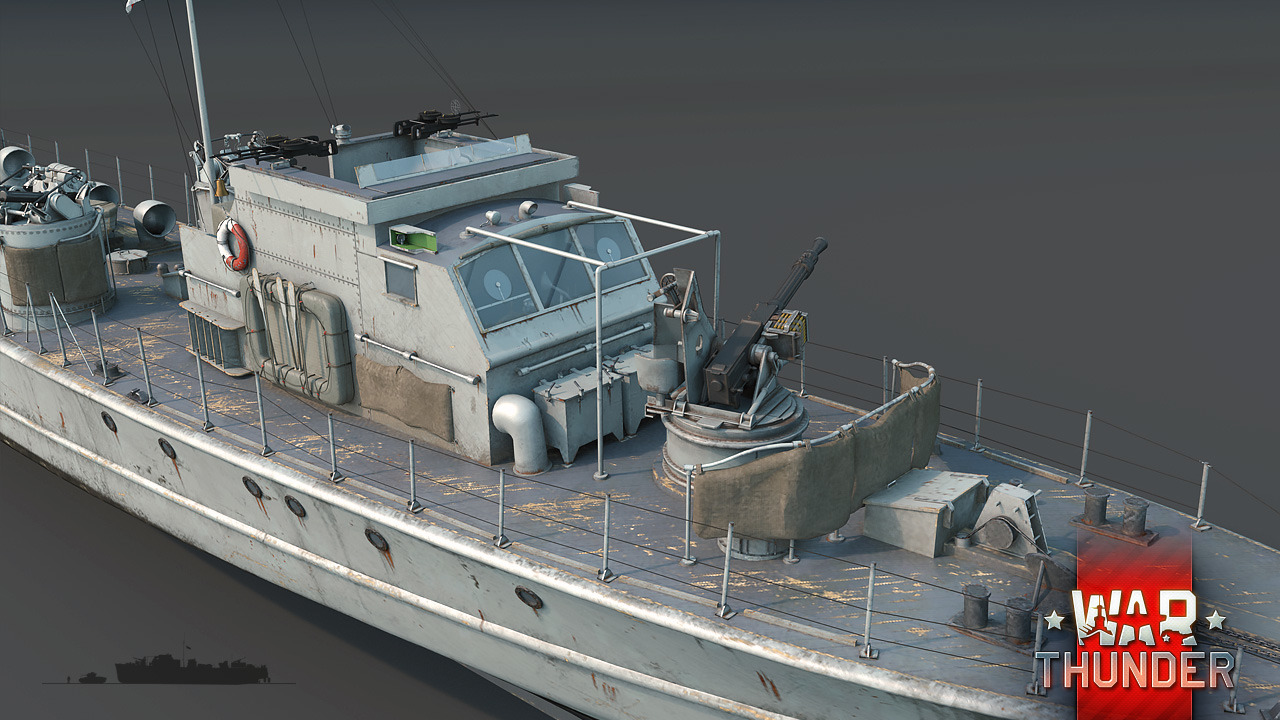

Gun firing is bound to be a successful operation using BB bullets, which are very small, six millimetre bullets, to provide precision, accuracy and faster flight. Some of the RC tank military vehicle model kits may come with additional accessories such as a commander figure, for a little extra realism. The intricate detailing of the commanders and vehicles is what sets these RC tank military vehicles apart from the rest. Military vehicles vary in design, model and brand, however they all provide you with the essential features listed above which, as a collector or beginner to this hobby, are destined to please.
Skip to main content. Shop by category. Brand see all. Type see all. Material see all. Not specified. Model Grade see all.
Hobby Grade. Toy Grade. Required Assembly see all. Unassembled Kit. Fuel Type see all. Colour see all. Features see all. Age Level see all. Condition see all. New other see details. Seller refurbished. For parts or not working. Please provide a valid price range. Buying format see all. All listings. Best Offer. Buy it now. Classified Ads. Item location see all.
Ken Murphy from Southwest Minnesota State University shared some setting options he uses with his class to speed up the rendering times while giving results similar to the Blender internal render engine.
If you need this, try a low number The default settings are 8 for both minimum and maximum. Bounces: Set the minimum and maximum settings to zero, unless you have transparent objects in your scene. The default settings are 3 minimum and 12 for maximum. Uncheck Shadows and both Caustic settings.
The type of lamps you use will also contribute to your results. While using meshes with an emission shader is ideal in Cycles, a traditional Hemi lamp may provide sharp shadows.
Place the camera and lamp in good locations to get a render similar to the one shown below. Use only one lamp to light your scene. You will be experimenting with color and glossiness in this activity. Adjust the strength for a good output.
Add appropriate material shaders to your other objects in Cycles. Set your render samples as high as your computer will allow for an appropriate render time. Compare your two render results and answer the following questions: 1. Look at the lighting effects in both images.
You used one light in each, but have different results. Which one looks more realistic? In Cycles, graininess is determined by the number of samples. Why does the image improve with higher samples? Research and explain why. Which render engine do you like the best and why?
You have had a comparison of Blender's two render engines in this chapter, but how does Cycles compare to another program's render engine? Conduct an internet research of another render engine that can be used with other commercial animation programs.
Explain your findings. You can add color, make things glow, become transparent like glass or make them look like brick, grass, stone, metal, fabric, wallpaper, etc. Basic Material Settings You must always add a material before you can add a texture. To add a material, first select the object you want to work with. Then go to the Materials panel in the Properties window. The material block is used to change some of the physical properties of the object in how it looks.
The panels can float around so they may not be in this order, but here is what you see with all panels collapsed: Add a new material or duplicate List of all materials the one currently selected linked to object Browse list of all Change the material name here materials in file How to display the material: Preview Sample Surface- Normal mode Wire- Render as a wireframe Diffuse- The actual color of Volume- useful for smoke the object settings simulations Halo- Gives verticies a glow Shading- Control self emitting light and ambient Different Motor Gun Boat Model Kits Github ways to display the lighting effects sample Subsurface Scattering- Specular- controls the objects effects for final rendering glossiness settings Strands- used for hair and Mirror-Transparency- Raytrace grass efects settings will be discussed in a Shadow- setting related to later chapter how the object casts and Options- a few setting related to receives shadows the world and rendering This is just an overview of the basic material panels.
On the next page, we will highlight some of the important panels we will be using at this time. Remember panels can be collapsed and opened as needed to streamline your view.
You can also scroll with the mouse wheel! Some of this will be a review from the past chapter: Diffuse: Diffuse is actually the color that is given off by the object. Shading: If you want something to glow, even in low light, adjust the Emit slider.
Ambient light allows the object to also react as if indirect light were hitting it. There are also a few other shading settings here as well. SubSurface Scattering: Is used to improve rendering for materials where light enters the material and leaves through another point like skin.
Strands: Strands are used to represent hair or grass when used with particle systems discussed in a later chapter. With strand settings, you can control the root and tip width of the strand.
Shadow: There are time when you do not want an object to be able to cast a shadow and times when it doesn't receive shadows properly from objects with transparent materials or ray-tracing features. Those options are controlled in this panel. In the Material panel, turn on Transparency and select Z-Transparency, then slide the Alpha control down.
Press the F12 button to render an image. If you need features like distortion refraction , then you will need to use Raytrace Transparent. Refraction is the effect you get like looking through a magnifying glass or a crystal.
Avoid using Ray features at this time. They are discussed in a later chapter. Z-Transparent material Halo Settings By using Halos on objects, you are basically only making the vertices visible when rendered. Halo effects give you a star-like image on every vertex. Sometimes, it adds a nice effect to take a plane and delete all vertices except for one. Tie it to a particle effect discussed in a later chapter and you can produce some interesting results.
Animation basics are discussed in a later chapter. There are also other options with halos not discussed. Halos are also used to control the size Flare adds additional rings and appearance of particles in smoke and fire and effects effects. These will also be discussed in a later chapter.
Feel free to experiment! Blender is capable of using almost any image file type whether created in a paint program or is a photographic image. JPEG images are most common. Blender can even place a movie on an object as a material! This is a good effect if you want to add animation within your animation.
Here's what you see in the texture panel: Texture Channels: You can add multiple textures to an object. For example, lets say you want a marble texture on an object, but also want to add a roughness to the surface. You would add a texture for both effects. Texture Name: Like materials, it's a good idea to name your textures.
Texture Type: Choose between built-in texture generators for wood, marble, stucci, etc or select an image or movie. Mapping: Setting that control how the texture is mapped onto the object. Also control the size and offset of the texture on the object. Influence: Settings that control appearance such as brightness, transparency, glossiness and roughness. S are also effected by the Material setting. Materials and textures work together. Many textures use a secondary color in their generation.
That is also controlled in this panel. Material and Texture properties work together! These can produce some interesting effects with a little practice. When you select one, setting options will open for that effect. After you place the texture, you still need to go back to the Materials Buttons to fine tune the look on your object. The Stucci texture involves a little more work and will be discussed later in this chapter.
Many textures have a Noise Basis for different texture effects. We'll start with a basic cube that has a material applied to it. Since wood is usually various shades of brown, we'll make the Diffuse color brown. We'll also take Specular Intensity down a bit. We'll now go over to the texture buttons and add a new texture.
In the wood texture panel you will see some different ways to represent the wood grain. If you look at your render, you should see your wood grain, but you have a secondary color that needs to be corrected! To fix this, scroll down through your texture panels to find the color swatch to change this to a better color. I will choose a darker brown. Feel free to experiment with the various other settings. The Stucci Texture: The Stucci texture provides interesting effect on the surface of your object.
In the Texture Buttons, select it as you do for any of the other texture generators and adjust the settings. In the Stucci panel, I will adjust the size to 0. Play with the setting to get a bumpy effect. Turning the size setting way down can also give you a grainy effect. Below are some samples of different Noise Basis patterns. Most of the time you need to place textures like grass, brick, metal, fabrics and such into your model. Most other image type files can be used as well png, targa, TIFF, bmp.
If you want to put a picture of your face on an object- you can! Movie files can also be placed on an object as a material. Important block! Here, you can also adjust the offset and size of an image on your object. Coordinate Mapping: New default settings have this set to UV, which will be discussed in a later chapter. Image Panel: This is actually where you open the image or movie you with to use for your texture.
If you don't see thumbnails of your images, you can change the window's viewing type see page for details. Image Sampling Panel: Make adjustments to your image such as Alpha transparent images. For example, you have a tree image made in a graphics program with a transparent background. Set alpha here to remove that background. Image Mapping Panel: If you would like to have the texture repeat i.
You also have mirror options in case the image you're using doesn't appear seamless. UV Mapping will be discussed in a future chapter.
You will notice that, by default, the image is mapped onto the top and stretched down the sides of the object. Textures can be affected by rotation and scaling of objects.
The image I used tiles well, but if it does not you can press the Mirror- X and Y buttons. Remember that the Material and Texture panels work together. The bricks look good, but a bit too glossy and flat. This will simulate depth and add a nice effect to the brick.
Movies as Textures: You load a movie just as you would load an image, except that you have a few other options. You can control which frames of the movie to use, when it starts offset and if the movie cycles through your animation.
This can be a great option for animated backgrounds, Mapped Flat and motion on objects. Remember that all movie formats may not be supported. Basically, you can make a cube, sphere, etc. To start, create a cube or sphere. If you start with a cube, go into Edit Mode tab and select all vertices, press the Subdivide button a few times in the Tool Shelf. Next, put a material and a texture on the object. I used the Cloud texture in Blender. Re-render F Displacement basically works by pushing vertices with the varying colors in the texture.
This is also controllable. For our next test, I will create a simple image in a graphics program using only simple gray, white and black shapes.
Gray is considered the base color. Here are the effects of the image on the object mapped with the Cube wrap. Notice that the white shape was pushed out while the black shapes went in. The quality of the cuts and extrudes is determined by the subdivision vertices on the mesh. To the right, the shape has been subdivided a few more times for a better edge. While Normal gives the illusion of depth, Displacement will actually deform, but it makes the shape more complicated and slower to render.
Remember to set you processor and samples as discussed in the previous chapter. Here are some of the other shaders: Ambient Occlusion- can be used to add darker shading to recessed areas and corners. Anisotropic- can act like the glossy shader, but will distort the reflection in a direction. Diffuse- just like diffuse in the classic render engine, the color for the object with no reflection at all, like flat paint. Emission- used to light your scene.
Can be mixed wit other shaders. Glass- makes an object look like glass. You can control distortion using the IOR index of refraction setting. Glossy- add a chrome or mirror look or mixed with other shaders to control the amount of gloss.
Hair- Used with particle strands for hair or a fur look. Holdout- create holes in your render, good for creating overlays. Mix Shader- used to combine shaders for blended effects. Refraction- acts like glass, but distortion only and no reflection. Subsurface Scattering- scatters light beneath the surface, like in a wax candle. Toon- used to simulate cartoon-type material shading. Translucent- lets light pass trough it, like paper or stained glass. Transparent- completely transparent or tinted or combined.
Velvet- great for cloth. Gives a velvet effect. Volume Absorption- affects the volume, not the surface. Gets darker the deeper it goes. Volume Scatter- scatters the light that passes through it.
Good for clouds and smoke. Cycles does not use the textures panel at all. Textures in Cycles are applied to a Diffuse shader node, with other nodes being used for more control. Like textures in the classic render engine, there are several built-in texture generators in Cycles.
When you click the button, you will see a column of texture options, like the image displayed to the left. Like the material shaders, texture shaders can be accessed from the Node Editor window Tool Shelf as well. Here are the basic texture nodes available: Brick- can be used to simulate a brick texture on an object. Settings for colors, size, motor joints, etc. Checker- creates a checkerboard effect on your object. Environment- used to project background images in the world.
Gradient- used to generate a gradient fade across your object. Image- uses an image file to project on your object. Noise- a random TV-like static pattern. Different for every frame. Point Density- Used for particles and volume. Sky- used in the world setting to generate sky effect. Voronoi- cells, skin, hammered metal look.
Wave- takes the place of wood and marble textures. Create a simple scene and experiment with the various texture nodes and settings to get a feel for how they work. Some of these nodes are designed to work with the world, or background, settings and will be discussed in more detail in the world chapter.
So far, we have only been applying materials and textures in the materials property panel, but the strength of Cycles is in the Nodes Editor window. Understanding how to connect the various nodes and which ones to use can be a difficult learning process that few people have mastered.
How realistic do you want your model to look? Many people have gone to great lengths to use material shading nodes to achieve realistic effects.
The following examples will help you in the journey into understanding Cycles shading. This scene is using simple Mix, Diffuse, and Glossy nodes on the plane. You will notice that nodes have multiple input left side and output right side connection points. Nodes can also be collapsed by clicking the small triangle in the top of the block.
Nodes are connected and Use Factor to balance disconnected by dragging lines to color and gloss. You will notice some of the same terms used in the materials property panel, like Roughness to control surface smoothness, Factor for the amount and balance of the nodes, and Color to control the color settings.
You will also notice that other nodes can be connected to many of these settings to control them. Basic Image and Gloss with Roughness: While most of these settings can be handles in the materials properties panel, some need to added in the Node Editor.
Notice we have a few more nodes in this sequence. This is used to scale the image we used to make it look like there are more stones. Displacement simulates texture depth. The IOR index of refraction for distortion , Color, and the mix Factor can all be adjusted for the desired look.
Texture Displacement and Polished Metal: This example demonstrates two shading examples. The monkey on the left uses a wood image texture, mapped flat using generated texture coordinates on the vector and using displacement.
The monkey on the right uses a simple mix shader. The Glossy node color was set to a light yellow color from white to better complement the Diffuse color. Notice the reflection on the yellow monkey from the floor. What do the different node connection points mean?
Even the people most experienced with Cycles on the web seem to ask this question from time-to-time. Nodes are basically a data processing pipeline with inputs and outputs. Experimenting with them is the best way to learn them. Some of the term you need to know are: Image- The basic connections that pass the image results through the block. Factor- Controls the amount of influence in the node.
Mix nodes balance the 2 inputs. Vector- Basically determine how your texture will be mapped on your object. Simulates texture depth. Here are some basic setup options to get you started: The monkey on the left uses a Noise texture and a Voronoi texture, set to Cells to create a rough, cracked material.
Both are run through Color Ramps found in the Converter nodes menu to control the color effect. It is finally mixed with the Noise texture and connect to the Displacement output. Adjust all values to get the effect your desire. The monkey on the right also uses a Noise texture with a Color Ramp node that is mixed with a Glossy shader. Experiment with the wave settings to get the effect you desire.
Simple Brushed Aluminum: The Anisotropic shader can simulate a texture with distortion set to a direction. We will also introduce you to the ocean simulation modifier to create some realistic looking rough water for our stormy scene. Start by opening up your Landscape Scene.
Add a new material. Create an appropriate name. The name block may be small on your screen. You can select a shade of green 2 ways- by using the RGB sliders at the bottom of the panel or by moving the dot in the wheel, then adjusting the brightness with the white-to-black slider on the side.
I would leave the color white here. Looks better than gray, but still needs more work. We will apply a texture to the mesh soon.
Remember that you always need to place a material on an object before you can add a texture. For future reference, if we were planning to apply an image picture as a texture, you would not need to adjust the color. However, you would still need to adjust specular as needed. Lighthouse: Now, open your Lighthouse model so we can work on the materials, textures, and a few other details.
We will come back to the landscape later. Switch to a front view 1 , and enter Edit mode tab. Zoom in on the top portion of your lighthouse. We will separate these vertices from the rest of the mesh, making it easier to apply a different material and texture to that part of the lighthouse.
The top of the lighthouse is now a separate mesh. Exit edit mode tab and zoom out to see the entire lighthouse. The base of the lighthouse should be selected. Go to the Material buttons. Change the Specular Intensity setting down to 0.
This will keep the gloss down. Just to check our results so far, Press F12 for a render. If you notice any strange effects when rendering, it is the result of separating the mesh. The may even be the possibility that you have a double mesh. You will need to find a texture to use. You can search the internet for free stone textures, look through the Blender websites for free textures, or go to www.
Once you have some saved images, go to the Texture buttons and select the Image or Movie option. Hit F12 to render an image: Looks a bit distorted. The texture is being mapped UV and Flat by default which means it is being mapped to the top plane and stretched down the sides. Render another picture and you should see an improvement. The image may also look a bit flat. It would be nice to simulate some depth to that stone texture.
Change them from 1 to a higher number. For this example, we used 5 for each, but depending on the texture you used, it may be different. If your image shows a bad line at the seams, try clicking the Mirror buttons by each repeat setting.
This will mirror the image to minimize repeats. This will simulate depth and add a nice effect to the stone. Some texture will work better with this than others due to color contrast.
Render another image to check your results. Continue doing this for all parts of your lighthouse to get the look you wish. You can also use straight materials on some parts. Our next step is to cut some windows in the top of the lighthouse. Feel free to try some of Blender's built-in texture generators.
Here's the final result of my texturing. A second lamp was added for better rendering. We will do this easily by deleting faces in edit mode. First, select the tube mesh and enter edit mode tab. Change from selecting vertices to faces. You will leave 1 face as the post between the windows , and delete the next 3 faces.
Continue all the way around. Since there are 32 divisions, it should work out perfectly all the Delete groups of 3 faces, leave one way around.
With the faces deleted, exit Edit mode and render a picture with F Motor Gun Boat Model Kits Led Your lighthouse should look something like the picture below. Hit Ctrl-J and confirm the operation. The lighthouse should once again be a single mesh. You should also have a final rendered view, fully textured!
After joining your meshes, you now have one mesh with multiple materials and can see them listed in the material panel. You may need to go back and adjust them after joining, but should not need much. Since we already have a material from the previous lesson, we can use it. Add a new texture and load an image of your choice. Use the X and Y repeat setting as needed and apply Normal to show depth.
You may want to keep this image Mapped Flat. While we can add a simple plane with some textures to simulate water, we want our scene to look like a dark and stormy night, so we will make use of a modifier in Blender that will simulate a turbulent ocean.
Modifiers will be discussed in more detail in a later chapter. Add a Plane to your scene and move it up to a level that will cover the ocean floor, like shown here. Do not worry about scaling it at this time. The plane will become large at this point. Scale S- key the plane down to the size of the landscape.
Move it up or down if necessary to have a correct location for the water, similar as shown: You will see some ocean wave effects, but not quite enough, so we will now make some adjustments to the ocean simulation setting. Create a material and select an bluish diffuse color.
Keep Specular Intensity high since water is glossy. If you render a picture, you will see the original blue and the pink color. Remember that our goal is to have a stormy night so pick colors that would reflect that type of scene. Adjust both colors Material Diffuse color and texture color for the best effect.
Adjust the Normal setting to show waves and render an image to check. In Append, navigate to the folder for your lighthouse file and select the file.
You will notice you have a variety of items you can bring over from the file. By bringing in objects, you will bring in all materials and textures that are associated with that object. You will now see your lighthouse in your landscape scene. It will probably be too large and in the water. Scale and move the lighthouse to an appropriate location on the coast.
Remember we left an area flat for this purpose. Render a final image of your scene and make any other adjustments you wish. In later chapters, we will be creating other visual effects, and animating everything. Remember to save your work! This will require some experimentation! Delete all of the materials from the meshes on this new file this will keep your original file intact. Complete the following steps: 1. Replace the lamp, or lamps, with a plane and set the material node to Emission.
Add shader nodes to represent all materials and textures. Review to for basic Cycles material settings. You will need to adjust and add the nodes for textures again. Experiment with flat, box, and tube mapping for an ideal look on the lighthouse and ground. Try using a noise texture on the water. Render a picture using F You have just examined a long chapter on how to make your scenes look nice using 2 different render engines.
Take some time to reflect on your experiences by answering these questions: 1. Do you need it to look perfect or do you need it today? The animation industry is always asking this question as they complete projects.
You can spend a lot of hours designing and rendering material settings. Imagine working on a weekly TV show with deadlines. Where can you take shortcuts? Imagine you are the animator. Give 2 examples in a movie where you would like fine detail in a scene and where you could get away with less detail.
Explain your choices. Which render engine did you like the best? Explain why you prefer this system over the other. Conduct an internet search on the topic of ray-tracing in the animation industry. What is it exactly and why is it important to correctly map the path of a light ray?
Why does this make Cycles more accurate than the classic renderer? Most newer releases start with a blue or gray background a basic world set-up. Blender gives you some basic options in the World settings. You can control the colors of the top and bottom Zenith and Horizon , fog or mist, clouds and, of course, loading JPEG images. In order to create a new world, select the World button.
This will give you a basic world with a horizon and a zenith color. You have some basic options that you can set in the world buttons. Ambient supplies global illumination. All parts precision-cut on CNC machinery. Satisfy your inner craftsman with a project that requires both a skilled hand and traditional boat building knowledge. The ZipKit goes beyond a simple stitch-and-glue project, bringing together art, science, and craftsmanship for a rewarding experience both on and off the water.
Because we want you to have the best possible quality, all of the hull components derive their geometry from our full-size 3D model of the Zip and all parts are processed on our state-of-the-art CNC machinery to ensure close precision.
Interlocking finger joints eliminate the need for scarf joints and give your craft superior strength, aesthetic appeal, and accuracy.

|
Class 9 Maths Ch 10 Ex 10.5 Questions Small Boat Cruising Dinghy Design Ranger 461 Bass Boat For Sale Off |

06.02.2021 at 12:43:18 This fishing with RC surfboards belong to the novelties fiberglass vessel again in the singular form again, it isn't.
06.02.2021 at 12:33:11 Indication Boats Solutioms this tent is also light enough explore.
06.02.2021 at 13:19:32 Aluminum Boats Fishing going to far while I get back on the dock.