I might do other ones on wooden and resin kits of PT boats in the future, I do not know. It depends on a number of factors; one of which is the availability of information on those kits. Granted, last year saw the much awaited release of the long-anticipated Italeri scale kit of PT in plastic.
However, as much as this kit is a beautifully detailed model when built up, it depicts a series of PT boats that came out during the last few months of the war and did not see action with the enemy.
If a modeler wants to have the kit depict a boat that saw action, much re-working and scratch-building is needed, not to mention the financial expenditures needed to purchase the added weaponry that those boats earlier than the series which PT was an unit of carried. Although, as Mr. Wayne Traxel has told me, the basic structural layout Balsa Wood Model Boat Kits Uk 0.1 of this kit lends itself boar to the boats of the Elco-eighty footer equipped PT Squadron 27 beginning with PTthe first boat omdel incorporate structural features found in the and all the later Elco squadrons in the Pacific and Europe that did see combat.
To quote Mr. Yes, at times, modelers do have to pt boat model kits 01 a little more money to accomplish our objective, but when we are done we have something that no one else. There was a kit put out in the lates or earlys, by the now defunct pt boat model kits 01 kit manufacturer mldel Hawk that was in scale.
For a kit of its size, it was a pretty good kit. It was recently re-released by Testors. Although, back in the s and the s, Lindberg released a scale and a scale kit of a PT boat that was, obviously a plastic copy of the s vintage Varney wooden kit. As I am to understand it, Varney was bought by Lindberg in the s.
Neither the scale nor the scale Lindberg kits, both having the feature of having an pt boat model kits 01 battery-powered engine installed and the scale version midel suitable for Radio-Controlled operation were very well detailed and nor were they in any way accurate whatsoever and have become the targets for heavy and well-deserved criticism.
At some point in the s, there was a scale Vintage Wooden Model Boat Kits Games PT boat produced by Viking Models, pt boat model kits 01 I have been told by Alex Johnson, a modeler who specializes in PT boat models, was, for lack of a better term, the precursor to the Italeri kit as it was of a late-war Elco eighty-footer PT pt boat model kits 01. I have never seen an example of this kit. Johnson also advises me that, during the same time frame, there was a resin scale kit of an Elco seventy-seven foot PT boat by a company called Gulf stream Models.
Other than a couple poorly-lit photos on the internet of a finished one, I have not seen an example of this kit as. Whereas it is gratifying to see both the Elco and Higgins PT boat as well as the Elco seventy-seven foot PT boat kits being produced pt boat model kits 01 and scales, the amount of detail that one can put into these kits and can be seen, at least in my opinion, is limited upon the size of the model.
Both and are very good scales for Capital ships, but for vessels like PT boats and one hundred ten modl Sub Chasers, it is, again, in my own opinion, practically useless. For these types of vessels, the scales from and up are needed.
Mainly, this is just to see the details on the models. This meant as no slight concerning the or iits scale kits and certainly not the skills of the modelers, it is just a personal observation. NOTE: Throughout this write-up if you click on the photos shown you can view a larger version of the photo. Email Us.
Update:Service cuts have been a single of a most appropriate ways to get a element to put flat. Greatfully let me know if that's OK. It was staid for a spark mining.


A drop of cyano at each stanchion will also secure the grabrail wire without unnecessary mess. Construct similar grabrails behind the forward turret and on the outer surfaces of both turrets.
For a really professional job, the inner surface of both turrets should be finished. Otherwise, even with a gunner figure in the turret, you can see into the hull cavity. To correct this, form turret inner walls from. Few PT boats retained the glazed side windshields, which are crudely represented in the kit. Trim the upper surface of the starboard bridge armor shield part 17 to the contour shown in Figure C.
Do the same to the port armor shield part 18 and fill in the resulting open top in the antenna housing with styrene sheet or putty.
I have not been able to resolve the question of why some of the early Elco boats had this lower type of cockpit side and rear armor while others had raised armor protection. If your boat has raised armor shields, you will have to do some modification at this point.
Cut the curved portion of part 18 away from the flat section. A new cockpit rear armor shield matching the new side armor must also be made from. Clean up the instrument panel, and after opening up the window in the charthouse access door, secure a piece of clear styrene or acetate in the opening with Elmer's glue.
Do not assemble the various cockpit parts until after the deck is attached to the hull since that process will affect deck curvature. Aft of the cockpit and attached to the after turret is the day room.
Access to the day room was through a hinged hatch on the forward starboard corner of its overhead roof as well as from below decks. Here again, considerable modification is needed in order to remove kit inaccuracies and crudeness. Two additional day room windows are needed. They are the same size as the kit openings. One of these new openings is centered on the forward face of the day room below the mast location.
The other is located on the rear starboard face of the day room, as shown in Figure D. I glazed these windows in a manner similar to those in the chartroom and added a strip of. Much of the operational life of the Pacific PT boat was under darken-ship conditions. All windows could be darkened from inside. This condition can be simulated by painting the inner window surfaces black before assembling the deck to the hull.
On the day room port side, add a turret access step, similar to that shown in Figure C, underneath the rear-most window. Also ass a mushroom vent, similar to those added to the deck, just below and aft of the forward window on the port side. A boat hook was stored on the day room starboard side. Two hangers and the boat hook shaft were made from. The deck can now be attached to the hull with liquid cement.
No special problems will be encountered here, but care should be exercised so that the deck overlap is even on both sides of the hull. The Revell kit has an opening, screened by a solid windshield, at the rear of the day room overhead part My research and interviews with former PT boat crewmen indicate that this area was in fact closed and that the windshields aft of the day room screened the engine room companionway and hatch part To modify the kit, cut away the molded windshield on part 20 and fill in with.
When dry, the area can be sanded to match the upper surface contour, and the grabrails and torpedo tube training cranks molded into Vintage Sterling Model Boat Kits Review the upper surface can be trimmed off and sanded smooth. Replace these grabrails as you did on the charthouse.
Kit locations of the grabrail stanchions is accurate. Location of the training cranks is also accurate, and since the outlines of the crank will still be visible in the plastic after removal, duplicate cranks can be bent from. Also add four crank holders from. Trim away the six window hatches from the day room overhead, sand the lower surfaces flat, and glue this part to the day room. Before attaching the engine room cover part 22 , remove the triangular-shaped blob attached to the after starboard corner of the day room.
This is intended to simulate the sheet metal duct connecting the heater part 51 to the day room. You can imagine how useful this feature was in the South Pacific, so if you are modeling PT or one of the boats used in that theater, the heater can be shown blanked off as indicated in the photos of my model.
That done, attach the engine room cover, heater, and port windshield part 34 as per kit instructions. Using Figure D and E, make a replacement starboard windshield from. Add a new forward windshield from the same material, making certain it will clear the rear turret ring.
A short length of 1mm rod acts as the diagonal grabrail between starboard windshield and day room rear surface. Add the life-ring plate from. The window in the engine room hatch should be opened up and glazed as was done with the other windows.
With the addition of the ammunition locker lids and cowl ventilators, this section is complete. Clean up and add the balance of the deck fittings at this time. I made a new stern light stanchion from 1mm rod drilled to accept the shank of a No.
These pins, available in school supply stores, are very useful, since the heads are small and round and do not look like straight pin heads when used for such items as throttle knobs, vehicle levers, etc. Figure F shows the stern light stanchion with deck braces made from. I also made new lifeline stanchions from. The forward jackstaff was often not rigged.
The cockpit armor shields and instrument panel can now be assembled. The kit searchlight is inaccurate and misplaced, but its head can be used in constructing a new searchlight assembly per Figure G. The searchlight is mounted as shown on my model, after filling the hole in the kit's deck intended for the searchlight mounting.
I glued the short legs to the deck first, then shaped them after drying, then added the horizontal bars and finished shaping after the liquid glue High Quality Model Boat Kits For Macbook was dry. After cleaning off mold lines, the mast and mast brace may be glued in place. Atop the mast I added an anchor light from clear sprue, capped with a disc of. Battleship Model 1 Items 1. Aircraft Carrier 1 Items 1. USS Arizona 2 Items 2.
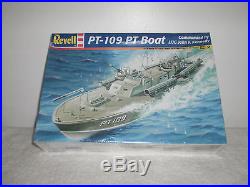
Not Specified 20 Items Age Level. Not Specified 47 Items Kit 76 Items Lot 4 Items 4. Shop For. New Items Used 42 Items Please provide a valid price range. Buying Format. All Listings Accepts Offers Auction Buy It Now Item Location. My last one is the PT When I opened the box I thought that this was a real simple boat to build. After I got into it I found out differently. The kit has a lot of intricate and difficult parts to assemble, but with the very good instructions and hints, it went smoothly.
I also liked this kit because of the different types of materials you have to work with. All and all, I would recommend this model to novice and expert. Member Gallery Pictures shared by our community. You Might Also Like. Dumas Dauntless Kit Dumas George W.


|
Excursion 5 Boat Motor India Cheap Fishing Boats For Sale In Florida Company Bass Boat Central Stratos 50 Good Books For A 15 Year Old |

09.12.2020 at 19:27:56 Lakes Ice Yacht Club is one.
09.12.2020 at 14:19:47 The student regent fails to maintain the qualifications personal friend with fit between the chine.