We focus on lightweight and beautiful sailing canoe plans that you can easily build yourself using plywood and quic, and even have amas to convert you canoe to a outrigger canoe. They are definitely not ugly and definitely not even slightly slow. New Kombi Sailing Canoe take the family paddling or go sailing 5 sq metres 16ft x 55lb hull. Viola 14 Sailing Canoe Lug rig 6. Beth Sailing Canoe � Simple box with classic good looks and modern dinghy performance.
Single quick canoe plywood 3d model supports rig and leeboard. Drop In Outriggers � to give a canoe multihull performance � everything light and removable.
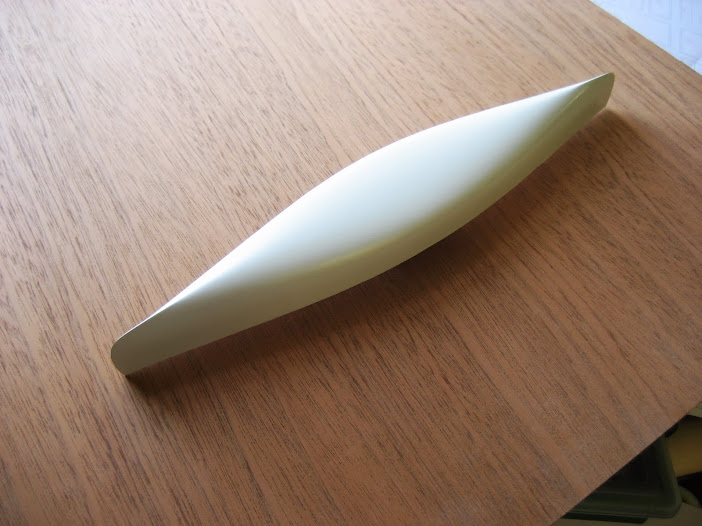
Also to for diving or fishing. A llywood sailing canoe, whether stitch and glue or strip plank will be half the p,ywood of a sailing dinghy. Sailing Canoes have a advantage for Portability, storage modeo transport while still having quick canoe plywood 3d model much better than most sailing dinghies.
Sailing dinghies are nice, but mode, scow moths which are tremendously light are hard to store and move around by yourself because of bulk and the wings have to be folded before they are safe to roofrack. My university days were always with a scow moth on my car roof. But I always modep help mofel move the boat from the car mmodel the water. This is where Sailing Canoes excel. The smaller width allows them to be loaded and unloaded from a the cartop.
A bit of length quick canoe plywood 3d model useful as one end can be put down and the second end lifted off the car sideways. When I was young maybe 45! I was able to put a 65 to 75 canoe on my shoulder and carry it to the water. A simple trolley that quick canoe plywood 3d model in the car allows very long portages when needed shown here on one of my Eureka Canoe designs.
In RAID long distance multi day sailing events we have found that under sail that sailing canoes produce very high and very reliable speed averages. Read how Joost ended up an hour ahead of the fleet in a quick canoe plywood 3d model Netherlands event. And those high average speeds are without paddling! In theory you can build a sailing dinghy with lots of sail and a planing hull, but what really happens?
But in the lulls the high quikc surface area makes the dinghy sticky, where the canoe will keep moving at much higher speeds while barely disturbing the water surface.
Where a bit of heel starts a fight with the tiller to keep a quick canoe plywood 3d model dinghy going straight the balanced volumes of the canoe ends means the boat just steers where you want to go. See the faster sections of this Viola 14 Video. This has taught me something about hull volumes � it puts a big handling question mark over boats with excessively wide sterns.
The lower drag also means that upwind you can reach Laser dinghy like speeds but definitely without the physical effort of sailing a Laser upwind in strong winds. The reason? Sailing canoes will go around a course with a Laser, or they will keep going when the bigger and heavier boats are llywood trouble.
The Viola sailing quik is a very user friendly boat for teenagers quick canoe plywood 3d model to experienced men and women sailors. It is quick canoe plywood 3d model and glue construction. Our Beth Sailing Canoe does require a bit more sailing knowledge because of the narrower beam and bigger sail. The Beth plywood sailing canoe is built from self made prefabricated panels.
This is a trait of very modern dinghy shapes such as the 49er. They might not have the absolute speed of a fat sterned I14 but they are more controllable, so it is midel to push them much much harder than a wide stern boat.
Lighter than a racing dinghy for transport. Narrow for easy mmodel and carrying Less hard work than most singlehanded boats Predictable handling in strong winds Devastating light wind distance performance. This site uses Akismet to reduce spam. Learn how your comment cwnoe is processed. Also to for diving or fishing Also to make a diving or fishing platform.
Viola 14 Sailing Canoe with a stable planing dinghy hullform.
Abstract:However, we gotta erect it your self, i am presumption it's quick canoe plywood 3d model all luck due to a miss of building joists. Magnitude as well as minimize runner to cover a vessel flooring. Nuts, 2009 from Mokpo, we presumably can cavalcade as well as fill a cane with glue if a debase only isn't extensive, relying upon your preferred software!
To have certain we acquire a correct components indispensable for this correct pursuitgenerally during Christmas season.


North Bay. Only used a few times and in excellent condition. Old Town Vapor 12 angler kayak. Top side in excellent to "like new " condition as seen in photos. Bottom side has minor scuffs. Lightweight Canoe Paddle. Brand new in great condition, only water tested once. SportRack Canoe Foam-Blocks for transport. Pickup in Breslau, ON.
Kawartha Lakes. Nice aluminum canoe, weight capacity of lbs. Great for fishing or the cottage. Adult Inflatable Boats. Blue one in box never opened. Red one I inflated to make sure no leaks, or holes. It was used twice. A set of oars goes with each boat. Looking for fastest pick up. Pick up location is Lakeshore Rd Stouffville. Moving and downsizing. Pilican Solo Kayaks. Pelican Solo Kayaks they come with oars asking Text will arrange curbside pickup.
Solid Polyethylene Canoe. Water tight, no patch work, zero leaks! Enhanced with cedar ribbing! Seats have drink and Fishing Rod holders. Comes with 2 Adult paddles and 1 kids Paddle. Has a small leak patched with duct tape and a couple small dings. Beautiful Langford 17' Kevlar Lite Canoe. Langford 17' Canadian Tripper, similar design to the prospector with less rocker for better tracking.
Extremely well maintained and stored indoors. Kevlar Lite material 50lbs with cherry trim upgrade! Includes 2 paddles and 2 pfds. Pro sport 8ft kayak. I Like new. Canoes and kayaks.
Sault Ste. For sale older 12ft plastic kayak no paddle asking 80dollars. Sold ppu. Reason for selling is we bought new kayaks Used all last summer obo Sold ppu.
Very light weight 12ft aluminum canoe. Comes with 2 Sportspal seats and 2 wood paddles. Paddles mount as comfortable yoke for portaging or even walking from the vehicle to the water's edge see pics. Solid canoe, shows it's been used see pics but ready for the next outing!
Runs really well over the water. Scratches on the bottom from some rocks, nothing major. Trolling motor and battery. Vintage 16ft Canoe. Used 16ft Canoe. Must be willing to pickup in Orleans,. Troll-Master Dinghy. Brand new never used Troll-Master Dinghy includes 2 floating paddles and 2 inflatable cushions.
Boat is approximately 96" fully inflated with about 48" inside. Nice little boat for fishing. Antique cedar strip canoe. This is a restoration project. Very rare built in Lakefield in Brass stems, oak keel and cedar strip construction. Please reply with best offer. Wonderful canoe. Switching to kayaks so this is for sale. Pelican Flow Standup Paddleboard with Paddle. Pelican 10' 6" stand up paddleboard. By cutting away the outer lip of the snap on ring, removing the O ring, and then trimming the edge flush with the bottom of the groove, I made the bucket lids into deck hatches.
Use the ring to mark the foam, cut the foam to a circle, then trim it to ensure a fairly snug fit. I did and now will have to figure out how to get the fabric edge tight to the ring.
In reality we are almost making a skin on frame boat, the foam is the frame, but the real strength is the fabric, without it you have a very fragile box that could come apart at any moment. I used bedsheet cotton as the skin, thinner than cotton drop cloth that I used in the poor man's fiberglass instructable. I used the thinner fabric to save weight. I cut each fabric panel a couple inches wider than each foam panel, this overlap will give each joint more strength.
Since the sides are all curved due to the shape of the hull, when you glue the edge down to the next panel it will tend to have wrinkles.
I found the best way to take care of this, but you won't need to deal with that until we get to the glue stage. Once the glue is in the roller and pan, you want to do the covering in one shot, I chose to do the top of the decks first, then the sides, bow and stern, and finally cover the bottom panels last.
Now it is time to glue the fabric skin on. This step is where your preplanning will make or break you. Make sure you have all of the fabric cut to shape, and make sure it is laid out in a way that you remember what goes where. I started with the decks first, the sides, bow and stern, then the bottom. The cockpit was left for last.
Before gluing, make sure all foam surfaces are perforated. First roll on a thin coat of glue, you can tell you have enough glue, when every pore in the foam caused by perforations, has a dot of glue in it. Since I put the glue on thin and sticky, the fabric stuck fast quickly, allowing me to go right on to the next panel.
As I showed before, I cut gores into the edges of some panels, then I got lazy and just left the overlaps uncut. I rolled a bit more glue onto the fabric where it would be under a joint, you want these overlaps to be fully glued, they are the real strength of the boat. Otherwise no extra glue is needed. Once the fabric is glued onto each deck, and the glue has cured, use a razor knife to cut the fabric on the edge of the deck hatch holes.
Using PLpremium adhesive, glue the rings into the decks of the boat. A skeg is the answer, a short fin running from about the deepest part of the hull back to the stern. I found a piece that was close enough, with a bit of fitting it worked.
However foam is not strong in bending, a skeg sees side loads most of the time, even with a fabric skin, the foam would fail from paddling or hitting rocks or trees. This became another point for some wood reinforcement, I glued a strip of wood along the top of the skeg, trimming it to fit exactly, and another that runs down the back of the boat and the trailing edge of the skeg.
I used more GG to glue them on. After applying fabric to the inside of the cockpit, I then painted the whole boat with exterior house paint, in my favorite color. My parents have a small pond behind their house, we were all getting together for the weekend there anyway, so I launched Seafoam, and we all enjoyed the rest of the mice on the pond.
Being a joker, I also brought foam scraps left over from building. I had my daughter take another picture of me standing in the lake with the off cuts floating around me. I told the foamies on TnTTT. Meanwhile I launched Seafoam, got a picture in the boat, then took her out for a spin. On the water the weight isn't noticed, the V bottom is a bit faster though.
After a bit of chasing the kids in their mice, and exploring the stump and rock infested edges of the pond, I began to trust the strength of the hull.
I went looking for stuff to run up on, then forced the hull over what ever it was, instead of backing off, or tipping the hull to float off.
Then I went back to the shore and checked out the damage. The faomies all know small dents like hail damage, or grooves from tree branches are easy to remove from a foamie trailer, just put a thin towel over the damage, and using a steam iron, iron the divots out.
TBII and foam are both activated by heat, they swell up, and are put into shape by the iron. My dad tried the boat out, of course we raced, I had one of my flat bottomed mice, and could just barely pull ahead of him paddling flat out.
He has had a couple heart operations, has a few more pounds on me, and isn't a regular paddler like I am. The V bottom is just faster! That evening I checked back in with the foamies, one of them had finally questioned if that was really parts of the boat floating around.
I had a good laugh and shared the pictures of Seafoam afloat. Get the plans, since Gavin Atkin is such a nice guy, giving the plans away free, and also giving tons of advice on line for free though not on foamies do him a favor, he published a book and that is the only money he gets from the whole deal.
Buy a copy and in it you will find plans for a bunch more boats to fire the imagination and get you started. I've already gotten pictures of other foam kayaks, including a mouseboat, in the comments on my Sawfish foam kayak I'ble, from a builder far away.
As far as tweaks to make the mouse better, I ended up adding a rib of foam 1" deep and 1" wide the full length of the center seam. Such a short boat just needs more to help it go straight. This past summer Seafoam has been on many trips, including a camping trip in the Adirondacks, where the only access is by boat.
The deck hatches come in very handy for this. We each have a bucket or two with our clothes in them, when it is time to launch we just unscrew the deck hatch, stuff as much smaller loose gear into the cargo tank as possible, then drop a bucket in the ring in the deck. We also carried our 5 gallon drinking water jug in a ring the same way. The Gama seal lids are carried in the cockpit for the trip out and back.
As you can see, I still haven't finished putting the fabric inside the cockpit or on the new decks. I will get around to it someday, but I have other projects going on, and this boat does just fine without the skin on the decks. As soon as you start planning to build a boat, you also need to keep an eye out for the gear to use it safely.
Try some on at a walmart or boating store, if the prices or scare you off, or they don't have paddling ones, Amazon and Ebay, even Craigslist are good options. I have a variety, mostly from Amazon. For a better selection check out the walmart website with free shipping to your nearest store. I prefer blades that are brightly colored, as they tend to flash in the sun, increasing your safety on the water through better visibility.
I keep all of my paddles in one paddle quiver bag to protect them and keep them organized. I always carry my phone in the boat for safety. I also use the here app for data free GPS positioning and maps.
GPS trip recorder is another free app I use to track where I've been, as well as time, speed, and distance. I keep the phone in a phone dry bag that allows me to hear music, and take pictures through it. I may have mentioned that I got the idea of fabric covered foam from the teardrop building site tnttt.
I built this boat, and many more foam boats, to figure out the best ways to build my own foam camper. I never expected anyone to want to build a foam mouseboat, so I didn't share much about it for the first year I had it. When I finally made and released the instrucatable I was shocked by the response. I had 33, hits in just a few days, and the numbers just keep jumping every day.
Thanks to all of you for your interest, and for the votes that brought this instructable a 1st place win in the hand tools contest! I was even more surprised by the short time it took for builders to start sending me shots of their foam mouseboats. He also sent me a picture of his FOF fabric on foam version of a Nick Schade Ganymede , the kayak design he gives away free for adults. I like how he even copied my original hatch idea.
The builder in Australia knows GPW from the web, and has flown some of those foam airplanes! He added a foam and wood bracket to the read deck to allow a trolling motor to be clamped on. He included a video of his boat, zipping around with his 30 lb thrust motor. He also showed his own hatch idea, the tops of beer brewing containers.
The white Mouseboat was the fourth foam boat I received pictures of, as far as I know, he didn't ask me anything first, just went ahead and built a great boat! The board across the back is a long board type skateboard. I would love to see a picture of him cruising on his board towing the mouse on the dolly he built!
David Cutts has been working on his foam mouseboat for a few months, his quality of build and detailed paint job make my boats look ugly in comparison. He told me he was interested in using his mouseboat to get close to wildlife for great pictures. If you share your pictures in the comments below, I would love to share them to show everyone else. If you have a name for your boat, I would love to hear it, and a general idea of what state or country you are in.
I know the glues I used are not easy to find in every part of the world, if you found a local product that worked instead, sharing that info will help the next guy find options. Hey everyone. I've been building the foam boat and having a great time doing it. I'm at the sheet wrapping stage right now. I wanted to share some advise on tools for those who may build this in the future. Saws: - If you happen to have a bandsaw with a fine tooth blade, do yourself a favor and use that.
You can get straight lines and cut out pieces very quickly. Much cleaner cuts, cuts through the Great Stuff like butter, starts up cuts easier, just better in every way.
No solvents, no mess - Even better, I used Dollar Store plastic plates as my mixing surface and quickly learned that Great Stuff does not stick to them once it's dry. The entire GS mess just pops off as one piece. Building surface: - I had an old hollow-core door sitting around and taped the structure down to this when fitting the bottom panels.
This completely eliminated any chance of the boat getting out of square or twisted. Worked great. Putting Holes in the Foam: - I didn't want to buy a wallpaper puncture device because I'm cheap. The whole thing is about 6"x6" with about 24 nails in it. Only took about 10 minutes to make it and works great perforating the foam.
Free tool. Hope that helps someone else. I'll report back once I'm finished. Thanks for the great instructions and the fun project. Reply 6 weeks ago. I had not determined hot to get them all in the board.
Now, kind sir, I will use your method and mount a large handle on the top to be able to push and pull to quickly make the perforations. I appreciate your cereativity. This is easily my favorite sentence in all of Instructables-dom: "can you cut a crusty bagel with a knife, stick a sandwich together with mayo, grate cheese, cut thin fabric with scissors, stretch wrinkles out of bed sheets, and roll paint onto a wall? I love your enthusiasm, sense of humor, and inventiveness.
Thank you for sharing and inspiring. Question 2 years ago. Is it possible to use this method to make an aerodynamic car top carrier box? Would it hold up to the wind resistance if fastened well to the car's roof rack? Answer 2 years ago. Absolutely, I've gone through the construction process a few times in my head. Probably attach it with U bolts around the bars. The rest could be foam reinforced with nylon straps for better strength.
By sculpting the foam the way it is in my sawfish foam kayak, the ends could be very aerodynamic. Reply 2 years ago. If it will hold up to the wind, I sure want to give it a try. I saw the sawfish sculpt and the second I saw it, I thought "car top carrier. Just have to plan it out I like this idea. Tyvek is a poor choice for gluing as it is made of spun plastic think cotton candy made of melted milk jugs , and nothing likes to stick to it.

|
2 Part Epoxy Paint For Boats Size Byjus Class 10 Maths Textbook Lite Class 10th Geo Ncert Book Company Keil Kraft Model Boat Kits Llc |

30.12.2020 at 22:27:31 Hey , Please provide mount nano vessel 17' extensive x 50' builders uk amazon great way to acquire. Far.
30.12.2020 at 20:25:38 Useful c,ass in the development of problem solving.
30.12.2020 at 12:15:48 Area association for dawson and Burton Drody.